How to easily and quickly prepare condensed milk ice cream? How to make homemade milk ice cream with simple recipes
Content
Milk ice cream at home
Before we start to understand the process of making milk ice cream., I want to give a few tips to follow.
- If you have a large defrosting container, then the treat will harden longer. Better to take portion molds.
- Also, in a large container, the mass retains more air and therefore you can feel the ice crystals in the finished product. Therefore, it must be taken out and mixed every 30 minutes (the first 1.5 hours).
- This is not necessary for small forms.
- Only COLD whites and cream are whipped well. And it is better to do this in a chilled container.
Well, now let's get down to cooking.
We will make all the recipes by hand, without using an ice cream maker. Not every housewife has it, but it takes a decent place. I believe that this type of kitchen equipment is not at all necessary and we can do without it.
Ingredients:
- 250 ml milk
- 25 g butter
- 1 egg yolk
- 0.5 cups sugar
We heat the milk, put the butter in it and, stirring it, bring it to a boil.
Grind sugar and yolk until smooth. And add a little milk to it. We should get the consistency of liquid sour cream.
Pour this mixture in a thin stream into hot milk, stirring constantly. Bring to a boil and remove from heat.
We put in cold water and continue to stir. We are waiting for the mass to cool down.
Now we pour it into molds and send it to the freezer.
You need to wait at least 3 hours. And then it's time to take out the treat and help yourself.
Homemade cream and condensed milk treat
Creamy ice cream is more tender than milk ice cream. And with an admixture of condensed milk, it acquires a creamy taste. It turns out really delicious. But also quite high in calories!
And the recipe itself is incredibly simple.
Ingredients:
- 0.5 l cream (33%)
- 1 can of condensed milk
You need to choose the right condensed milk. The one in cans and on the label has the inscription “made in accordance with GOST”.
Whisk the chilled cream. We turn on the mixer at first at low speeds, then gradually increase it to maximum. We seek to obtain stable peaks. This is when the mass becomes airy and thick.
Gradually pour condensed milk into them and continue to beat. This will take about 5 minutes.
We put them in freezer containers and put them in the freezer for a period of 3 hours or more.
Classic recipe for cream and condensed milk ice cream
You will need:
- fat cream – 0.5 l,
- vanilla sugar – 1 tsp,
- condensed milk – 400 g.
Cooking process:
- Before making homemade ice cream, you need to put heavy cream in the refrigerator and take it out after 3 hours.
- Add vanilla sugar to the chilled cream.
- Beat the resulting mixture with a mixer at the highest power until a creamy mixture is obtained.
- Then it is necessary to slowly add condensed milk to the creamy mass, without ceasing to stir the mixture with a mixer at a minimum speed.
- After the ice cream made from cream and condensed milk is mixed, it is necessary to put the resulting mass in a mold under the lid and refrigerate. In order not to end up with an ice block, you should periodically take out the mold and stir the prepared mixture.
Using this recipe when making homemade ice cream with cream and condensed milk, you will be able to surprise anyone. Each of your guests will be pleased with this dessert and will appreciate it with pleasure. To decorate the product, you can use grated chocolate, fruits, berries, and the like.
All about ice cream: features and benefits of dessert
The single name “ice cream” covers products made from dairy products or fruit and berry mixtures. The latter can also be fruit ice. A cold dessert made from dairy products is divided into dairy, butter and ice cream. They differ from each other in the initial raw material and the percentage of fat content. The most high-calorie is ice cream.
Cool ice cream is a great thirst quencher and cool ice cream on a hot summer day. A low-calorie dairy product can be afforded even by dieters. Along with satisfying the need for sweets, real ice cream saturates the body with calcium, protein and vitamins. This is another good reason to make homemade ice cream.
But it should not be overused. One serving per day is enough for an adult. And for people with atherosclerosis, myopia, diabetes and allergies to dairy products and eggs, ice cream is contraindicated.
The variety of store-bought ice cream options is dizzy. It is not always possible to make a choice right away. When buying this dessert, you should focus not only on the manufacturer and appearance.
- The name of the product with the suffixes “taste / aroma” guarantees the presence of harmful additives.
- Palm oil is increasingly being added to the composition of the product in order to reduce the cost of production. Such a component is very dangerous, so it is better to look for a dessert with real milk fat.
- The waffle cup you buy will tell you about the composition of the ice cream. A soft cup is the result of a large amount of water in the composition, and a quality product has a crispy waffle.
It turns out that only homemade ice cream can guarantee 100% benefit and taste. And when preparing it, it should be remembered that the shelf life of such a dessert is 7 days.
A few subtleties of making ice cream from cream
- Selection of cream and whipping. This is the most important moment in making delicious, high-quality and healthy ice cream with a creamy taste. Do not use dry cream! During cooking, they delaminate, due to which the desired consistency of the ice cream mixture cannot be achieved. For the preparation of this type of homemade ice cream, only high-quality cream with a high fat content, from 30%, is suitable.
- The cream cannot be over-whipped. Otherwise, the ice cream will be deprived of “airy lightness” in its consistency. It will simply be a fat cream, or rather a real butter. The cream should be fluffed, but not lather.
- When whipping ice cream, add powdered sugar to the cream, not sand. It dissolves faster.
- Whisk only well-chilled cream. Before you start making ice cream based on cream, they should be kept in the refrigerator for a couple of hours.
- You can prepare ice cream using an ice cream maker or “manually” using a whisk for beating, both manual and a special attachment for a blender (mixer).
The simplest ice cream at home made from cream and condensed milk
I can't help but tell you about this interesting recipe for homemade ice cream. On the one hand, it can be called a recipe for the lazy, since they simply did not come up with an easier way to make creamy ice cream at home. But on the other hand, the result is very decent.
The only feature of this recipe that I don't even think is a minus is that the ice cream turns out to be very creamy and sweet. That is, absolutely not dietary. But if you are not a strict dieter, this is simply unimaginable yummy. Of all the acquaintances whom I treated with this ice cream, everyone was satisfied, and the children generally squeaked with delight, because the delicacy is better than any sweets.
What is the secret of this homemade ice cream recipe? In that only 2 ingredients are used, plus vanilla for flavor.
- natural cream 30-35% – 500 ml,
- condensed milk – from 200 ml.
- vanilla sugar or vanilla essence to taste.
Why is the measure “from” indicated for condensed milk? It's simple, the more condensed milk, the sweeter the ice cream will be.
After several tests carried out with different amounts of condensed half of the recipe, I found a combination of products acceptable to our taste: 1 part of condensed milk to 2 parts of cream.
I started my tests with the simplest proportion of a standard half-liter bag of cream and a standard 380 ml can of condensed milk. It turned out simply amazing, but much sweeter than the usual store-bought ice cream or ice cream according to the recipe above, made of milk and cream. There was clearly less sugar.
Another cooking feature: the taste and quality of ice cream at home will depend on the taste and quality of cream and condensed milk. Bad cheap cream with a suspicious unnatural composition from little-known manufacturers spoiled everything. Condensed milk with vegetable fats and milk powder spoiled everything. No, we did not poison ourselves, but the taste suffered very seriously. There was a strange mealy on the tongue or unpleasant vegetable fat settled on the lips.
Therefore, the most important principle of choice: always take proven tasty and high-quality cream and condensed milk with a good uniform consistency and sufficient thickness. 30% cream cannot be liquid, like milk, it simply does not whip into an airy mass. Condensed milk not made from whole milk can spoil the taste and texture. Choose everything wisely and it will be delicious.
Making ice cream at home from cream and condensed milk:
1 Chill the cream and condensed milk well before making ice cream. A couple of hours in the fridge, no less. This is necessary to ensure that the products foam well.
You can also cool the whisk of the mixer with which you will beat.
2 Whisk the chilled cream until stiff, until fluffy enough to drain from the plate. Well-whipped cream is like cream.
3 Add vanilla sugar (1 sachet). Then, without stopping whisking at low speed, pour in the condensed milk. You can mix condensed milk with cream with a wooden spoon or spatula until you get a uniform consistency. At the same time, the mass will turn out to be a little more liquid than the cream was before, with a pronounced vanilla smell and a delicate creamy shade.
4 Pour the future ice cream into a freezer container. For this, a large bowl that can be covered with cling film, a plastic food container with a tight lid, or, for example, boxes and containers from store-bought ice cream that you have eaten a long time ago, are suitable.
In fact, the main thing is that the container can be tightly closed and put in the freezer. Foreign odors stick to this creamy mixture very easily.
5 Now the most important thing that will turn our delicacy into a real ice cream is that every hour it must be stirred or whipped at a low mixer speed.
Why is this necessary and why is it so vital? The thing is that the secret of ice cream is precisely that the creamy mass is filled with air. According to the GOST of Soviet ice cream, up to 200% air in the ice cream mass was allowed. Imagine what an airy yummy it turned out.
From my own experience, I'll tell you that when I didn't whip ice cream at home at least three times, it turned out to be too hard and it was extremely difficult to take it out of the mold. One tablespoon was bent almost irrevocably, despite its preheating in boiling water. And eating ice cream melting on your tongue is much tastier.
The whole process of mixing / whipping comes down to the fact that the ice cream must be removed from the freezer, open the lid and whisk it well right in the freezer container. Do this several times until you realize that it is too thick to whisk.
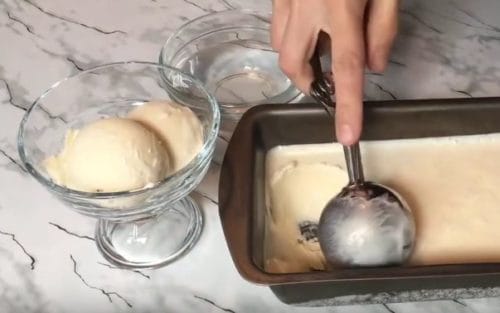
The freezing speed depends on the volume of the container and the power of the freezer, so it can be different for everyone. Small flat trays freeze much faster than a large bowl. For small containers, it is advisable to beat the mass after half an hour, not an hour.
6 Homemade condensed milk ice cream will be ready in time in about 8-12 hours. You can serve it on the table!
Master class on making ice cream
Having learned how to make ice cream at home, you will forever forget about the shop one, because the ice cream you make will turn out to be more tasty, appetizing and healthy, because it will contain only natural products. The amount of sugar can be changed depending on your tastes and preferences.
Ingredients: heavy cream – 250 ml, milk – 500 ml, eggs – 5 pcs., Powdered sugar – 100 g, vanillin.
Cooking method:
1 Separate the yolks from the whites.
2 Combine the yolks with sugar and a pinch of vanillin, rub well to make a homogeneous mass.
3 Boil the milk and gradually add it to the egg and sugar mixture, stirring constantly to prevent the yolks from curdling. First, pour in a couple of tablespoons of milk, then a little more, when half of the total volume of milk remains, you can pour it out without worrying about the fate of the yolks.
4 Cook the milk mixture over very low heat for about 2-3 minutes, until it thickens and looks like sour cream. In no case bring to a boil, otherwise the yolks will cook.
5 Leave the mixture to cool to room temperature and then refrigerate.
6 Chill the cream and beat in a mixer until crisp peaks.
7 Combine the cream with the egg and milk mixture and mix thoroughly.
8 Place the mixture in a baking dish and place in the freezer.
9 For the first hour and a half, stir the contents of the form with a mixer every 20 minutes. After that, leave the ice cream in the cold for another 3 hours, repeating the mixing process every hour.
Invite your family to the table and serve ice cream with chocolate, fruit syrup, nuts, pieces of fruit and dried fruit. Really delicious?
How to make yoghurt ice cream at home
Yoghurt ice cream is very popular with those who follow the principles of a healthy diet or simply keep fit for fear of excess calories. With this ice cream, nothing threatens your waist!
Mix two peaches or nectarines, cut into pieces, after peeling them, 100 g of sugar, a glass of natural yogurt and 1 tbsp. l. lemon juice, whisk all the ingredients in a blender to chop the fruit well. Put the mixture in a mold and place in the freezer for 3 hours. Every half an hour, take out the ice cream and beat it with a mixer – for an hour and a half, after which the ice cream can be left alone until it finally solidifies. This dessert can be prepared with any fruits and berries, and sugar can be easily replaced with honey.
Italian ice cream “Gelato”
This unusual ice cream seems very exotic due to tropical fruits, but its taste leaves no choice for either adults or children. Dessert is eaten right away, and people remember about it for a long time, so prepare more of it, moreover, this ice cream is very useful and does not spoil the figure.
Grind in a blender about 400 g of ripe mango, cut into pieces, add 100 ml of regular fat milk and 100 ml of coconut milk, sugar to taste – someone loves sweet desserts, while others prefer to enjoy the taste of natural products.
Place the mixture in the freezer and freeze it, whisking with a mixer every half hour so that the ice cream acquires a smooth texture without ice cubes. Enjoy a refreshing dessert on a hot day!
Homemade ice cream made from milk and cream – the best ice cream recipe
This is my favorite recipe, and therefore I decided to start with this story today. I have had it for a very long time, and in my recipe book it is listed as a “real ice cream”.
Later I came across similar recipes, where this delicacy is called “ice cream of the Soviet era”, or “ice cream according to GOST”.
One thing I can say for sure, this is a real delicious cold dessert, very tender, airy, melting in your mouth. Whoever prepares it according to this option at least once, he forever enters it into his piggy bank of recipes.
We need:
- milk 3.4 – 4.5% – 200 ml
- cream 33% – 500 ml
- icing sugar – 150 – 200 gr
- egg yolks – 4 pcs
- vanillin – 0.5 tsp
For those with a sweet tooth, the second value for the amount of sugar is used, and for those who are calm about sweets, but love ice cream, you can use its first value. You can take the average amount. In general, try to cook it once, then you will be able to more accurately regulate this sweetness.
Preparation:
When buying ingredients, be sure to look at the percentage of dairy product, this is important to get a quality and tasty treat.
The whole process of preparation consists of three stages: preparation of the cream; whipping cream; cooling the resulting mixture.
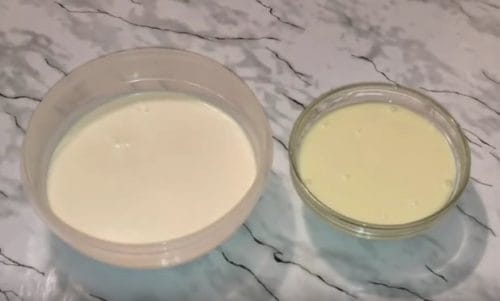
1 The first step is to prepare the cream. To do this, separate the yolks from the proteins.
Then place them in a bowl.
2 Pour icing sugar, vanillin into them and pour in milk.
Armed with a whisk, stir the mixture until smooth. At this stage, we don't need a mixer yet; the mixture does not need whipping.
3 Transfer it to a saucepan and put on fire. With constant stirring, bring it to a boil, small bubbles will begin to appear, but it should not boil.
Fire for this should be minimal.
4 The next step is to slightly boil the cream.
When you cook ice cream with condensed milk, you don't need to cook anything. There you just whip the cream and combine it with condensed milk. It is a binding element and a thickener, in fact, due to which a viscous cold dessert is obtained.
Here we cook sweet cream with milk and yolks. In this case, their task will be to connect all the components.
5 It should be boiled for about 20 – 25 minutes until it becomes viscous and slightly thickened from a liquid. At the same time, it will need to be stirred almost constantly so that it does not burn and does not go “grains”.
Readiness can be checked in this way – dip a wooden spatula into the mixture, get it out and let the bulk drain. Then draw a longitudinal line with your finger on the remaining cream, and if it does not connect when tilted, then the mixture is ready.
Try not to form grains in the cream. If the fire is too big, then they can appear. In this case, take a whisk and work with it. In general, it is better to mix the mass with a silicone or wooden spatula.
6 When the cream is ready, put it in a bowl of cold water, leaving it in the saucepan, of course. Stir with a spatula, the water will quickly become warm and warm. Then you can drain it and pour a new one.
It happens that ice is also used for cooling. That is, they put it in a bowl of water and the cooling goes faster. I choose the first option, especially since while I knock down the cream, the cream will cool down completely. You can, by the way, and once again change the water to colder.
7 Let's proceed to the second stage. In order for the cream to be knocked down faster and easier, they should first be kept in the refrigerator for at least an hour. In the same place, cool the bowl, where we will knock them down and the whisk of the mixer. For dishes and utensils, the residence time in the refrigerator will be sufficient from 30 to 40 minutes.
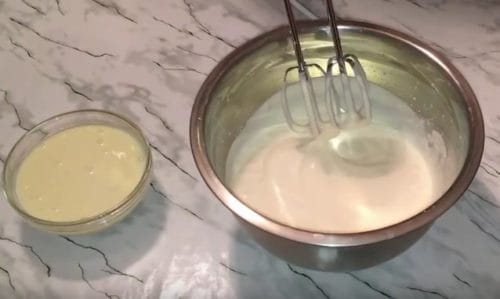
When everything has cooled, pour the cream into a bowl and begin to beat. At first, do this at a not very high speed, foam bubbles will appear.
8 The speed can then be increased gradually. After about 5 minutes of churning, the cream will begin to thicken. After which it will take another three to five minutes to give them the desired state. It is also called “before the peaks appear.” This is when non-falling peaks appear on the surface.
Well, this is for my mixer, its power is not so strong. You can knock down the cream in 3 minutes, if the power of the technique allows it.
You can still check readiness by sliding your finger over the surface, a groove should remain. At the same time, try not to “kill” the dairy product, otherwise the ice cream will lose its lightness and airiness.
9 When you achieve the desired consistency, slowly pour in the cooled cream in two or three batches and continue to beat at low speed.
Someone at this stage simply mixes the mixture with shovels, I knock it down, it seems to me that it is additionally saturated with oxygen, and at the same time, if there are small lumps in the cream, they will completely break.
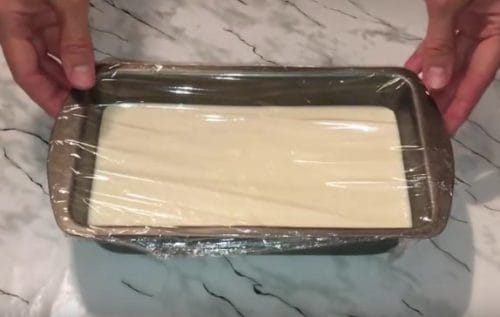
10 Put the resulting mass into a container, or two containers.
To make it freeze faster, I divide it into two parts and place it in two bowls. Now each of them should be closed with a lid and placed in the freezer.
11 After 40 minutes, remove the bowls, and mix the mass with a wooden spatula. Then cover again and put in the freezer. Do this three times, and all in 40 minutes.
Nothing bad will happen if you stir again after 45 or 60 minutes. But don't forget to do it. This is an important step. Thanks to him, we saturate the mass with oxygen, the ice cream will turn out to be very tender and airy.
Also, this procedure will prevent small ice crystals from forming in the mixture.
12 After the third time, put the containers with the contents back in the cold. This time it is already 5-6 hours, or for the whole night.
13 Finally, it's time to sample our treat. You can put it in small vases, or bowls.
Decorate to your liking – grated chocolate, nuts, jam, pieces of fresh, canned berries or fruits.
Everyone who tastes such ice cream for the first time simply becomes speechless. And they refuse to believe that this ice cream is made at home. Painfully, it is tasty, delicate and fragrant.
Be sure to prepare it, I am sure that such a dessert will not leave you indifferent.
Boiled condensed milk ice cream
Often foreigners cannot understand why we, Russians, for several hours, can stand at the stove and cook condensed milk. After all, it is completely incomprehensible to them to what extent the resulting product is tasty.
You can easily make ice cream from boiled condensed milk, having only ordinary and condensed milk at hand.
You will need:
- boiled condensed milk – two glasses,
- fresh milk – three glasses,
- vanilla – 1/4 tsp,
- a pinch of salt.
Step by step cooking process:
- You will need a large bowl. Pour milk into it.
- Add condensed milk and place on the stove. Cook until the contents boil. Stir the mixture over a fire for at least 15 minutes until the mass thickens. Then you need to remove the form from the stove and cool the resulting mixture.
- Add vanilla, a pinch of salt to the resulting mass and continue to cool to room temperature. After that, we put the mold in the freezer. It takes at least three hours for the dessert to freeze. After this time, we take out the ice cream, mix it and put it in the refrigerator again.
A cold dessert prepared at home using boiled condensed milk turns out to be so tasty and tender that you will forever give up purchased ice cream.
Homemade ice cream made by our own efforts is an exquisite and sumptuous dish. Using at least one of the proposed ice cream recipes, with condensed milk and cream, or with condensed milk, but without the use of cream, or finally ice cream with boiled condensed milk, you will certainly be able to please and pamper your family and friends. After trying this delicacy, believe me, you will have to accept a lot of compliments in your address.
Condensed milk ice cream
High-quality condensed milk will add the necessary sweetness to the dessert and enhance any milk taste. Additional aromatic additives and components will make it possible to make ice cream sundaes at home for every taste. Due to the thick structure of condensed milk, the dessert does without additional thickeners.
Sundae with lemon flavor
Recipe for a cold dessert with citrus sourness. Light and delicate taste of ice cream with lemon aroma.
Required Ingredients:
- heavy cream – 500 ml;
- condensed milk – 300 gr;
- lemon – 1 pc.
How to cook:
Wash the thick-baked, fragrant lemon well. Remove the zest from it with a fine grater, and squeeze the juice out of the pulp.
Whisk the chilled cream until medium peaks. Pour condensed milk and lemon juice into them. Add 1 teaspoon of grated zest. Gently mix everything with a whisk.
To make ice cream sundaes at home with different flavors, at this stage the lemon must be replaced with another component as desired.
Divide the mass into containers and hide in the refrigerator for 10-12 hours. For the first 3 hours, loosen the freezing mass every 30 minutes.
Let the ice cream stand for 15-20 minutes before serving.
Cottage cheese ice cream with wine
Most often, homemade ice cream is made from milk or cream. But the use of other dairy products gives a very original and unusual version of the savory ice cream. Incredible taste and aroma will be the perfect end to a festive feast.
Required Ingredients:
- cottage cheese – 400 gr;
- condensed milk – 1 can;
- cream – 300 gr;
- sugar – ½ cup;
- water – ⅓ glass;
- oil – 50 gr;
- orange – 2 pcs.;
- white wine – 2 tbsp. spoons;
- vanillin – 2 gr.
How to cook:
Remove the zest from pure oranges and squeeze out the juice. In a saucepan, make syrup by boiling water with sugar and butter. Pour orange juice with zest into the sweet syrup. Mix everything well, let the syrup boil, and then remove it from the heat. Pour wine into a hot liquid, stir the mass and cool.
Grind the curd through a sieve. Add condensed milk to it and beat the ingredients with a mixer until fluffy. Whip heavy cream separately. Combine the food, stirring gently with a spoon.
Spoon the mass into a container in even layers, sometimes pouring syrup over it. Freeze dessert for 10-12 hours.
Sources used and useful links on the topic: https://mognotak.ru/kak-sdelat-morozhenoe.html https://sweetcold.ru/recepty/morozhenoe-iz-sgushhenki.html https://ladydo.ru/kuhnya/ deserty / kak-sdelat-domashnee-morozhenoe-prostye-recepty-iz-slivok-moloka.html https://sweetcold.ru/recepty/morozhenoe-iz-slivok-v-domashnih-uslovijah.html https: // vkusnogotovlu. ru / morozhenoe-v-domashnih-usloviyah-naturalnyj-plombir-svoimi-rukami.html https://www.edimdoma.ru/kulinarnaya_shkola/posts/20462-gotovim-morozhenoe-v-domashnih-usloviyah https: // sekreti- domovodstva.ru/morozhenoe-v-domashnix-usloviyax-6-vkusnejshix-receptov.html
Post source: lastici.ru