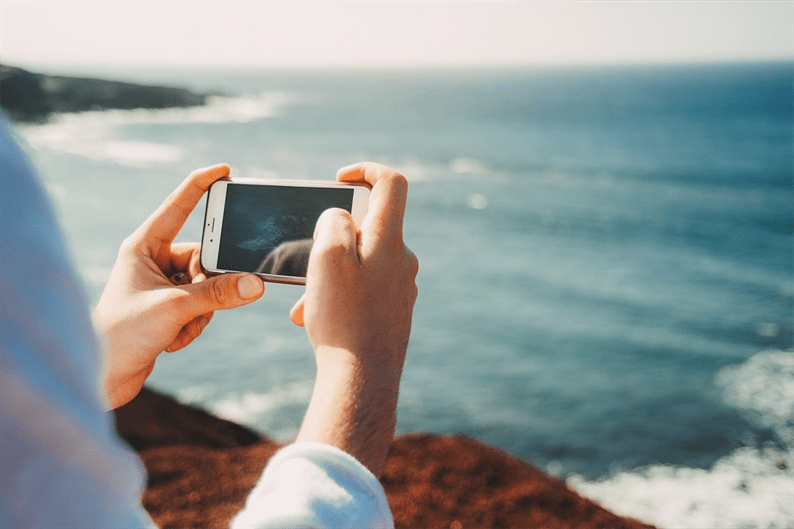
How to take pictures beautifully with a smartphone – tips for a beginner. How to learn to take pictures. Instructions for beginners.
Briefly about choosing a camera
There is a long article on the choice of a camera on the site, so here I will list only brief theses.
- If you really want to learn how to photograph, you need an interchangeable-lens camera. A smartphone with multiple cameras is not an option. Smartphones are conceptually sharpened for automatic shooting. For creativity, you need a full-fledged manual mode (at least sometimes).
- To learn photography, it is not at all necessary to purchase expensive equipment. Now the amateur technique has developed so much that its capabilities are more than enough for advanced photographers, not to mention amateurs and beginners.
- The main element in a modern camera is the lens. Buying a carcass is simpler, but with a good and expensive lens, it's a perfectly reasonable idea.
- The stock (“whale”) lens is not as bad as people write and say about it. It gets to the camera almost free of charge and you shouldn't give it up. For more details about optics, read the article on choosing a lens.
- There is no point in chasing the most modern models. New items always cost more, but they do not always have some revolutionary improvements in comparison with the cameras of the previous model. More often than not, the difference is only in the little things.
- Frank “old stuff” is also not worth buying, well, perhaps used for a symbolic price.
All SLR and most system cameras can be safely classified as a technique that can be recommended for teaching photography. The main thing is to make sure that the platform is still relevant, and the manufacturer has not left the market (this, alas, is not uncommon nowadays). Compact cameras (“digital cameras”) and smartphones impose a large number of restrictions and it is impossible to learn how to photograph professionally with them.
Introduction to Basic Camera Features
So, the camera has been purchased, now we need to get acquainted with its capabilities. To do this, it is advisable to be patient and study the instructions for the camera. Unfortunately, it is far from always written simply and clearly, nevertheless, this does not negate the need to study the location and purpose of the main controls.
As a rule, there are not so many controls on the camera – a mode dial, one or two control wheels for shutter speed and aperture, several function buttons, zoom control, an autofocus button and a shutter release button. things like white balance, format and quality level of photos, autofocus settings, picture style. All this comes with experience, but over time, you should not be left with a single incomprehensible item in the camera menu.
After all the basic controls of the camera have been studied, it's time to depict something with its help. First, turn on the auto mode and try to take pictures in it. In most cases, the result will be quite normal, but no matter how smart the machine is, it still makes mistakes from time to time and the photographs are obtained as originally intended. Most often – too dark, or vice versa – too light. So it's time to get acquainted with such a concept as exposure.
Exposure is the total luminous flux caught by the camera sensor during the shutter response time. The higher the exposure level, the brighter the photo. Photographs that are too light are called overexposed, and those that are too dark are called underexposed. This is very brief. If you want more details, read on. If you know all this, click on the “skip boring theory” link.
A bit of boring theory – shutter speed, aperture, ISO sensitivity, depth of field
Skip boring theory
The picture is exposed when the shutter is opened. If fast moving objects get into the frame, then during the opening of the shutter they have time to shift and in the photograph they turn out to be slightly blurred. The time the shutter opens is called shutter speed.
Exposure allows you to get the effect of “frozen motion” (example below), or, conversely, to blur moving objects.
Short exposure photo
The shutter speed is displayed as a unit divided by some number, for example, 1/500, which means that the shutter will open for 1/500 of a second. This is a fast enough shutter speed, at which the driving cars and walking pedestrians will be clear in the photo. The shorter the shutter speed, the faster the movement can be “frozen”.
By increasing the shutter speed to, say, 1 / 125th of a second, pedestrians will still be sharp, but the cars will be noticeably smeared. If the shutter speed is 1/50 or slower, there is an increased risk of blurry photos due to “shake” – the hand shake of the photographer. To avoid it, it is recommended to mount the camera on a tripod or use an image stabilizer (now it is available in almost all cameras and lenses).
Night photos are taken with a very long exposure of a few seconds or even minutes. It is no longer possible to do without a tripod here.
To be able to lock the shutter speed, the camera has a shutter priority mode. It is denoted TV or S. In addition to the fixed shutter speed, it allows you to use exposure compensation. Shutter speed has a direct effect on the exposure level – the longer the shutter speed, the brighter the photo will be.
What is aperture?
The diaphragm is the “pupil” of the lens, a variable-diameter aperture. The narrower this diaphragm opening, the greater the DOF – the depth of field. The aperture is indicated by a dimensionless number from the series 1.4, 2, 2.8, 4, 5.6, 8, 11, 16, 22, etc. In modern cameras, you can select intermediate values, for example, 3.5, 7.1, 13, etc.
The larger the f-number, the greater the DOF. Large DOF is relevant for landscape photography, when you need everything to be sharp – both the foreground and background. Landscape is usually shot with an aperture of 8 or more.

A typical example of a photograph with a large depth of field is the area of sharpness from the grass underfoot to infinity.
The idea of a small depth of field is to focus the viewer's attention on the subject, and blur all the background objects. This technique is commonly used in portraits. To blur the background in the portrait, open the aperture to 2.8, 2, sometimes even 1.4. At this stage, we come to the understanding that the kit lens 18-55 mm limits our creative possibilities, since at a “portrait” focal length of 55 mm the aperture cannot be opened wider than 5.6 – we begin to think about a fast fix (for example, 50mm 1.4), so that get a similar result:

Shallow DOF is a great way to divert the viewer's attention from the colorful background to the main subject.
To control aperture, you need to switch the command dial to aperture priority mode (AV or A). At the same time, you tell the camera with what aperture you want to photograph, and it selects all the other parameters by itself. Exposure compensation is also available in aperture priority mode.
The aperture has the opposite effect on the exposure level – the larger the f-number, the darker the picture will be (a clamped pupil lets in less light than an open pupil). This is compensated by a proportional increase in shutter speed.
If the aperture is closed too much, the loss of detail is possible due to diffraction blur, but this is practically “higher mathematics”, which for the time being it is better not for beginners to climb 
What is ISO sensitivity?
You've probably noticed that there are sometimes ripples, grain, or, as it is also called, digital noise in photographs. Noise is especially pronounced in photographs taken in low light. For the presence / absence of ripples in photographs, such a parameter as ISO sensitivity is responsible. This is the degree to which the matrix is susceptible to light. It is denoted by dimensionless units – 100, 200, 400, 800, 1600, 3200, etc.
When shooting at the lowest sensitivity (eg ISO 100), the picture quality is best, but you have to shoot at a slower shutter speed. In good light, for example, outside during the day, this is not a problem. But if we go into a room in which there is much less light, then at the minimum sensitivity it will no longer be possible to shoot – the shutter speed will be, for example, 1/5 of a second and at the same time there is a very high risk of ” shaking “, this is the name of the blur of the photo due to jitter hands.
Here's an example of a photo taken at low ISO with a long exposure from a tripod:
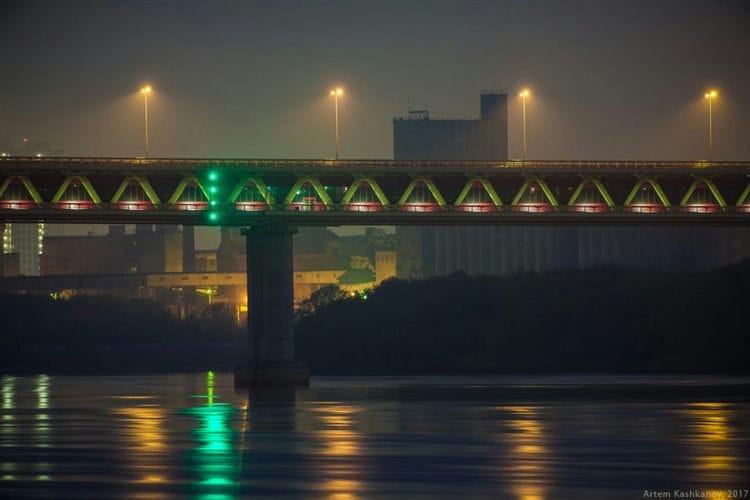
Note that the waves on the river were blurred in motion and the impression was that the river was not ice. But there is practically no noise in the photo.
To avoid shaking in low light, you need to either increase the ISO sensitivity in order to reduce the shutter speed to acceptable values, or continue shooting at the lowest ISO and use a tripod. Moving subjects are very blurry when shooting with a tripod at long exposure. This is especially noticeable when shooting at night.
ISO sensitivity has a direct impact on exposure level. The higher the ISO speed, the brighter the picture will be when the shutter speed and aperture are fixed.
Below is an example of a photo taken at ISO6400 late at night outside without a tripod:
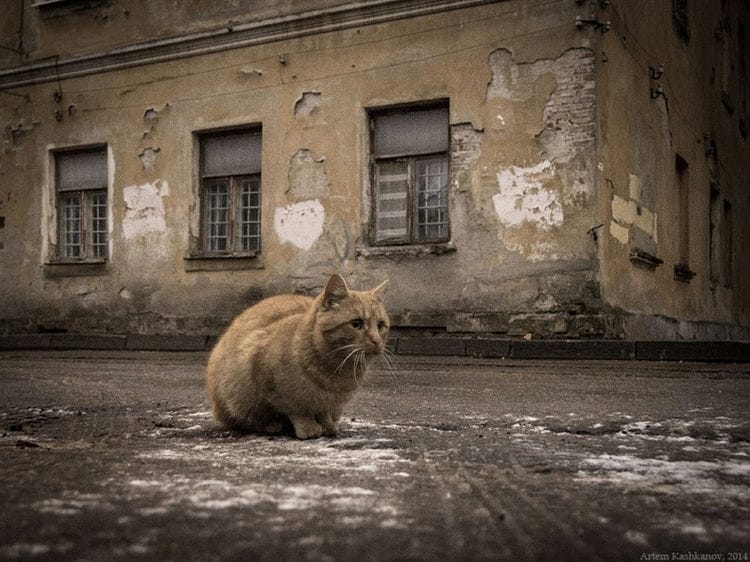
Even in web size, it is noticeable that the photo turned out to be quite noisy. On the other hand, the grain effect is often used as an artistic technique, giving photographs a “filmic” look.
The relationship of shutter speed, aperture and ISO
So, as you probably already guessed, there are three parameters that affect the exposure level – shutter speed, aperture and ISO sensitivity. There is such a thing as “exposure step” or EV (Exposure Value). Each next step corresponds to an exposure 2 times greater than the previous one. These three parameters are interrelated.
- if we open the aperture 1 step, the shutter speed is reduced by 1 step
- if we open the aperture 1 step, the sensitivity is reduced by one step
- if we reduce the shutter speed by 1 step, the ISO sensitivity increases by one step
Based on the foregoing, we can make a fair conclusion that lenses on which you can open the aperture wide (up to 2.8, 2, 1.4, etc.) allow you to photograph in low light at short shutter speeds and low ISO. These lenses are called fast or “bright” lenses. These optics are not cheap, but they are very popular with professional photographers, as they have a much wider range of applications than amateur low-aperture optics.
5 What is the difference between P, A, S and M modes?
Almost all cameras (all SLR, mirrorless and top compact) have several modes of operation. The most obvious one is the automatic one, which most people use. It allows you not to understand what shutter speed, aperture, sensitivity are, but simply to shoot and in half the cases get an acceptable result. The explosive growth in the popularity of photography in the 90s was triggered precisely by the massive introduction of auto modes. But alas, even the most advanced automation does not work with one hundred percent result.
The most popular modes for advanced and professional photographers are the semi-automatic modes – A and S (or Av and Tv in Canon cameras). In A mode (English A perture – aperture, aperture), you manually set the aperture value, and the camera automatically selects the optimal shutter speed based on the data from the built-in sensors. This is why it is called aperture priority mode. The shutter priority mode is called S (English S hutter – shutter), it works in the same way. You manually set the shutter speed, and the camera selects the optimal aperture value itself. This mode is often used by reportage photographers, in the next article I will explain in detail why.
With the M mode (English M anual – manual), everything is simple – it is completely manual mode. You set the shutter speed and aperture value manually. The camera can only tell you that with the selected values the frame will be underexposed or overexposed (overexposed).
And finally, the P mode (English P rogram AE – programmed autoexposure) is an alternative version of the fully automatic mode. Both exposure parameters (shutter speed and aperture) are set automatically. In all of these modes, you set the ISO yourself, while in Auto mode, manual sensitivity control is not available.
On whom the result depends
The photographer usually has a lot more responsibility. He will always find contact with you and will try to conduct a photo session in a positive atmosphere. And he will definitely help you with posing. You can experience pleasure not only from the images received after a month, but also from the shooting process. And it really raises self-esteem. Choose the “right” photographer, and you will want to return to him more than once.
How to hide body flaws
- Keep your back straight and straighten your shoulders.
- Bend your back as much as possible to keep your figure graceful.
- When photographing sideways, do not press your hands to the body: even if the forearm is thin, it will still be flattened.
- Watch your feet – pull the toe.
- The body should be directed away from the camera, hands are not pressed so that the waist is visible.
- To make your legs appear longer, turn them slightly to the side.
- Life hack for a beach photo shoot: it is best to wear a one-piece swimsuit. It will also look beautiful if the lower edges of the swimming trunks are pulled up a little.
Life hacks for selfies
- If you can't get a full-face photo, it's best to turn your head about 30 ° away from the phone. Thus, the face visually becomes narrower.
- Do not lift your chin high, it will not look very pretty, and even the nostrils will look directly into the camera.
- It is also not worth lowering your head very low. Avoid the appearance of a second or even a third chin.
- Don't strain your neck.
- Work with your shoulders, just do not lift them very high. Let the movements be smooth, natural.
- And don't forget to move! Look for more favorable angles for yourself.
How to capture motion in photography
Photography captures the movement of our lives in perfect shots that defy time.
Life hacks that will help you achieve cool effects without processing:
1 A trendy “bokeh” effect (blur / fuzziness) can be obtained in just a few minutes:
- For the first method, you will need cardboard, scissors and tape. Cut out a small desired bokeh image (for example, a heart, an asterisk, a leaf), and then attach it to the lens using tape.
- Foil, the material to which you can attach it, tape and a flash or other light source will also help create a cool effect. We take the required size of the foil (it depends on the background that will fall into the frame) and change it. After that, we attach it with tape to cardboard, for example. And then there is little to do: adjust the light, install our foil background and capture the desired object.
- And the easiest way, which requires a computer. We are looking for a bokeh photo, open the picture in full screen – and the background is ready. The disadvantage of this method is that you can only shoot small objects.
2 Cellophane wrapped around the lens will help create the effect of a slight blow-out of the photo, or the so-called fog effect.
3 A nylon toe put on the lens will create a “soft focus” that is often used on Instagram.
4 For a beautiful shade, you can use a sieve, Whatman paper, on which beautiful patterns, openwork fabric or blinds will be cut.
5 A photo taken through the glass of the glasses will create a beautiful effect. Try different ones: colored or with diopters.
6 The effect of mirroring will help you create your smartphone. Just place your phone horizontally against the bottom edge of the lens. Then adjust its position until you see the desired result.
1 Wipe the camera
Yes, the advice is banal. But many people forget it, although the lens cannot be absolutely clean. If you want to add clarity and sharpness to your masterpieces – wipe the camera. Or, by the way, you can do the opposite:
Life hack: If you rub the camera with your finger, you can get soft pictures with smooth outlines.
2 Forget the zoom function
In most smartphones, digital zoom spoils the photo quality a lot. Better just go to the object that you are shooting, closer or enlarge already during processing.
2 Learn to look at the world through the lens of the camera
The art of photography is largely about seeing beauty in everyday things, noticing inconspicuous details, unusual angles, showing familiar things from a new perspective.
Make it a habit to look at your surroundings through the prism of an imaginary photographic lens. Notice the intricacies of shadow and light, outline the composition of future shots, look for eye-catching places and interesting subjects. If right now it is not possible to take a picture, you can write down or memorize the places or objects you like so that you can return to them later when the time comes. This practice will help you dramatically improve the quality of your photos over time.
3 Hold your phone firmly when taking pictures
If you want to get the clearest and sharpest image possible, try not to shake your smartphone while shooting. Better hold your breath for a couple of seconds. By the way, the inconvenient shooting button also often spoils the picture, and the pictures are blurry. How to solve the problem? In the settings, move this function to the volume control key. Well, if you are a big fan of experiments, you can skip this step – and take blurry pictures!
4 Turn the smartphone over
Remember that there is more than vertical photography. Yes, it is good for selfies in the mirror or for full body shots. But landscapes and portraits with beautiful backgrounds look perfect in horizontal photographs. And also try to photograph horizontally – the result will surprise you, we promise!
5 Feel free to use the built-in flash
Even if it is weak, it illuminates objects at a distance of up to two meters, but in some situations it can save the image. Sometimes, beautiful views are placed directly in front of the sun. In order not to get just a dark spot, turn on the flash. But indoors it is better to use a different light source. For example, a flashlight or another phone will help you. Well, at night, no flash will help you.
5 Shoot regularly
Practice, practice and more practice. Sooner or later, quantity necessarily turns into quality, and one day, unbeknownst to yourself, you will be surprised to find that your photos have become much better.
Learning, comprehending the nuances of photography theory, analyzing the work of recognized masters is an important part of improving in the profession, but all this is meaningless if you do not hone your skills day after day. The learned fundamentals must be brought to automatism, so that you do not have to remember it on purpose every time.
Constant training helps to shape a professional look, as well as gain experience in shooting in a wide variety of conditions. Over time, you will learn on the fly to distinguish good angles from unsuccessful ones, choose the optimal point for shooting, correctly build a composition, and much, much more.
6 Try something new
Look for interesting angles, build unusual compositions, in a word – experiment. Do as you want and as you are interested. Do you want to take a photo of something through the car window? Take pictures! Do you want to take a picture through a glass of water? Please try! We are sure that one day these attempts will yield results, and you will have cool photos that you can safely brag about.
And now cool life hacks for happy owners of DSLRs. If you have such a camera, it means that you are seriously engaged in photography and are ready to express yourself with all your heart. These tips will help make your shots even more stunning. Listen!
7 Find your niche
It is impossible to be an expert in many directions at the same time, at least at first. Try to find something that interests you. There are a lot of types of photography: portrait photography, wedding and family photography, reporting, product photography, animal photography and much more.
Try yourself in different directions, experiment, and gradually you will understand what you do best. Then gradually delve into the chosen specialization, mastering its subtleties and nuances.
8 Slow down
Modern cameras make it possible to take thousands of frames at a time, capturing literally everything that is happening around, without additional material costs. On the one hand, it can be useful if you shoot, for example, in motion. However, such a number of photos sprays attention, a single frame ceases to be something that requires special attention, comprehension and preparation.
Try to shoot as if you were holding a 36-frame camera and you will see how the quality of your photos changes. We do not suggest that you completely abandon the possibilities that modern technology provides, but more intelligent and unhurried preparation and selection of images can significantly enrich your work.
9 Learn to use image editors
There is nothing wrong with processing your photographs using special programs; even the most outstanding photographers adhere to this practice.
If you are smart about editing your shots, it can significantly improve the quality of your shots. Photo editing will help you to visually see how different technical parameters are reflected in a particular photo.
With competent work with graphic editors, you can correct the shortcomings made during the shooting.
Photo processing also provides tremendous opportunities for creativity: you can add personality to the shot, highlight individual details, place accents to draw the viewer's attention to a specific subject in the photo, and much more.
Camera setup recommendations
Let's dwell on the camera settings. What do you need to pay attention to?
Manual shooting modes
M – manual mode;
A / AV – aperture priority, in this case the camera will set the shutter speed;
- Tip:
When the shutter speed is 1/60 s, it is recommended to use a tripod.
S / TV – shutter priority, the camera will automatically set the aperture value, it is convenient to use when you need to capture the movement in sharpness;
P – programmed, almost automatic shooting mode, suitable for the first exposure metering.
Exposition
Exposure is the amount of light that hits the camera's sensor when the shutter is opened. A lot of light – the frame is overexposed, little – underexposed.
Aperture is a device in a lens that adjusts the size of a circle by changing the amount of light passing through it. The higher the value, the more closed the aperture, less light enters the matrix. If you want to shoot a landscape, then use a closed aperture of f / 8, then the entire area of the frame will be in sharpness. For a portrait, an open aperture of f / 1.4 – 3.5 is a great option.
With the aperture wide open, shoot in spot focus mode.
The light meter is a scale on the camera screen, in the viewfinder. The exposure meter readings depend on the mode of operation.
Matrix – makes metering of a significant part of the frame, suitable for most types of shooting.
Spot metering – performed in the central square. Perfect for shooting in difficult lighting conditions, as well as for shooting portraits.
Center-weighted – Measures the amount of light throughout the frame, focusing on the center area. Essential when you need to take a photo of the subject in the center of the frame.
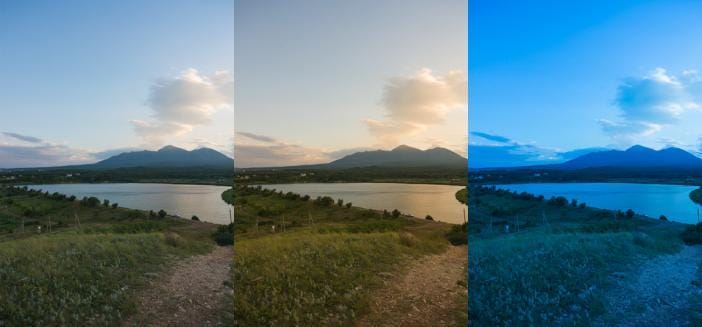
White balance
White balance is the adjustment of the colors in a photo based on light sources so that white objects do not take on a warm or cool hue. All the colors in the photo depend on the white balance setting. If you change the lighting conditions, then the white balance also needs to be re-adjusted.
Take pictures in RAW format, this will allow you to change the white balance in editing programs.
It is impossible to tell everything for a beginner photographer. There is a lot of information, it is constantly being updated, new technology appears, respectively, the possibilities of using the camera. We have shared some useful information for aspiring photographers. If you feel a great desire to take pictures – do not postpone it for later! Maybe a hobby will grow into a lifelong business.
Macro photography
Unfortunately, when taking macro shots, smartphones do not perform well. But this problem can be solved with a miniature lens.
What to do: A small lens can be found in any laser pointer or flashlight. Secure the lens to the smartphone lens using a hairpin and adhesive tape. Now you can take amazing macro photography.
Top 3 Portrait Photography Tips
Portrait photography requires a special approach. A lot depends on the photographer's ability to establish contact with models, break the ice in communication and create a relaxed atmosphere during shooting. It is not easy and requires experience and good communication skills.
Odd number of items
You can frame an odd number of objects for your photo to be eye-catching. For example, a photo of 1 rose or a group of 3 friends attracts. This technique makes the picture more interesting and attractive to human eyes. If there is an even number of objects in the picture, then it is difficult for an untrained viewer to find the center of focus and concentrate on details.

A photo of a lovely rose catches the eye.
Focus limiting
Focus limiting allows you to highlight the center of the exposure. This is not used everywhere, but it is useful when a person wants to hide objects in the frame. A popular method is to blur the background, you can also reduce the sharpness by setting a large aperture, zoom in on the image, etc.
In all paired shots, experts try to blur the background in order to focus on people, and not on nature or buildings.
Rule of thirds
The rule works like this: a person mentally divides the frame into 9 identical rectangles. Cameras have a built-in grid display function. The idea is to place the main detail of the frame along one or more stripes. If you place the subject in the center according to the rule of thirds, an attractive composition will appear in the photo. Using this idea, the photographer can take a high-quality photo of a city or a symmetrical subject.
Centering objects
There are times when placing an object in the center of the frame when it is justified and looks interesting. Symmetrical scenes are good for centered composition. They fit nicely into the square.

Place objects in the center when warranted.
Foreground filling
Most of the pictures have a middle and background, but very little space is allocated to the foreground. You can improve the quality of your photo by highlighting some of the objects in front. This technique is used to create a sense of scale and make viewers feel like they are inside the shot. And if you expand the foreground to 50% of the frame size, then you will have a sense of the reality of what is happening.
Frame framing
A frame within an image is a technique for improving the depth of a composition. For framing, windows, arches and hanging tree branches are suitable. The frame should not surround the photo to add impact. This rule was often used in Renaissance painting to depict perspective.
By following these guidelines, you can easily learn to photograph like a professional photographer. Not immediately, over time, but if you don't give up, you will definitely succeed and take masterpiece pictures.
Use other images
Your smartphone will help you take a unique collective selfie.
What to do: Find an image online or create one yourself to complement your self-portrait with an element from another photo. It all depends on your imagination, just improvise!
Create highlights
A beautiful color lens flare can completely transform your shot. All that is required is colored translucent paper.
What to do: Take colored wrapping paper and bring it to the edge of the lens to create a colorful flare. You can also take a photo through it to give your photo an interesting rainbow effect.
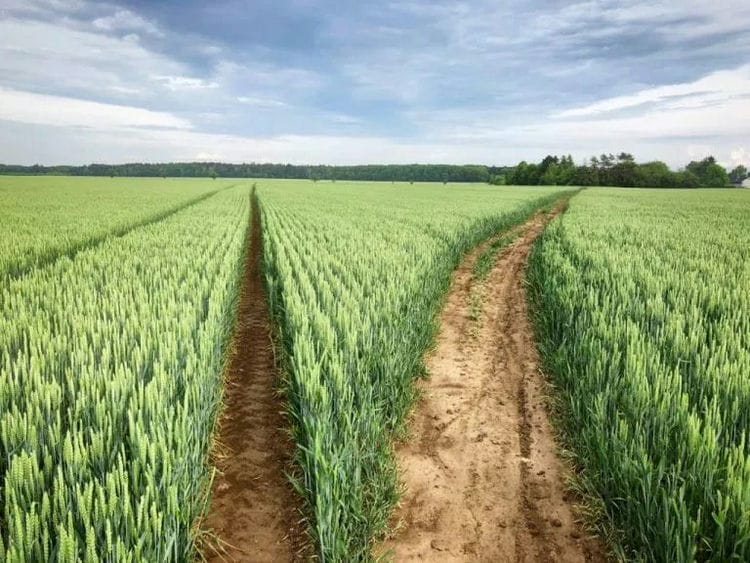
A good photo will only come out in good conditions, try to find them
Yes, a smartphone camera is capable of taking good pictures, but not everywhere and not always. And it is important to understand where and when you can get a high-quality photo. A smartphone in the overwhelming majority of cases can compete with a camera only in conditions suitable for shooting. Particularly in situations where the scene is well and interestingly lit. That is, you need to look for and remember the conditions in which high-quality photographs were obtained. As an example for my daughter, I gave a photograph of her little sister walking in a green summer meadow illuminated by soft light.
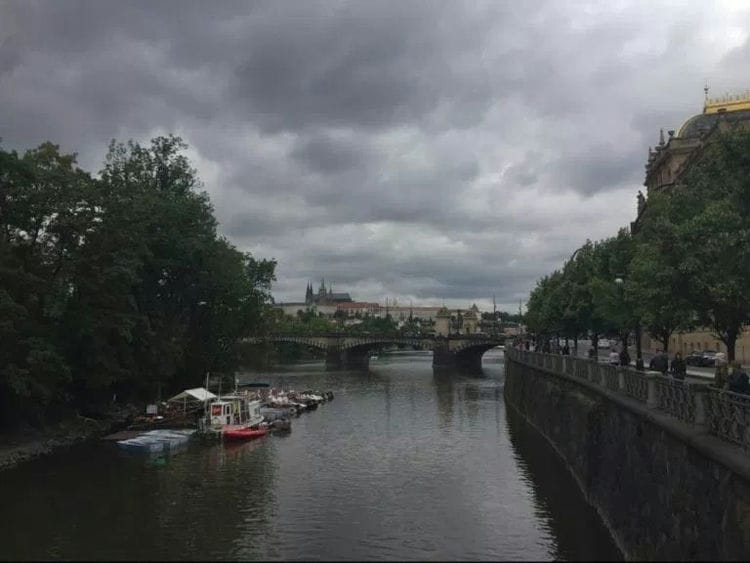
You should not take pictures with a smartphone at dusk or cloudy weather – in most cases, the photos will turn out to be inexpressive.
In poor lighting conditions, a smartphone, unlike a camera, is useless
Even the most expensive smartphone has limited photography capabilities simply due to the fact that its camera is equipped with a small sensor and a small lens. Thus, the capabilities of the vast majority of smartphones in terms of shooting in low light conditions are very modest. Even for flagships, shooting in low light remains a daunting task, as our recent review showed. For example, a mirrorless camera or a DSLR camera will do a great job with a scene in which a family is drinking coffee while sitting in a cozy cafe, submerged in twilight. But the smartphone in such a situation will have problems, and the photo, most likely, will not turn out very high quality.
As a simple rule of thumb, a smartphone is usually useless when shooting in low light conditions .
When there are a lot of bright colors in the frame, the photo is likely to be good.
When photographing with a smartphone camera, it is very important to know and use as many different little tricks and tricks as possible in order to get the most beautiful photo possible. One of the most effective and simple tricks is that when there are a lot of different colors in the frame (bright clothes, jewelry, decorative elements, colorful desserts, etc.), the photo will almost always look better than a photo with a solid color or dim scene. This is a very effective way to take a good photo with your smartphone. Just try it and you will see that the result will not be long in coming.
Create a carousel If there are a lot of bright colors in the frame, the photo has every chance of success. Photo taken with smartphone
Learn to get closer to your subject – this is the only way to take interesting photos
This advice is relevant both for a full-fledged camera and for smartphones: try to get as close to the subject as possible. If you need to take a photo of a friend in the woods, there is no point in shooting him from a few meters, because such a photo will be unattractive. So it doesn't matter what you're shooting – always try to get closer to people (or what you're shooting). Stand literally at arm's length – it is at this distance that great photographs begin to emerge, in which there will be not only the subject and the environment, but also the context and atmosphere. In short, the picture will look interesting and effective.
To create a carousel I gave this advice to my daughter: if you photograph your mother from a close distance (but not so that you can see only her head!), The photo turns out to be more attractive and effective. It's harder than it sounds, but you can't get good photos without it.
Never photograph only the head or face – it will look disgusting in the photo.
Never, do you hear, never, do what almost everyone does: do not shoot only on someone's head or face. I know that friends or girlfriends most often want you to shoot this way, but refrain from that! Smartphone cameras are equipped with wide-angle lenses, and if you only shoot someone's head, the result will be far from perfect: the lens of a mobile phone distorts the face a lot. This advice is always true – whether you shoot with a smartphone or a camera. Yes, I know everyone takes selfies, but find the strength to give them up.
Don't try to take a classic portrait with your smartphone
From the previous advice, there is a fundamental limitation on the use of mobile phones: do not try to shoot a classic portrait with them. That is, a portrait taken not at close range, but at a short distance from the model, with zooming on the face. Such shooting is possible even with an inexpensive DSLR, but not with a smartphone. Just accept it.
Don't use digital zoom – photos will be of poor quality
Yes, your smartphone's camera is capable of magnifying objects. Most often it is thanks to digital zooming. If possible, don't use it. At first glance, this function may seem attractive, but remember that it only crops the image and, therefore, reduces the quality of the resulting photo.
Of course, some modern smartphones are already equipped with optical zoom, but even on these I would advise using the zoom function with caution.

Create a carousel This photo violates two basic principles of mobile phone photography: 1. Don't use digital zoom – the image quality is terrible. 2 Do not take pictures of birds (see last point)
To beautifully blur the background, photograph objects as close as possible.
As you know, the sensor and lenses of a smartphone camera are very small, which imposes some limitations on the smartphone's shooting capabilities – compared to a conventional camera: it is very difficult to blur the background and create the effect of depth and three-dimensionality of space (as our review of the iPhone X showed, even the flagship models smartphones blur the background with built-in software).
But you can get out of this unpleasant situation if you remember one little trick that can help visually blur the background. You just have to get as close to the subject as possible and focus on it exactly – that's all it takes to beautifully blur the background. This method is not suitable for photographing people (as mentioned in point 5), but for photographing any other objects it will work very well.

Create a carousel Here I really got very close to the flower, so optics and physics came to my aid in the fact that otherwise smartphones do not work very well: the background is blurred and it looks quite interesting. Photo taken on a smartphone (no editing)
Master exposure compensation – you can't shoot quality without it
Without knowing the principles of exposure compensation, it is impossible to take a good photo either with a smartphone or with a DSLR. I think you noticed that ordinary smartphone cameras are not very good at choosing exposure (that is, they do not select such an exposure value at which the photo is not too light or not too dark). To prevent this from happening, smartphones literally need to be prompted which scene should be shot darker and which one should be lighter.
A classic example: When photographing someone in a meadow with a bright sky behind you, you will most likely end up with a gray, shaded figure and face of the model. To fix this, you will need to instruct the camera to brighten the scene you are shooting. This is usually done in two ways: either by tapping your finger on the darkest place of the smartphone screen (in this case, the camera will measure the exposure in the specified place and thereby brighten the image). Or, as, for example, on iPhone or Huawei, with a double tap, a yellow scale with a sun icon pops up on the screen, moving the slider up and down, you can lighten or darken the image.
If the photo is blurry, adjust the ISO
It might surprise you, but you can even adjust the ISO on your smartphone camera. Moreover, adjusting ISO when shooting with a smartphone not only works, but in some situations is simply necessary to maintain the quality of the photo.
“In what?” – you ask. This is mainly necessary when you are photographing a fast moving subject, or when you are shooting in the shade, indoors (that is, in low light conditions).
For example, to photograph a cyclist in a forest, it is advisable to manually set the ISO value, and then start photographing (because the camera does not know that you are going to shoot a moving subject and will not be able to select the correct settings). How to be in a similar situation? Choose a higher camera sensitivity (ISO). Just don't overdo it – the higher the ISO, the more noise will be in the image (that is, the photo will be of lower quality). Also note that in order to be able to manually adjust the ISO settings on the iPhone, you will need to download a third-party application.
Do not use standard filters (and indeed any filters) unnecessarily …
Most smartphones offer the user a variety of filters and “embellishments” for photographs – from filling the entire image with a yellow tint, to substituting a model of bunny ears or some other way to make fun of a photo.
You can, of course, have fun with them. But nothing more. If you want to get high quality, aesthetic photography, stay away from filters.
When capturing high-contrast scenes, be prepared for photographs to fail
Even a high-end camera has a hard time capturing images with pronounced contrasts between highlights and shadows, let alone a smartphone camera! You just need to come to terms with this.
Always remember that any scene in which there is an area that is significantly darker than others, the human eye does well, but the camera does not.
If you want a good photo of the sky, use HDR.
A little tip: if you haven't installed the ProCamera app yet, do it. I think, having worked with him once, you will love him for a long time. When the sky turns out to be ugly in the photo, try to capture the same scene using the ProCamera HDR module (I do not recommend using the standard HDR camera module of your smartphone, as in most cases it will give a poor quality picture).
Create carousel Add description
ProCamera takes two to three shots at different exposures and then stitches them into one HDR photo. In this way, you can often solve the problem indicated in the paragraph above, that is, shoot a photo with a high-contrast scene.

Create carousel Add description
Don't take pictures of what should remain invisible
In conclusion, I will be as brief as possible: never, I repeat never, do not photograph what an outside viewer should not see. Photography is a dangerous thing, and mobile photography is doubly so. I think you have heard about cases when malefactors stole photos of celebrities and posted them on the network. None of us is safe from the fact that photos from his mobile phone may end up in the hands of strangers. Keep this in mind and avoid taking photographs that could compromise you or harm you.
Another tip that may seem obvious. Photos from a smartphone, unlike most photos taken with a camera, contain GPS coordinates. Therefore, by sending someone a photo, you can unwittingly tell him and other information: for example, where you live, or where this or that amazing location is located.
In other words, this and the previous advice boils down to the fact that you should not rush to send your photos to the Internet – the online world is less secure than it seems.

Used sources and useful links on the topic: http://www.Artem-Kashkanov.ru/article106.html https://www.ferra.ru/review/multimedia/kak-nauchitsa-fotografirovat-1.htm https: // www.adme.ru/tvorchestvo-fotografy/10-sovetov-professionalnogo-fotografa-kotorye-pomogut-horosho-poluchatsya-na-snimkah-2088315/ https://blog.depositphotos.com/ru/20/20-lifehackov-dlya- fotografov.html https://www.ellegirl.ru/articles/kak-delat-krutyie-foto-layfhaki-dlya-smartfonov-i-zerkalok/ https://zen.yandex.ru/media/id/5a2cd210a815f1e7d2fcb89c/9 -sovetov-nachinaiuscemu-fotografu-5bb8ee4317241200aa646ea2 http://top100photo.ru/blog/azbuka-fotografii/o-chem-dolzhen-znat-nachinajuschij-fotograf https://www.adme.ru/tvorchestvo-fotografy/12-sovetov-ot-professionalov-kak-delat-potryasayuschie-snimki-na-telefon-1527215/ https://legkonauchim.ru/hobbi/kak-nauchitsya- fotografirovat https://zen.yandex.ru/media/fotosecret/kak-krasivo-fotografirovat-na-smartfon-sovety-dlia-novichka-5bc2d438782b5d00aed50eda
Post source: lastici.ru