DIY brick oven for home: step by step instructions. We make the simplest stove with our own hands

How to fold the simplest brick oven?
First you need to decide what you want to get from the future stove. If you only need to heat the rooms, and you use bottled gas or electricity for cooking, then choose the option without a stove and an oven. Anyone who loves soft, healing warmth chooses the option with a stove bench.
For regular cooking of large quantities of food and pet food, a simple oven with a hob will do just fine.
We'll look at three examples of ovens with a step-by-step guide to laying them:
- Simple straight-through;
- With a hob;
- Heating.
Let's say right away that one cannot expect high heat transfer from a simple design, devoid of gas revolutions. For this reason, such stoves are installed in garages and other small rooms with an area of no more than 16 m2.
We will consider this option so that beginners get their first simple lesson in practical masonry.
Direct-flow heating structure is designed to heat a small room
A powerful foundation is not needed for such a stove. Having poured large gravel with a layer of 15-20 cm, filling it with cement mortar and leveling the surface to a level, in a couple of days you can start laying.
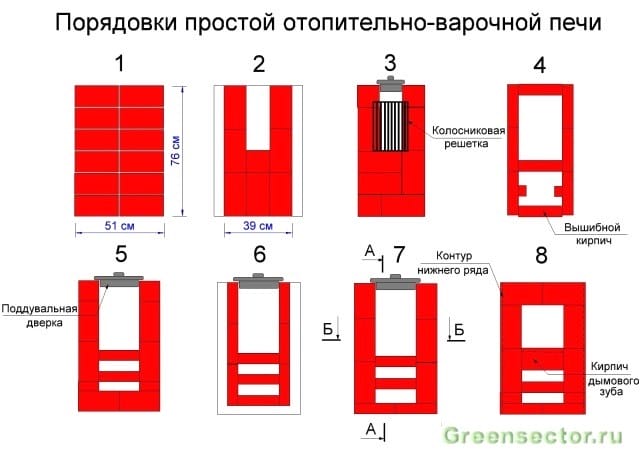
The dimensions of the furnace in the plan: width 2 bricks (51 cm), depth 2.5 bricks (64 cm). Since there is no blowing chamber in it, holes for air intake are drilled directly in the furnace door.
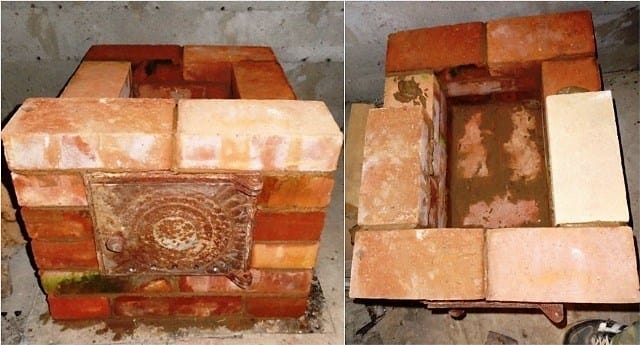
The sixth row covers the combustion chamber door. The top view helps to better understand how the brick is laid out.
The orders of this design are simple. The main condition during work is to observe the dressing of the seams so that the upper brick covers the seam between the two lower ones.
On the eighth row, the firebox is narrowed, using halves and “three-quarters” for this – ¾ of a whole brick. The exit from the firebox is thus obtained with a section of 1 brick (125×250 mm).
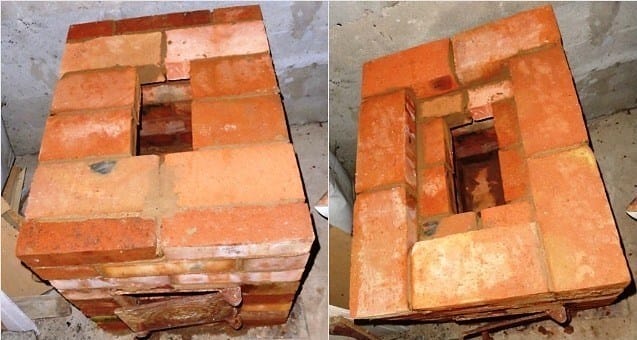
The next row (ninth) is laid out in the same way as the seventh, using a whole brick.
After that, the tier of bricks is placed on the edge flush with the inner edge of the lower row. The new tier is laid flat, using two whole bricks and four “three-quarters”. In this way, the smoke channel is again narrowed in order to retain gases and increase heat transfer.
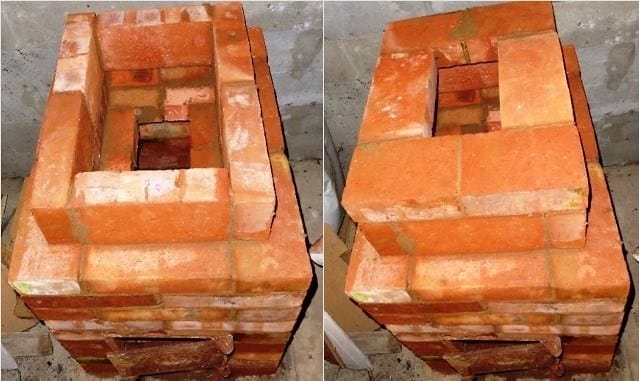
On the next tier, stones are placed on the edge. A brick is placed in the middle of the smoke channel. In this way, the furnace is raised five more rows (one tier per edge and a brick in the middle, the other tier flat).
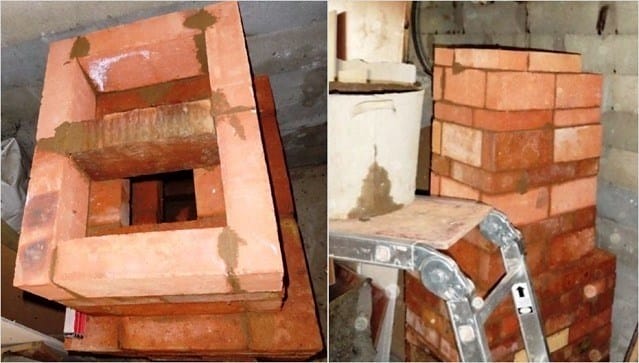
The other four tiers are laid flat. With the last two rows of masonry, the smoke channel is narrowed to a size of 12×12 cm (half a brick). At this level, a smoke damper is placed in the furnace. A steel pipe is inserted into it from above.

Oven with hob
In the simplest version, such a structure has small dimensions (width 2, and depth 3 bricks – 78×53 cm). Nevertheless, even in such a limited area, a single-burner stove can be placed.
Work gets done when you have everything you need at hand.
Therefore, buy the following materials and accessories in advance:
- Solid red brick – 107 pcs;
- Blowing door – 1 piece;
- Grizzly grate – 1 piece;
- One-burner cast-iron stove – 1 piece;
- Furnace door – 1 piece;
- Pipe gate valve – 1 pc.
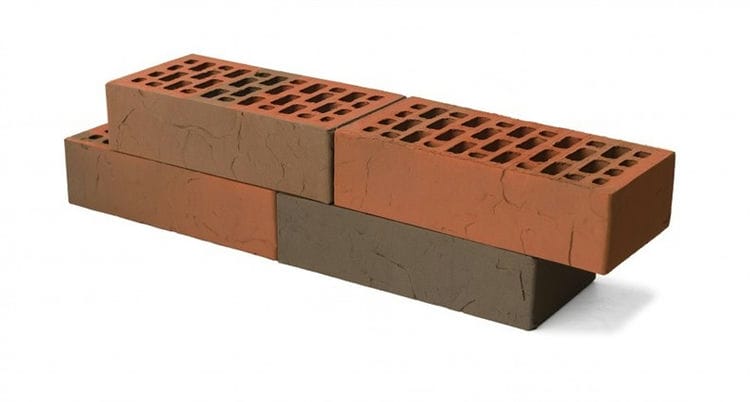
Refractory bricks for a wood-burning stove are not needed. Buying it is a waste of money. But red should be chosen carefully, rejecting cracked and uneven.
Solution preparation
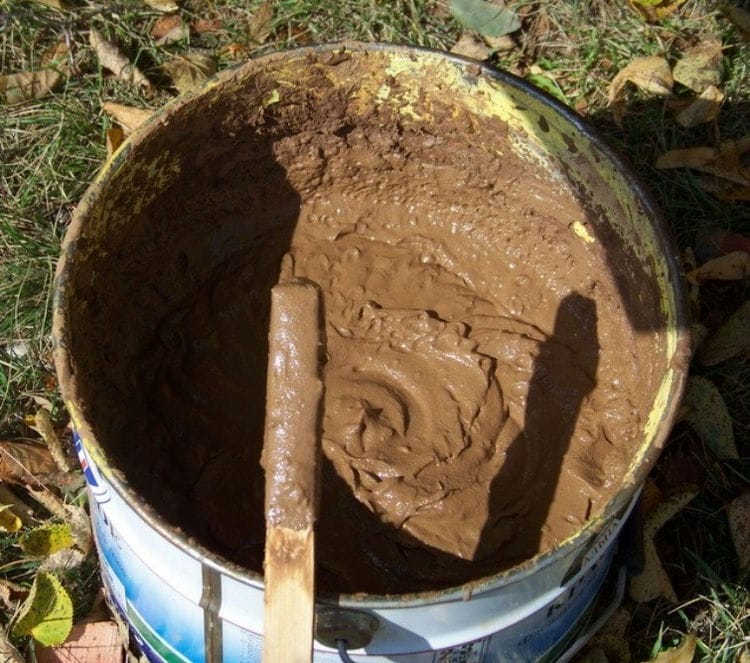
A masonry mixture is made by mixing four parts of clay with one part of water and adding eight parts of sifted sand to them. The normal consistency is determined simply: the mortar easily slides off the trowel without leaving streaks on it. When laying, it should not flow out of the seams.
The volume of the solution is determined based on the number of bricks. With an optimal seam thickness (3-5 mm), one bucket is enough for 50 pieces.
Having prepared the masonry mixture, you can start laying the base. Its width is made 10 cm more than the width of the oven. The height of the foundation is selected so that the bottom of the first row of bricks is at floor level.
An approximate prototype of the stove
If the underground is deep enough (50-60 cm), then there is no need to dig a hole under the foundation. It is enough to make a formwork on the ground with a plan size of 76 x (51 + 10cm). Two layers of roofing material are laid on its bottom to protect it from moisture. Having laid the concrete, he is given a week to gain strength, after which they start laying.
The dimensions of the oven we are considering with a hob are 3 x 1.5 bricks (76×39 cm).
Master's advice: lay out each new tier of brick without mortar (dry). After adjusting the bricks to size, you can start laying.
The first row is placed on a layer of clay mortar (4-5 mm). Aligning the base with a level, lay out the second, leaving room for the blower door.
Before installing the door, you need to screw a soft wire to it and lay its ends into the seams for better fixation.
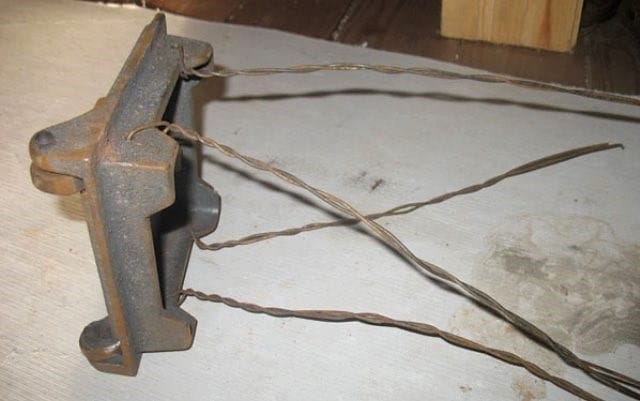
In the frame of the cast-iron door there are four holes for the wire, which serves to fix it in the masonry
To compensate for the thermal expansion of the metal, a gap is left between the door and the brick. Before installation, its frame is wrapped with a wet asbestos cord.
The masonry of the third row is carried out, overlapping the seams of the second. At this level, a grate is installed in the firebox.
Ordering scheme from 1 to 8 rows
The fourth row is placed on the edge, observing the dressing of the seams, and the walls of the combustion chamber are formed. Behind it there will be the first and only smoke circulation (see section А-А in the scheme №2). To clean its bottom, a so-called kick brick is placed in the rear wall without mortar, periodically removed to remove ash. Inside the chimney, two supports are made of pieces of brick to support the internal partition.
The stones of the fifth row are placed flat, leaving room for the furnace door. At the rear of the stove, in order, we see the walls of two smoke channels. During work, their surface must be thoroughly cleaned with a wet cloth from the clay protruding from the seams. This is an essential prerequisite for good traction.
Helpful advice! Focusing on the order drawings, do not forget to look at the two cuts of the stove. They will help you better imagine its design and not make mistakes when laying out bricks.

Ordering scheme from 9 to 11 rows
Raising it into the masonry up to the eighth row, they block the fire door, laying a wire in the seams that fixes its frame. At the same level, a brick with a beveled end – a smoke tooth – is placed in the back of the fuel chamber. It improves heat output by preventing flue gases from escaping quickly into the chimney.
Having finished the ninth row, an asbestos cord is laid on it in a clay solution. It is necessary for sealing the joints of the cast iron plate and brick. On the tenth row, the firebox is covered with a hob.
On the eleventh, a smoke damper is installed in the pipe. It is also compacted along the contour with an asbestos cord dipped in clay.
12 and 13 rows – the formation of the pipe walls. After their completion, a light sheet metal pipe is placed on the furnace, which is brought out to the roof.
Varieties of brick ovens
Brick ovens are divided by purpose, type of gas movement, performance and frequency of the furnace. In order to make the right choice, you need to decide on at least three criteria. The dimensions of the stove depend on the available space, and its appearance depends on personal preferences. Therefore, assignment remains the leading parameter.
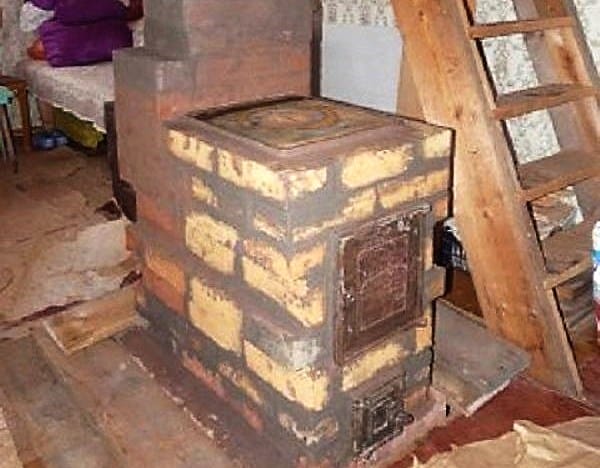
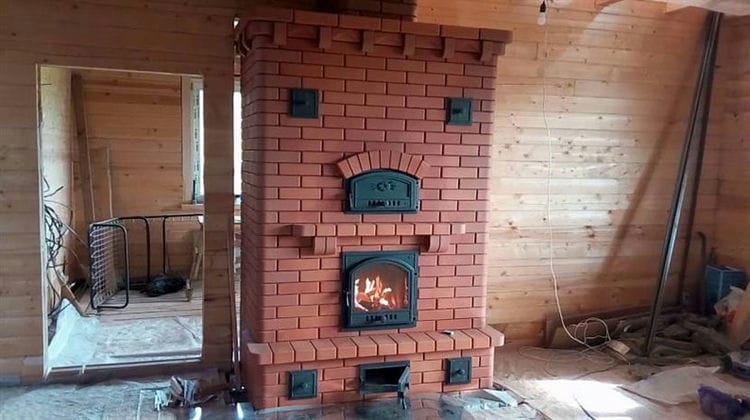
- Heating and cooking. From the name it is clear that it plays the role of heating the room and is used for cooking. Equipped with a heat generating surface and a hob. The brick oven can only be equipped with a cast iron hob.
- Heating. The main purpose is to heat the room. In this case, there can be from one to three heated rooms. The best option is when the walls of the stove serve as interior partitions.
- Cooking. Used exclusively for cooking. They have a compact size and a hob. The heat for heating the room with such a stove will not be enough.
- Multifunctional. These furnaces can have a specific purpose or be used for several purposes at once. In addition to heating the premises and the presence of a hob, there is the possibility of baking bread, drying clothes, and so on.

Selection of sand and mortar
They lay a brick on the mortar. It is prepared from clay. Please note that red clay is suitable for red brick, and fireclay clay is needed for fireclay. You can prepare a solution from river sand with grain fraction of 1-1.5 mm and clay in a ratio of 2.5: 1 with the addition of water to the desired consistency. The easiest option is to buy a ready-made oven mixture.
For heating
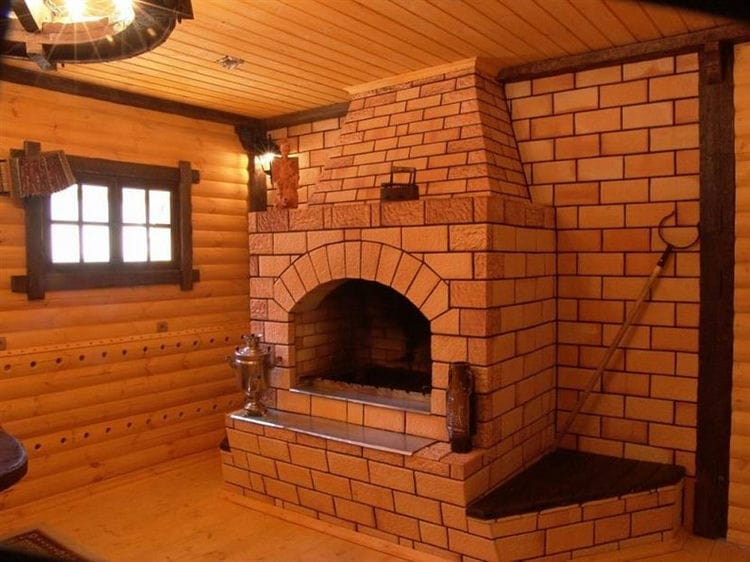
The most common and simple one. For heating purposes only. It is used mainly in houses remote from gas pipelines. It is also often installed as a fireplace stove. These include fireplaces, which can have a closed or open firebox, which allows you to effectively heat up to 20 m² of the room. Includes a combustion chamber (can be laid out or purchased separately), an ash pan and a chimney.
Stove-fireplace in the country
Source pechnoy.guru
Heat dissipation depends on the type of masonry, the size of the walls and the materials used. The most popular masonry option is one brick. The walls warm up to 600 degrees. The shape is elongated, wide, round, triangular. The choice of form depends on the desire of the owner of the house, the interior and the area of the room itself. For decoration, stone, plaster and tiles are used.
The easiest way is to make a rectangular or square oven. All other options must be entrusted to a good specialist, since there are many nuances and features of masonry, which must always be remembered. To increase the tightness, the oven can be equipped with sheet metal from the outside, which allows heating large houses.
For heating
Consider how to fold a brick stove for heating. For example, take an oven 51cm x 90cm x 2m 38cm (WxDxH).
The following materials will be required:
- sand / clay / brick (18/9 buckets / 390 pieces red, full-bodied);
- doors (cleaning and blowing);
- a roll of waterproofing roofing material (60cm x 1m);
- one valve and a grid 40×25 cm;
- one sheet of steel pre-furnace 70×50 cm.
The masonry process is as follows:
- The base is laid, serving as the first row. Be sure to check the horizontal level. The hardest part is working with corners. It is recommended to install template stands at the corners from bottom to top.
- Two stones with beveled edges are placed at the end.
- The blower door is installed, fixed.
- On the next 2 tiers, an ash chamber is made.
- The furnace chamber is laid out, a grate is placed.
- The firebox door is placed from tiers 7 to 8, beveled bricks are placed behind (they improve traction inside the stove).
- At 9, the firebox door closes.
- The chimney and the fuel chamber are placed from rows 10 to 16.
- The cleanout door is placed on the 17th row.
- Smoke ducts are made in 18-30 rows. The walls should be flat, inside the walls are rubbed with a wet rag.
- On the next two tiers, the furnace ceiling is made.
- The last 2 tiers are laid out for the chimney.

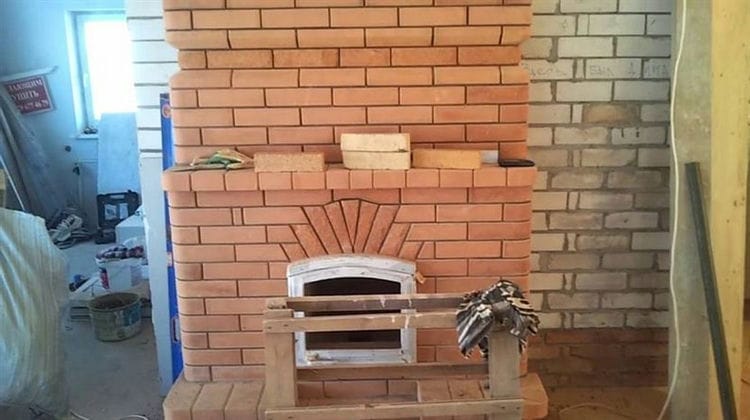
How to make a brick oven for a house with your own hands, if the room is small, is described above. The main thing is to adhere to all requirements and rules. At the end of the laying, the structure must be left to dry. After seven days, a test fire is required.
Economical option
If your budget is limited and the room itself is small, then such a design will be a real salvation. There are many fairly simple schemes for economical stoves. You can try to make them yourself or order an installation. But in any case, you need to understand how to lay a brick oven with your own hands. Even if you yourself will not be engaged in masonry, then knowing how to fold the stove will allow you to control all the work.
The first thing to do, even before putting the stove on, is to find a place for it. Since the total mass of the entire structure will be relatively small, there will be no hard restrictions that exist for traditional models. You can fix solid boards or other similar material on the floor, be sure to use suitable hydro and thermal insulation. This material is non-flammable only. Next, the roofing felt-oilcloth is laid, corresponding in size to the design with a small margin. Next, 2 cm of sand is poured, leveled.
The construction is laid as follows:
- Without a solution, the 1st tier is immediately placed on the sand. The stones are lubricated with a thin layer of mortar, the blower door is placed from the end, wrapping it with asbestos. The door is fixed and a blower is formed, fireclay is used and the grate is laid.
- The stones are placed on the edge, a channel is formed for the removal of smoke, the base of the partition is made. One stone lays down without mortar, then it is removed. The firebox door is installed and fixed.
Russian stove
Large and multifunctional oven. But its size justifies the presence – free space where you can relax. There is a firebox under the stove bench, you can cook food in it. There is a stove next to the firebox, and just below the blower that supports the fire. There is also a niche for freshly prepared food.

A Russian stove will easily warm up a room whose size exceeds 40 square meters. But for a full-fledged robot, a lot of raw materials are required.
Materials (edit)
The heat dissipation and durability of the stove will depend on the material used in the construction. Therefore, this stage is very important.

For cladding, ceramic bricks are used – M-500 brands. It is insensitive to temperature changes. And the combustion chamber must be laid out only from refractory bricks.
In addition to bricks, it is used:
- Sifted sand.
- Clay is of normal fat content.
Preparation
The first step is to determine the location of the oven. Since the mass of the structure is small, there are no limitations inherent in traditional brick solutions. By fixing solid boards or a suitable alternative material, the “foundation” is thermally and waterproofed.
The role of an insulator can be played by a non-combustible material – for example, basalt wool. Polyethylene or roofing material is placed on top of the base. The size of the latter corresponds to the size of the base plus a small allowance.
A layer of sand 1-2 cm thick is poured on top. Level the bedding. It is important to make the base even – the quality of the structure and the convenience of subsequent work depend on this.
Masonry scheme
The oven order is as follows:
- The first row is laid on the sand without using a solution. A dozen bricks are leveled strictly. The bricks are thinly coated with a mixture, after which the blower door is mounted from the end. The door is pre-wrapped around the perimeter with an asbestos cord, which compensates for the thermal expansion of the metal.
- After fixing the door with a wire, lay the second row according to the diagram. A blower is formed.
- Chamotte is used (in the diagram it differs in a yellow tint). After laying, a grate is mounted above the blower.
- Before that, the brick was laid flat. On this row, he is placed on the edge. A flue duct is formed, inside of which the basis for the partition is made. One of the bricks (you can see it in the illustration) is put “dry” – later it will be removed. After that, the firebox door is mounted, which is wrapped several times with asbestos strips before installation. But this must be done so that the door opens well upwards. The element is fixed with a wire and a pair of bricks.
- Again lay the brick flat, duplicating the previous row.
- Again, the turn of the “ribs” is the second and last row in which the brick is laid in this way. An exception is the next row, in which one of the walls is formed by masonry on the edge. The walls of the chimney must be wiped with a damp cloth.
- The brick is laid flat according to the scheme. The back wall is made using the ribbed format again.
- This next to the firebox is closed. A pair of bricks should hang over the firebox so that the flame moves to the middle of the hob – in case the stove will be used as a fireplace (without closing the firebox door).
- The bricks are slightly shifted to the back wall to support the firebox door. Strips of asbestos dipped in water are laid in front of the brickwork. This ensures the sealing of the gap between the ceramic and cast iron. The cast-iron panel cannot be placed directly on the clay solution, otherwise the difference in the parameters of thermal expansion of the materials will lead to cracks.
- At this stage, the formation of the chimney starts. The latter, according to the plan, should smoothly expand towards the back. But only a chimney base is made of bricks. The rest is made of lightweight metal. Otherwise, the excess weight of the element can lead to a shift in the center of gravity of the stove.
- Here, a valve is mounted, sealed with asbestos strips. The latter are recommended to be pre-coated with clay solution. This is the final row, which completes the construction of the brick oven directly with your own hands. The remaining pair of rows is given to the chimney, which will then be docked with a lighter metal channel.
After that, remove those bricks that were laid “dry” on the 4th row. At the same stage, the chimney duct and the surface of the stove are cleaned from construction debris.
Final works
The simplest stove does not imply serious decorations. The only decoration is whitewashing. It is recommended to add a little blue and milk to the composition – this will save the coating from the formation of a yellow coating and whitening.
It is necessary to grease very well the seams between the brick and the metal of the chimney, as well as the seams between the ceramics and cast iron.
It is imperative to close the joint between the oven brick and the floor. This will eliminate the ingress of baked sand into the room. It is advisable to cover the joint with an L-shaped sheet. Then a plinth edging is made, which serves as both a decor and an additional element that prevents the “foundation” filling from spilling out.
The stove is ready. The whole process took no more than one working day. Already now you can try to make a low-power kindling. Logs cannot be used – only wood chips or paper. The wood firing will create too high a temperature and the structure will crack. For a full set of the mixture, you need to give a week or two. After that, you can already drown “in an adult way.”
Sources used and useful links on the topic: https://greensector.ru/pechi-i-mangaly/kak-slozhit-prostuyu-pech-iz-kirpicha-svoimi-rukami-primery-s-poshagovymi-skhemami.html https: / /kaminguru.com/pech/svoimi-rukami-schemy-foto-instrukciya.html https://m-strana.ru/articles/kak-slozhit-pech-iz-kirpicha-svoimi-rukami-dlya-dachi-samuyu- prostuyu / https://materialyinfo.ru/pech-iz-kirpicha/ https://ZnatokTepla.ru/pechi/prostaya-pechka.html
Post source: lastici.ru