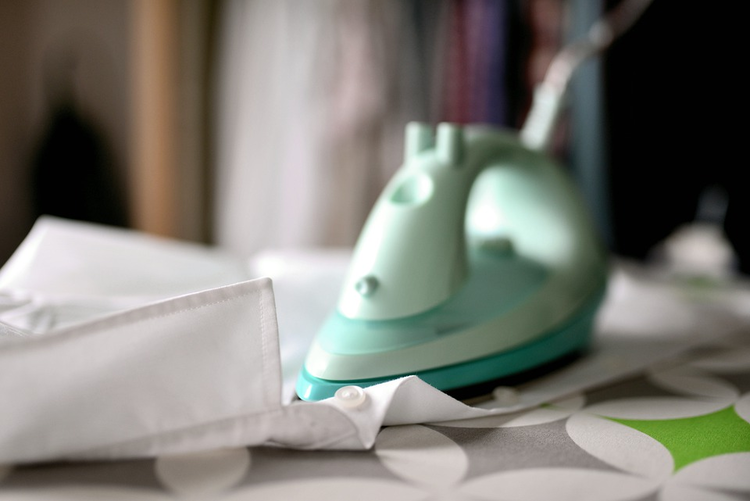
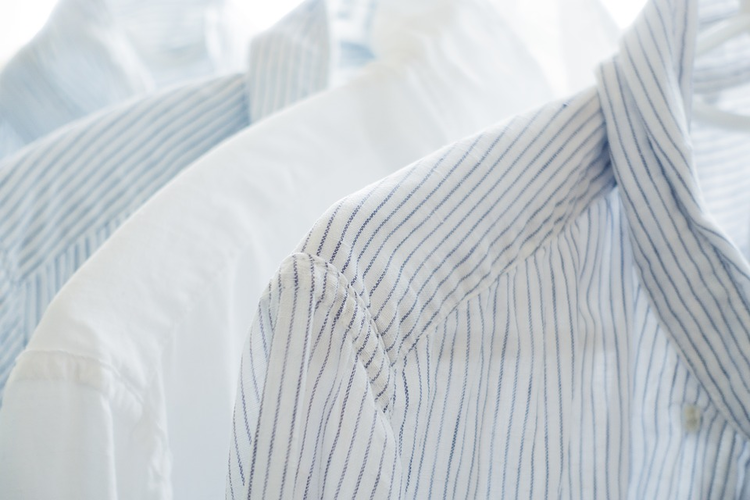
How to iron a shirt quickly and correctly, an overview of devices. How to iron a shirt and 7 more tricks to make shirts last many times longer
A little theory about ironing shirts
The first thing I would like to draw your attention to is that it is necessary to iron the shirt without waiting for it to dry completely after washing. In this form, it will be much easier to achieve the result, and even with uneven moistening from the spray gun, stains may remain after ironing. If you need to iron a dry shirt, sprinkle it with water and place it in a plastic bag for an hour or two, this will help to distribute moisture evenly throughout the garment.
Ironing a men's shirt correctly, especially with a long sleeve, is impossible without a good surface, so it is best to get an ironing board, if possible with an additional surface for ironing sleeves, but if you already have a board without such an addition, you should not run to the store for a new one, we will teach You how to cope with the task without it.
Of course, you can't do without a good temperature-controlled iron and a non-stick surface. Do not save on water, pour distilled water into it to iron shirts, this will save you both from salt deposits inside the device and from the formation of stains when steaming wardrobe items.
How to iron a shirt properly
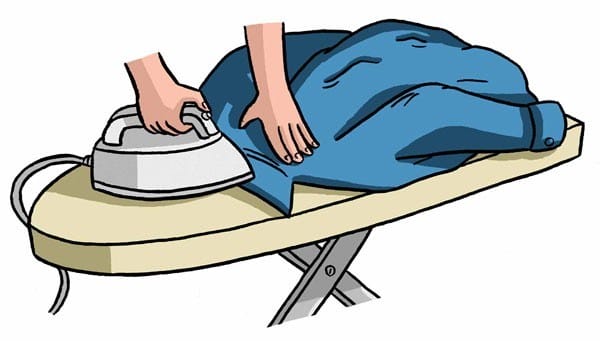
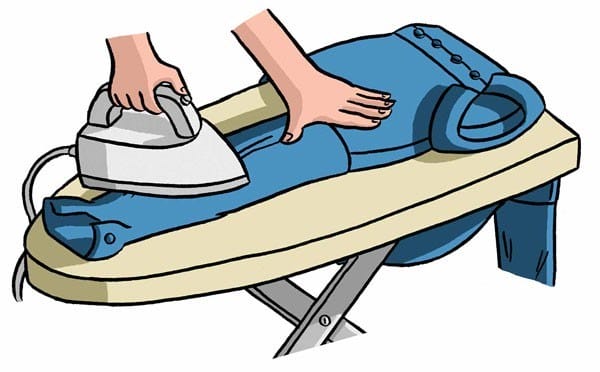
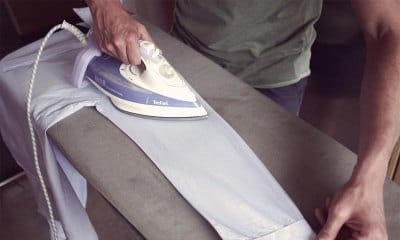
Correct ironing of men's shirts is carried out in the following sequence:
- Ironing begins at the collar because this is the most visible part, especially when worn with a suit. To iron the collar, you need to unscrew it and start from the bottom, and then, slowly pressing on the iron, draw it from the corners to the center. The next thing to do is turn the shirt over and repeat the process on the other side of the collar;
- cuffs, when worn with a suit, are the second visible part of the shirt and require a lot of attention. Just like the collar, they are first ironed on the inside, then turned over and ironed on the outside. When ironing the cuffs, you need to be careful not to iron over the buttons;
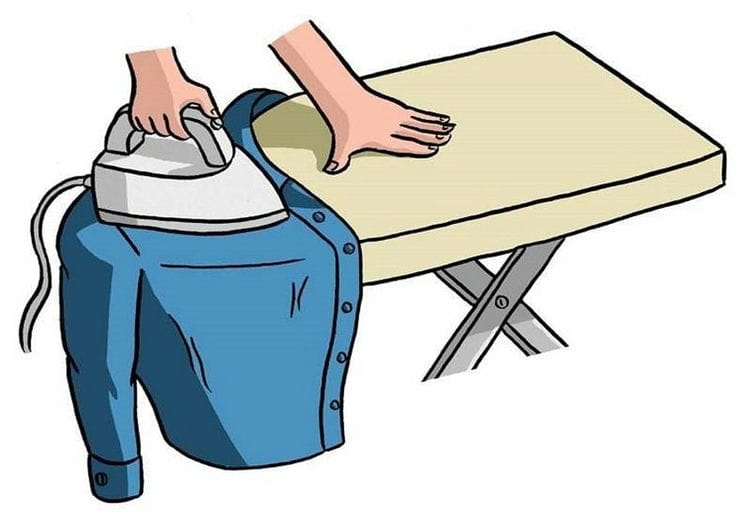
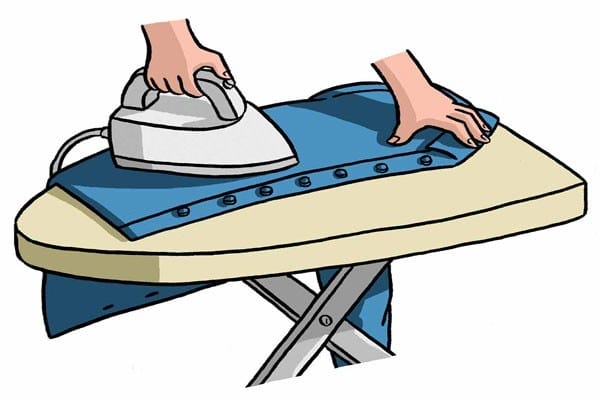
- the front of the shirt. You need to start ironing the front part from the side on which the buttons are located, gently pressing the iron around the buttons;
- back. To properly iron the back of the shirt, you need to place the back of the shirt on the ironing board so that one shoulder is placed on the tapered edge of the ironing board, this helps to keep the back in the desired position for ironing. The same must be done by changing the sleeve and ironing the second part of the back;
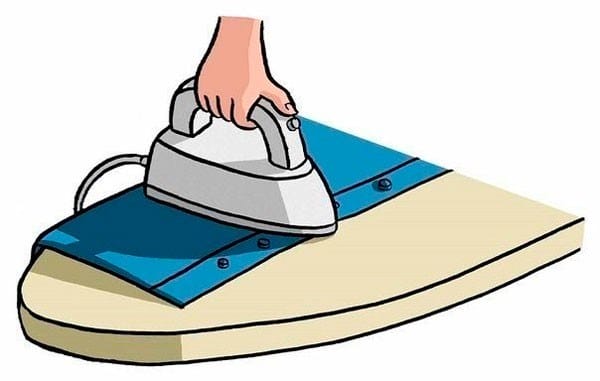
- sleeves. Sleeves are the hardest part of ironing a shirt. The problem with sleeves is that without a special board with a cutout for the sleeves, you will have to iron two layers, so you need to be careful and make sure that the fabric is smoothed out.
Where to begin
So, before you is a heap of shirts that need to be given a flawless look.
-
Before you start ironing, they, of course, need to be washed. Never iron a worn shirt, even if it was only worn once and looks clean to you. Invisible dirt and stains after ironing will firmly weld to the fabric and it will be difficult to get rid of them.
-
When washing, use the “easy iron” function, this will simplify your task.
-
Do not dry the clothes completely, a slightly damp cloth is easier to smooth out.
-
Examine the product label to determine the composition of the fabric. As a rule, it also contains recommendations for care, this will help to set the correct temperature on the iron.
A label on the shirt will tell you about the composition of the fabric and help you decide on the ironing mode
Essential accessories for successful ironing – gallery
How to choose a shirt ironing board
Quite simply: the harder the surface on which you iron, the more noticeable the subsequent effect. But do not press the thing to the edges of the board, so the shirt will be remembered even more and the creases will become visible.
Preparing a shirt for ironing
-
If the shirt is dry, sprinkle it with water from a spray bottle and put it in a bag for 20 minutes, or wrap it in a damp towel.
-
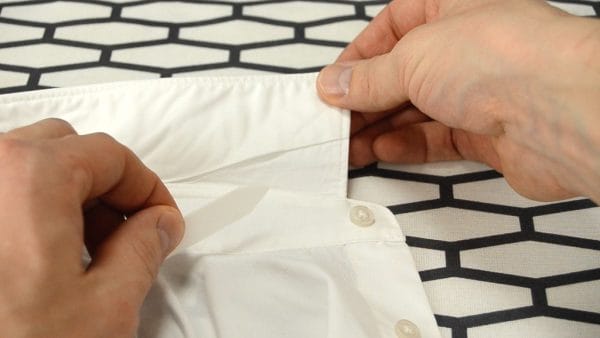
In men's shirts, the ends of the collar are often reinforced with plastic clips located in small pockets. Take them out if you haven't done so before washing.
![How to iron a shirt quickly and correctly, an overview of devices. How to iron a shirt and 7 more tricks to make shirts last many times longer]()
Remove the clips from the collar before ironing.
-
Unbutton all buttons, including the sleeves.
-
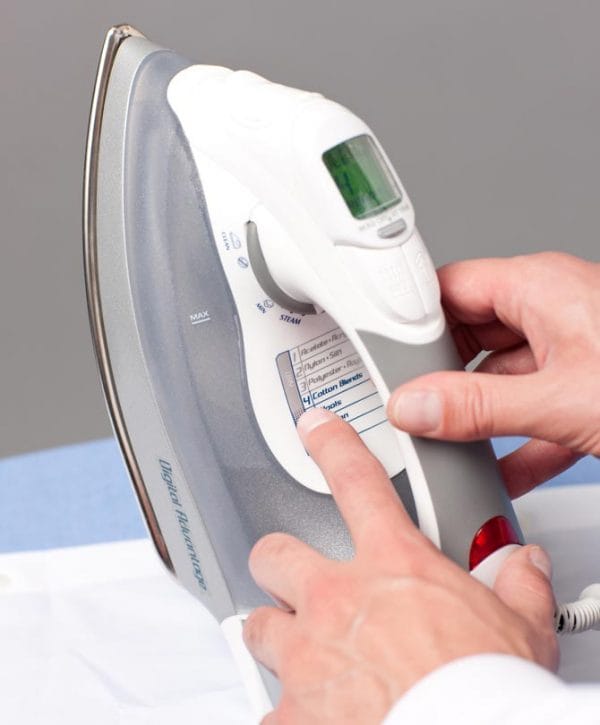
Set the required temperature on the regulator of the iron and plug the appliance into an outlet.
![How to iron a shirt quickly and correctly, an overview of devices. How to iron a shirt and 7 more tricks to make shirts last many times longer]()
Set the temperature to suit the type of fabric
Having prepared everything you need, start ironing.
Ironing modes for shirts by type of fabric
Cotton shirts
Iron items made of cotton slightly damp, sprinkle water on the part that is being ironed. You need to work with the iron longitudinally, and not in a circular motion, so as not to damage the material.
- For a 100% cotton shirt, a temperature in the range of 130-160 degrees with strong pressure and wet steam will be required;
- from reaped cotton – 110 ° C and without moisture;
- a cotton thing with linen will require a temperature of 200 ° C and damp gauze with strong pressure;
- cotton with synthetics will be sufficient at 100 ° C with low steam.
Polyester
They definitely need to use gauze or a thin cotton cloth to avoid the sole of the iron coming into contact with the fabric, because polyester is an extremely heat sensitive material.
You need to iron such a thing at a temperature of no more than 80 degrees with light pressure to avoid melting the fibers and using weak steam.
Linen shirts
For high-quality ironing of a linen shirt, it is recommended to warm up the iron to a temperature of 200 ° C with intense moistening, sufficiently strong pressure and jet steam.
Chiffon and silk shirts are ironed at a temperature not exceeding 70 ° C without moisture and steam.
Viscose and knitwear – 120 and 80 ° C, respectively, using gauze and low steam. You need to iron things from these materials from the inside out.
For thicker fabrics, ironing both sides of the fabric will give the best results, and you can also find out at what temperature to iron the shirt on the label on the garment.
If there is no tag, the temperature regime can be determined independently by setting the minimum temperature and increasing it until the folds begin to smooth out.
Dark colored items, regardless of the material, are always best ironed from the inside out to avoid the shine caused by the iron.
Features of 100% cotton ironing
 Cotton fabrics are easy to care for, they are well tolerated by regular washing and ironing. The best smoothing result is obtained when the fabric is not completely dry.
In the event that the product is completely dry after washing, you can moisten it with a spray bottle and let it lie rolled up for about 15 minutes.
There are several ways to iron a cotton shirt :
- pre-moistening the product;
- through a damp cloth, which is placed between the decomposed product with the heated soleplate of the iron;
- using the steam function in the iron;
- using the water spray iron function;
- using other devices instead of an iron – a steam generator or a steamer.
Cotton fabrics are well tolerated when wet and ironed in cotton mode.
There is no difference between ironing a men's and women's classic cotton shirt. The exception is additional decorative elements on some women's products, which will require separate processing.
Wrinkled cotton
For crinkled cotton, 110 ° is enough; the product must not be steamed, so as not to damage the structure of the fabric. With proper drying and careful straightening of the parts, ironing can be avoided.
Cotton + Polyester
The choice of temperature largely depends on the percentage of materials. The maximum temperature is 110 °, steaming is used selectively. Do not put too much pressure on the iron.
Linen
It is better to iron linen shirts in a damp state, with strong steam. Temperature – 180-200 °. The pressure on the iron is maximum. To prevent the fabric from becoming shiny, it is better to iron it from the inside out.
Jersey
Knitted shirts are ironed through the sole or from the wrong side. The temperature is chosen according to the composition of the fabric – 100-140 °. It is important to choose the right direction – down the loops. The best way to iron is by steaming the hanging product.
Silk
Silk is ironed with a non-hot iron (60-80 °), without using moisture. Better to iron from the wrong side, do not use a protective cloth, as the marks remain on the silk.
Important: if the composition of the fabric is unknown, the label is lost, ironing begins in the most gentle mode, from the bottom of the shelf or back, tucked into the trousers, to determine the required temperature of the iron.
Increase heating if necessary.
Cotton + linen
Both materials need moisturizing when ironing, use a spray bottle, steaming. Temperature – 180 °. You can put too much pressure on the iron.
Wool
Woolen shirts are ironed at a temperature of 110-120 °. Iron pressure is minimal. It is convenient to use a steamer, put on a protective sole on the iron, or iron through a damp cloth.
Viscose
Moisture stains may remain on the viscose; steaming is not used. Iron at a temperature of 110-120 °. Better to use a protective iron sole or cloth.
Chiffon
Iron at the minimum temperature – 60-80 °, with light tangential movements. Do not use water. Damp protective cloth may leave marks on the product, it is better to iron with a dry iron.
Preparing the shirt for ironing
- The shirt should be ironed only after washing, since some dirt after processing the clothes with an iron will forever remain in the fabric;
- if your washing machine has an “easy ironing” function, then use it;
- no need to wait for the garment to dry completely, let it be slightly damp. If you nevertheless undertake to iron a dry shirt, then it is better to moisten it with a spray and briefly (for 10 minutes) place it in a bag or wrap it in a towel, this will help it to moisturize equally throughout the fabric;
- on the label, study the information about the shirt and adhere to the specified temperature regime, which is necessary for the material;
- on the collars of men's shirts in small pockets there are plastic bones, the so-called clamps, they must be removed before ironing, but it is better to do this before washing.
How to iron a long and short sleeve shirt
The basic principle that should be followed is that small and double parts are ironed first.
Using the following instructions, you can iron a long-sleeved shirt perfectly in the sequence shown without leaving wrinkles on the already ironed surface.
- Gate. Its fold does not need to be ironed, it should be natural.
- Cuffs. First, the seamy side is smoothed, and then the front side.
- Sleeves. First of all, the seam is smoothed, and then the sleeve itself.
- Shelves. It is necessary to avoid folds in the pockets and carefully bypass buttons.
- Back. Slide the shirt over the board to help iron the back from seam to seam.
Shirts with short sleeves are ironed according to the same pattern only a little faster. The sleeve must be pulled over the narrowed edge of the ironing board or over a special arm sleeve and ironed on all sides.
How to iron a white shirt
White shirts are most often made of cotton with a slight addition of polyester. For this type of fabric, it is enough to heat the iron to a temperature of 110 degrees, use a small amount of steam and not too strong movements of the iron. This method is also suitable for ironing pleated shirts made from specially crumpled fabrics.
For viscose products, a temperature regime of 120-130 degrees, a little more abundant steam or irrigation from a spray bottle are suitable.
It is not easy to smooth cotton without impurities and natural linen, the heating temperature should reach 200 degrees, and pressing the iron as hard as possible.
Make sure the soleplate is clean before ironing the shirt.
Features of ironing polo shirt
Polo shirts are sewn from knitwear, before ironing, you need to familiarize yourself with the composition of the material in order to correctly set the temperature of the iron. The product is turned inside out so as not to spoil the color.
It is convenient to iron the polo on the ironing board by simply pulling it on and turning it gradually to the desired area. For ironing short sleeves, use a small board or folded cloth. The collar and fastener are ironed first from the wrong side, then carefully from the front side.
When ironing on the table, the polo is folded in 2 layers, it is important not to run the iron on the fabric, under which the seam is located, so that it does not get imprinted on the canvas.
Reference: modern polo shirts are made of low-crease fabrics, with proper drying on the hangers, ironing is not required.
Men's shirts care
Washing men's shirts is not a big problem, they can be thrown in the same machine with blouses and dresses of the same color from a similar fabric. But when the time comes to take up the iron, the woman's mood drops: things of complex shape need to be ironed without a single fold, carefully bypass all the buttons, not leave wrinkles in the seams. If you do not feel sorry for your husband, buy clothes made of pure synthetics for him. The skin will be very unpleasant, but after washing you can dry things on a hanger and put them on immediately.
If you want your loved one to feel comfortable all day long, not to sweat, you will have to learn how to iron men's shirts. It will be difficult at first, soon you will master this work so much that in a few minutes you will bring a long-sleeved shirt to its perfect look. To make your work easier, think about ironing as soon as you take your laundry out of the washing machine. Do not throw things on the cord to dry in a lump, shake them thoroughly and carefully lay them on the cord or hang them on a hanger without wrinkles.
Monitor the condition of your clothes to prevent them from drying out. Take off the shirts slightly damp, leave only silk shirts to dry completely. If you missed the right moment and not a drop of moisture remains in the fabric, do not rush to put things under the iron. Spray the shirts well with a spray bottle, fold them in several layers and place in a plastic bag. Wait about an hour for the fabric to absorb moisture well and you can start ironing.

In what order to iron a men's long-sleeved shirt
To iron the shirt, you must adhere to a certain sequence – moving from the smallest parts to the largest. Otherwise, you run the risk of significantly delaying the process, because while you deal with small details, the previously ironed large ones will be worn out again.
To avoid scorching the product, do not leave the iron motionless for a long time. Move in the direction of the warp thread, this will help prevent the shirt from stretching and warping.
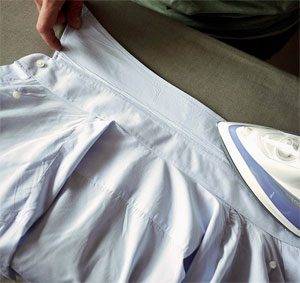 The first thing to iron is the shirt collar. We need not only to straighten out all the folds on the collar, but to make it stand. To do this, first stroke it from the wrong side from the edges to the center, this will allow you to properly straighten all the folds in the corners.
Then we turn over the shirt and walk along the front of the collar. We continue the process until we achieve complete drying of the fabric, then move to the wrong side, bend the collar and iron it without touching the counter.
Next, you need to iron the cuffs and sleeves on the shirt. The cuff is positioned on the board so that we can iron the whole from the wrong side, this is done from the edges to the center, and the front side is ironed in the same way.
The sleeves of the shirt must be ironed so that they are without arrows, except for shirts for some types of workwear. To iron the sleeve correctly, place it with the seam up and carefully smooth the fabric with an iron, without touching the fold. The iron should slide from the shoulder to the cuff. Next, we turn the sleeve so that the seam is at the place of the fold of the sleeve, and smooth out all kinds of folds again. We act in the same way with the second sleeve.
If your ironing board is equipped with a special sleeve ironing add-on, the sleeve is simply pushed over it and ironed in a circle. If you are going to iron a shirt with a short sleeve, then you need to put it on the edge of the board and iron it.
It is correct to start ironing the front of the shirt from the side where the buttons are located. We carefully iron the places between them, but in no case touch the buttons with the iron, even if we iron the shirt from the wrong side.
Having coped with this procedure, we iron the shoulder and the rest of the front half of the shirt, the iron slides from top to bottom. It will be easier for you to cope with the second half, you do not have to bypass the buttons on it.
The back of the shirt is ironed in 2-3 steps, first the right and left parts, and, if necessary, also the middle. Movements should also be done from top to bottom.
How to iron shirts correctly?
Usually, all things need to be ironed from the front side, but there are exceptions to this rule. If there is embroidery on a men's shirt, it must be ironed from the inside out, then the pattern will be clearer. Shirts made of shiny fabrics are also ironed on the seamy side, which can fade from heat. It is also undesirable to iron things with an iron from the front side: this procedure can leave shiny streaks.
The ironing procedure has been verified by the experience of many generations of women, who, through their own experience, have established in what sequence all the details must be processed so that they do not wrinkle during the next operation. It's easy to remember the order: first, small parts are put under the iron, then larger ones.
It is best to proceed in the following order:
- collar;
- cuffs;
- sleeves;
- strips;
- shelves;
- back.
The collar and cuffs must be ironed first from the wrong side, then from the front side. It is better to run the iron from the edges to the middle so that wrinkles do not form. Both long and short sleeves are ironed first along the seam, then they are ironed on the opposite side, then the side parts are processed. The finished product must be without arrows on the sleeves. The most convenient way to iron these parts is on a special board – you simply turn the part in a circle and smooth it out.
It is more difficult to iron the right placket where the buttons are located. Use an iron to go around them carefully. It remains to tidy up the shelves and back. Smooth them in the direction of the lobular thread. Remember to iron the side seams carefully when moving from the shelves to the back. The shirt is ready. Hang it on a hanger and let cool. After a while, you can send the shirt directly on the hanger to the closet, or fold it neatly and place it on the shelf.
Can I iron a wet item?
Before you start ironing your shirt, you need to prepare it for this process. First of all, the shirt must be clean, that is, pre-washed, and dried.
 Do not iron things that have been worn at least once. Even if there is no visible dirt on it, the shirt will not look fresh after ironing.
You cannot iron a wet product, but it is also important not to allow the opposite: so that the fabric is too dry.
Ideally, if the fabric is slightly damp, that is, when you press on it, moisture will not be released. During washing, it is advisable to turn on the “no folds” mode, this will greatly simplify further work.
If a mistake is made and the shirt is dry, it can be easily corrected with plain clean water and a spray bottle.
How to iron a shirt collar
It is advisable to iron the collar of a man's shirt damp. Start from the back from the corners of the gate to the center.
The front side is also ironed. You need to iron without pressure so that the fabric does not move along the sides, forming folds.
It is not recommended to iron it along the bend in a bent position, it should be natural and take its shape when the shirt is put on.
How to iron a shirt collar to keep it standing?
It depends on the fabric. With a good density of the material, it will be enough to simply smooth it on both sides, if the fabric is soft, you can starch the collar with a solution, dry it and iron it in the desired shape.
Ironing the sleeves
You need to iron the shirt sleeves without arrows. This is done like this:
- the sleeve is folded in half, seam up and it should be located in the middle;
- the seam is smoothed, the sleeve is turned over and also ironed;
- the sleeve is folded along the seam, and ironed from it to the edge starting from the shoulder and down.
Do you need arrows on the sleeves
Many wondered: is it correct to iron the sleeves of a shirt with or without arrows? According to etiquette, it is customary to wear a shirt without arrows.
But if the person does not plan to take off his jacket, arrows on the shirt are acceptable. It follows that arrows on the sleeves are bad form.
Sleeves: how to avoid creases?
 It is convenient to iron short and long sleeves with the help of a sleeveless sleeve. It allows you to smooth fabric in one layer.
The direction of movement of the iron is chosen from the seam to the edge. Do not smooth down the arrows on the sleeves.
If a sleeve is not available, you can replace it with a tightly rolled towel. The resulting dense roll is put into the sleeve from the side of the armhole and ironed.
3 Ironing the shoulders of the shirt
The next step is to iron the shoulders of the shirt. To do this, place the shirt on the narrow part of the ironing board so that only the left or right shoulder can be ironed. Try to reach difficult areas with the tip of the iron so that no wrinkles remain. Once you're done with one shoulder, move on to the second.
Ironing the shoulders of the shirt
Ironing the shelves and back
We put the shelf on the board, shoulder to the narrowed part. You need to start ironing the shelf from the front side. From bottom to top, the places between the buttons are ironed.
The seam is ironed at the collar and further down. Move the shirt with the side seam of the armhole onto the board, iron it.
Then with the iron you need to move to the side seam and back. Last of all, the left shelf is ironed.
How to iron a shirt without an iron
Consider a trick like being able to iron a shirt without an iron.
Method number 1 – Wet hands
If the garment is not too wrinkled, you can smooth out the wrinkles with wet hands by running your hands from top to bottom. Then shake the shirt and let it dry. Linen products are well susceptible to this method.
Method number 2 – Steam bath
Hang clothes on a hanger in the bathroom and open up hot water, close the bathroom door. The water must be so hot that steam is formed, since it is under the influence of steam that irregularities leave. The fabric will be ironed in 15-20 minutes. Do not spray water on the item.
Method number 3 – Dress her up
Put a wet shirt on the body. The tension and warmth of the body will smooth the fabric.
Method number 4 – Leveling mortar
A solution of vinegar and fabric softener is added to the water 1: 1: 1. Shake the resulting solution and spray on the surface of the clothing. Then dry it, preferably outdoors. The method does not work with synthetics.
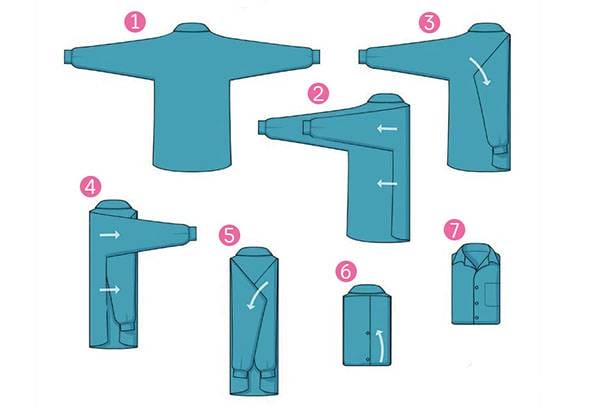
How to fold a shirt, no matter what it wrinkles
If you fold the shirt correctly, you won't need to iron it again. This is much easier than it sounds.
- you need to put the shirt with the buttons down;
- the sides are folded from shoulder to shoulder;
- the sleeves lie on the side of the shirt towards you;
- the bottom of the shirt is wrapped up, forming a neat rectangle.
Iron heating modes
Modern irons are equipped with a temperature controller. Ironing modes on them are indicated by dots, on some, the type of fabric is additionally indicated.
- one point corresponds to temperatures up to 1100
- two points – up to 1500
- three points – up to 2000C.
Ironing mode table for different types of fabrics
If the label is lost and you do not know the composition of the fabric, set the minimum temperature, gradually increasing it, until the fabric begins to flatten. Add gradually. As soon as you feel that the iron is slipping worse, lower the temperature and let the appliance cool down.
Prepare everything you need for ironing.
When the ironing of the shirts is over
After completing this seemingly laborious process, do not rush to immediately put on the shirt. It is necessary to let it cool down, otherwise new folds will form on it, and no one will see the result of your work. Hang the shirt on a hanger, close the top button, and let it hang a little.
If you ironed several shirts, and there is not enough space in the closet for storing them on the hangers, then you can try to fold them so that they do not wrinkle.
In order to roll up a shirt, you must :
- fasten all the buttons;
- put the shirt on a flat surface with the buttons down and smooth it so that there are not a single fold;
- dividing the shirt into 3 parts mentally, bend the left side back;
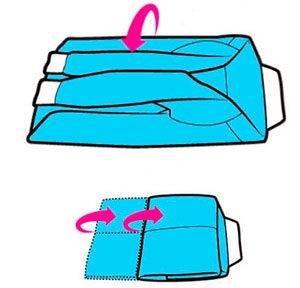
- bend the sleeve parallel to the sidewall;
- repeat the previous two points for the right side of the shirt;
- then mentally once again divide the shirt into three parts by two horizontal lines along which we fold it from top to bottom;
- you need to store the shirt with the collar up.
Now that you can not only iron shirts with long and short sleeves correctly, but also fold them so that they do not wrinkle, you can safely prepare a set of shirts for a whole week, setting aside one hour for this on a day off.
uborkagotovka.ru
Cleaning the iron
If you, like me, have hard water at home and mineral deposits constantly accumulate in the iron, then I recommend cleaning it sometimes. To do this, pour a solution into the water tank: 1 part – water, 1 part acetic acid. They say that you can still citric acid, but the concentrate will come out much more expensive than plain table vinegar (the concentration of vinegar is about 70%). Pour in the solution, heat the iron and place it on the ironing board with the soleplate down, so that the steam comes out from under it. When all the water runs out, see how much dirt has accumulated in the iron. Repeat the procedure if necessary. To prevent this from happening, fill in purified water if you have a flow-through filter or bottled water, if possible.
Knowing how to iron a shirt properly, you will never be intimidated by a mountain of crumpled shirts. Practice a little, ironing a couple of dozen shirts, and the time spent ironing one shirt will be reduced to insignificant 3-4 minutes. To slightly diversify the process of ironing wrinkled shirts, parallel watching TV or listening to the radio will help. I hope you have the patience to learn this not difficult, but necessary skill.
Alternative to the iron
Of the unusual methods of removing wrinkles on things, the following can be noted:
Steam generator
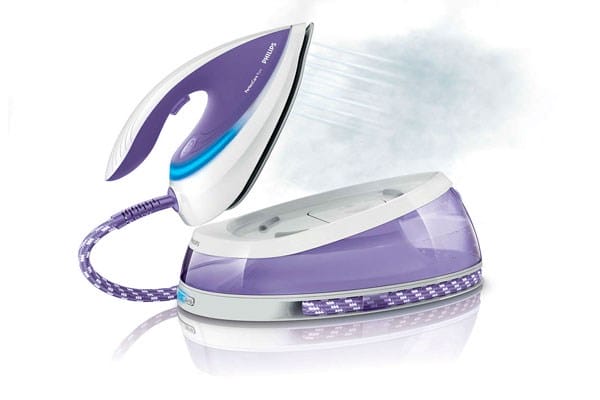
This device is quite similar to an iron, but according to the specifics of its work, it differs in that it constantly supplies dry steam with a powerful jet. Able to smooth out rather wrinkled things.
Steam dummy
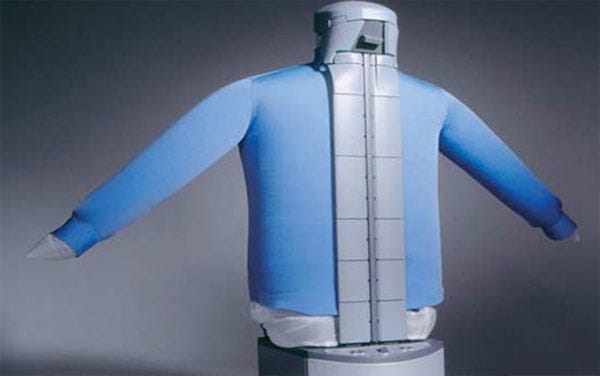
The steam dummy ironing robot, in the shape of a human torso, is designed for quick drying and smoothing of all clothes that are worn on the torso.
The best way to iron shirts with a steam generator or a steamer depends on the frequency and amount of badly ironed (complex, unusual cut, decor on things) clothes. In this case, the first option is preferable.
Steamer
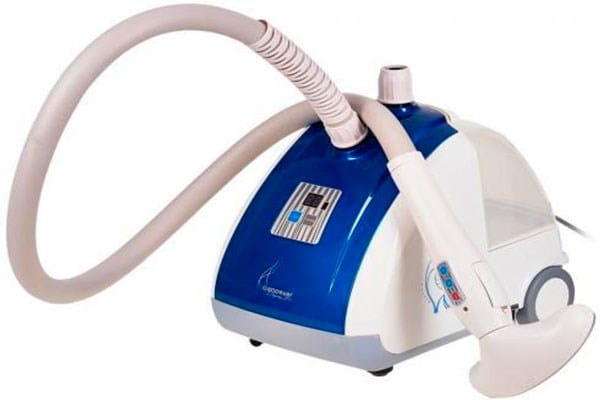
The steamer removes wrinkles by supplying hot steam, and at the same time disinfects the thing. Ironing can be done upright. However, not all fabrics are suitable for this method.
Remove wrinkles from a shirt without an iron
After the end of the wash, a strong spin is not required. You need to hang the item in the bathtub so that the water is glassy and the fabric stays flat. To keep the material looking smooth, you can draw hot water into the tub and hang a jacketed hanger over the water. Steam replaces the action of the iron, and the crumpled shirt can quickly straighten, only then it will take time to dry it.
There is also an effective way to iron wrinkled shirts without the aid of an iron by using a vertical steamer. Sometimes a simple sprinkling of water on separate parts of the item helps, and you can use a home hair dryer to dry quickly. In addition, in some cases, a smoothing solution is used, which can be prepared from the following components:
- Linen conditioner.
- 9% table vinegar.
- Distilled water. It is used to prevent stains on the shirt. Mix all the ingredients, fill the spray bottle. After dispersing the solution, the jacket is smoothed out in a short time. In an emergency, an effective ironing spray can be used. It is simply sprayed over the surface of the fabric.
Using the ironing machine
An ironing machine is a mannequin on which products (trousers, shirts) are put on, and then heated air is injected.
Important characteristics
Here are the main characteristics of most household appliances:
- ironing time – 6-8 minutes;
- mains voltage – 220 V;
- power – 1.5 Kilowatts;
- weight – more than 10 kilograms;
- height – about 1.5 meters.
Advantages of the adaptation
Owners of household ironing devices highlight the following advantages of the device:
- speed and safety;
- no damage to fittings and decor elements;
- products can be ironed on a mannequin, bypassing drying, immediately after washing.
We also note the disadvantages – high price (70-200 thousand rubles), significant energy consumption.
How to use a mannequin
The work is performed in the following sequence:
- the shirt is put on a mannequin and fastened with clasps;
- turn on the blowing and wait for the straightening of all parts, additionally fix it;
- turn on heating, a signal will signal the end of the process;
- cool the product with cold air.
Next, the finished product is detached and removed from the dummy.
Useful tricks
- A men's shirt should be ironed from the front side.
- If you are unable to smooth the item, moisturizing and firm pressure on the iron will help.
- Fabrics that are difficult to iron can be softened with a mixture of fabric softener, water, and starch.
- The print on the product or the embroidery must be ironed from the inside.
- For easy and efficient ironing, shirts can be hung by their hangers and ironed when wet.
- To avoid wrinkles in knitwear, it is better to store such items with a roller.
7 recommendations
It is easy to cope with ironing a shirt, and at the same time to avoid mistakes, useful recommendations of specialists will help:
 It is advisable to iron only a clean item. If there are stains on the fabric, then the effect of a hot iron can literally weld them, and make them more noticeable.
- If your cotton shirt has prints or embroidered elements, you can iron them only from the inside out or through the fabric.
- Proper drying of the washed shirt, flattened on a ram, will greatly facilitate subsequent ironing.
- When ironing a shirt, it is necessary to avoid contact of the sole of the iron with the buttons. Otherwise, the plastic may melt.
- Do not set the temperature on the iron higher than indicated on the product label.
- Do not pour untreated water into the iron. Violation of this rule can lead to stains on the shirt, to the formation of lime deposits in the iron itself, and its damage.
Dark-colored cotton shirts (black, dark blue, etc.) are ironed only from the inside or through a damp cloth. Otherwise, shiny glazed spots may appear on the product, which will ruin the entire appearance.
Sources used and useful links on the topic: https://uborkadoma.guru/stirka/kak-razgladit-rubashku-kotoraya-ploho-gladitsya.html https://postirajka.ru/glazhka-sushka/vse-tonkosti-glazhki-rubashki -s-dlinnym-i-korotkim-rukavom / https://legkovmeste.ru/poleznye-sovety/kak-gladit-rubashku.html https://www.cosmo.ru/lifestyle/lifehacks/kak-gladit-rubashku/ https://yborka.online/glazhka/rubashka/kak-razgladit-hlopkovuyu-sorochku https://hozzi.ru/sovety/kak-pravilno-gladit-rubashku https://yborka.online/glazhka/rubashka https: / /bowandtie.ru/kak-pravilno-gladit-rubashku/ https://zen.yandex.ru/media/id/5c1df2d024879800ab906050/kak-pravilno-pogladit-rubashku-utiugom-i-bez-nego-5e0ecc37433ecc00ae3fa8ad
Post source: lastici.ru