How to assemble a steel frame 3D printer at home. Homemade 3D printer on steps from a dot matrix printer
Do-it-yourself 3d printer assembly
Feeling brave enough to create a 3D printer from scratch? We assemble a 3d printer with our own hands. This is an attractive, low-cost option if you're on a tight budget.
It's also a fantastic way to learn about how 3D printing works. There is no better way to understand the basics of molten deposition modeling than building your own machine. This is also very nice.
WARNING. It takes at least a few hours to assemble each set of 3D printers in this article.
Typical assembly times vary from kit to kit. Much also depends on the quality of the instructions provided. These are usually available online and you are free to browse through them before making your purchase.
However, most of the kits on this list will eventually take you at least four to eight hours. This is because this article, unlike earlier versions, only contains complete DIY kits, not semi-assembled 3D printers.
It should also be remembered that this option will be more difficult than buying a fully assembled and tested machine. While you will be provided with accompanying documentation and guides to help you along your journey, you will, for the most part, be doing it alone. Luckily, there are great communities out there to help you.
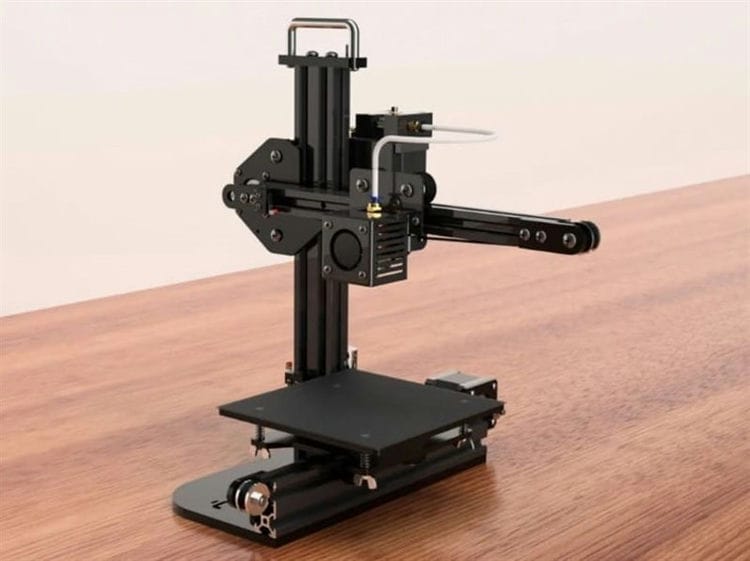
Tronxy X1
FEATURES
Build volume (mm³) – 150 x 150 x 150
Assembly time (hour) – 3
Connection – USB, SD Card
Heated bed -?
Market price (USD) – 140
In the eyes of the minimalist maker, Tronxy X1 is a cheap DIY 3D printer kit, it's a dream come true. This oddly constructed machine doesn't look like your regular Cartesian printer. It still manages to achieve good build size (150 x 150 x 150mm) and high resolution printing.
If you are looking for a DIY 3D printer kit but need something budget and inexpensive? Take a close look at the Tronxy X1.
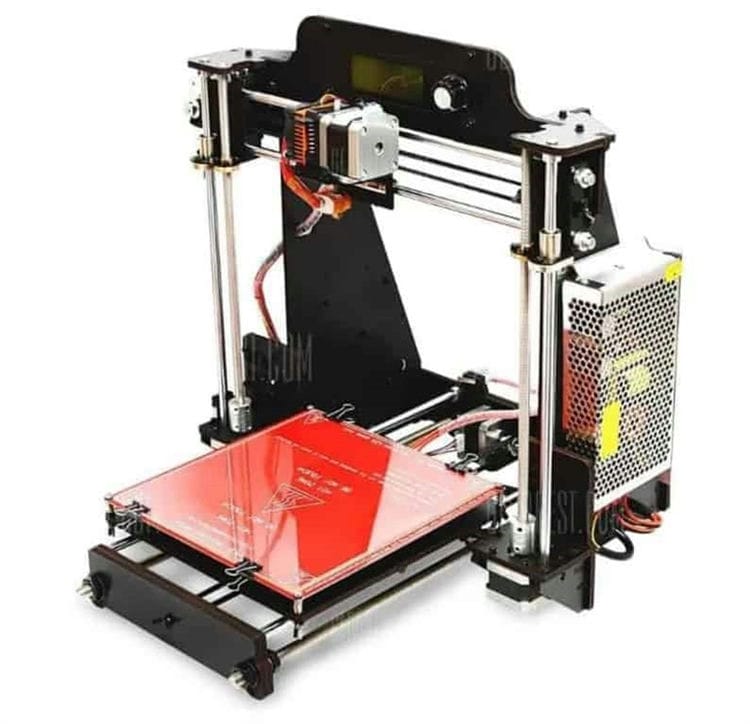
Geeetech Prusa i3 Pro W
FEATURES
Build volume (mm³) – 200 x 200 x 180
Assembly time (hours) – 8
Connection – USB, SD card
Heated bed – yes
Market Price (USD) – 150
The Geeetech Prusa i3 Pro W came out at the end of 2017, which gives us another reason to take the Prusa i3. Assembly time should be approximately 8 hours.
What makes this model stand out is its Wi-Fi option. Which will set you back about an additional $ 20. Geeetech has even developed an app so you can control your printer from your smartphone.
Anet A8 Plus

FEATURES
Build volume (mm³) – 300 x 300 x 350
Assembly time (hours) – 8
Connection – USB, SD Card
Heated bed – Yes
Market Price (USD) – 165
Anet A8 Plus 3D Printer is an improved version of the hugely popular Anet A8. Featuring more build volume and exquisite frame design.
The very popular Anet A8 desktop 3D printer. It comes in DIY form. And heralded a new era of accessibility for FDM technology. While it was an undeniable success in terms of popularity, it certainly had some drawbacks.
These include sloppy design and electrical problems. This makes the 3D printer potentially fire hazardous. The Anet team aimed to address these issues with the Anet A8 Plus. This is a new and improved version of the manufacturer's flagship 3D printer.
The A8 Plus has a new frame design, increased build volume, and a movable screen. And other intriguing features. Best of all, it can be found for around $ 300. Just a little price increase for more than a few modifications!
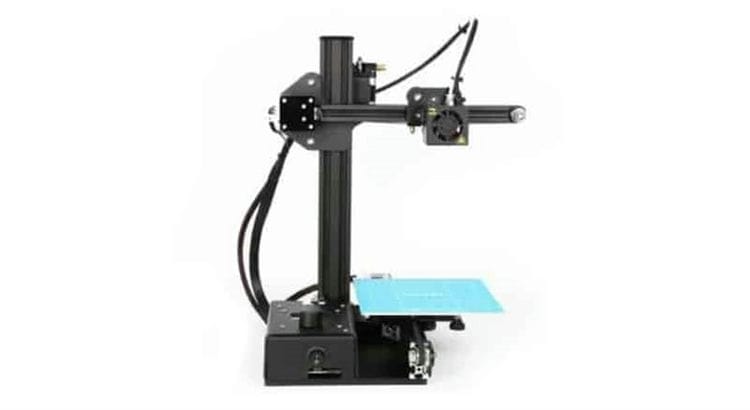
Creality Ender 2
FEATURES
Build volume (mm³) – 150 x 150 x 200
Assembly time (hour) – 3
Connection – USB, SD Card
Heated bed – Yes
Market price (USD) – 170
Well known for its CR-10, Creality3D also makes a range of other 3D printers, including the Ender 2. What makes this 3D printer kit stand out?
Why, its small area and equally small price tag, of course! It also takes approximately three hours to assemble. This is one of the simplest printers on this list.
Creality Ender 2 is a great value for money for a 3D printer. It is easy to assemble, equipped with a heated bed, automatic leveling and a building volume of 150 x 150 x 200 mm.
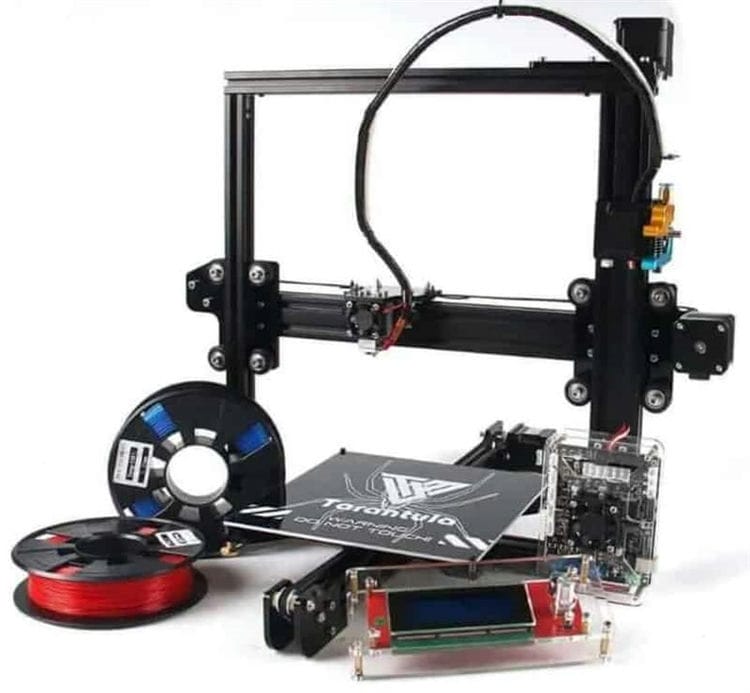
Tevo Tarantula
FEATURES
Build volume (mm³) – 200 x 200 x 200
Assembly time (hours) – 8
Connection – USB, SD Card
Heated bed – Yes
Market price (USD) – 180
Tevo Tarantula is a cheap “DIY 3D Printer Kit” with an all-metal frame construction. The frame material is extruded black anodized aluminum with laser cut acrylic plates. Plus control box and V-groove ball-bearing wheels for smooth, quiet operation.
Additional upgrade to consider? This is an automatic alignment feature. Which uses a proximity sensor and modified firmware to detect the aluminum printing device. It's graceful. Because you don't have to re-adjust the print bed every time you print.
Delta on rails

The Delta layout has its advantages, allowing you to print tall models while the printer itself remains reasonably compact. The use of rail guides makes it possible to provide the necessary smoothness and uniformity of movement along the axes, to the presence of which devices with such a layout are especially sensitive.
The author of this project, Gerald Klein, built a 3d printer on rails with his own hands 1 meter in height and a diameter of the base of the working surface of 30 cm.

The design is based on three meter sections of C-Beam linear rail guides. The movement of the print head is carried out through a belt drive from three stepper motors. The base of the desktop and the top of the printer are half-inch thick aluminum plates. The author especially emphasizes that with such an arrangement, their ideal plane is especially important. In the variant proposed by him, the plate is obtained by water cutting.
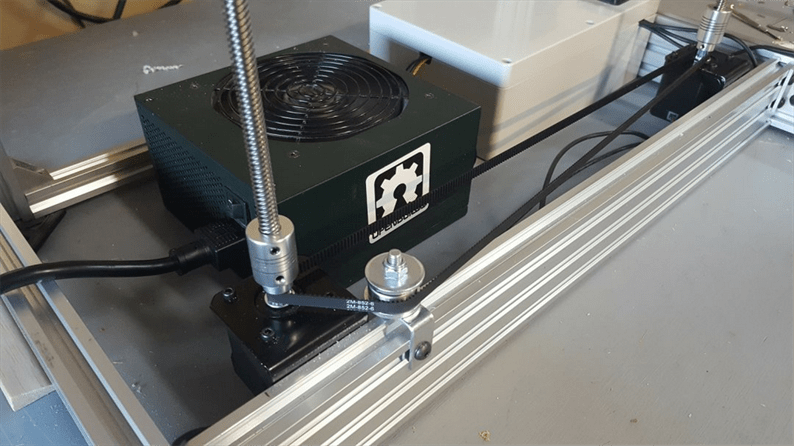
Double D-Bot on the rails

It is reasonable to use rail guides only where they provide high accuracy. In other words, moving the table up and down can be organized using helical guides, using rails only on the X and Y axes.
The project of just such a 3D printer (the author's name is Double D-Bot 400mm x 400mm x 600mm) was created at openbuilds by the user Troy Proffitt. At the time of this writing, it has not yet been completed, but from the available photographs you can already get an idea of how rail and screw guides will be used.
Vslot rails with C-Beam
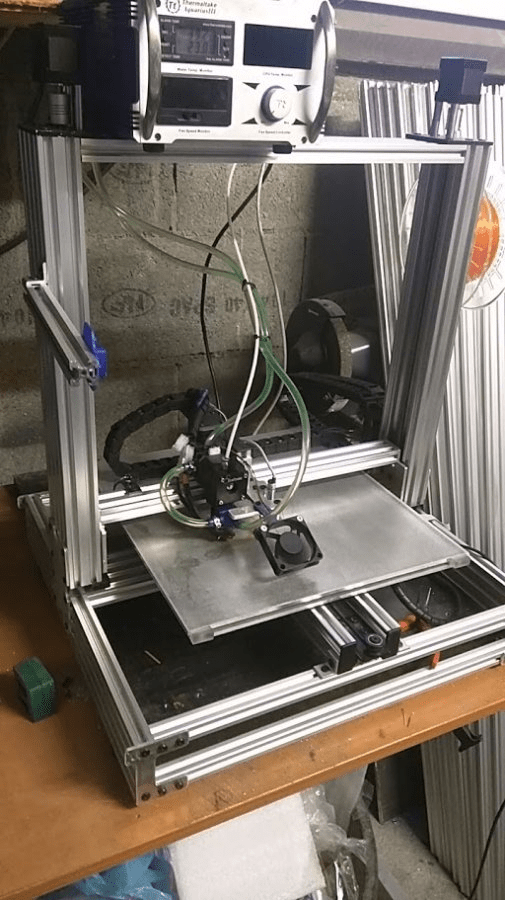
There are two types of rail guides used in this 3D printer project. Vslot provides movement for the X-axis only, while the other two work on the C-Beam. The author of the project is mytechno3d.
In addition to variations with the use of rail guides, this project is distinguished by the presence of water cooling for the hot end, which means that you can print on it with high-temperature plastics, for example, nylon .. In the description, the author gives only the project specification and several drawings of parts that were developed to make this 3d printer do it yourself.
Here are the brief specifications:
- Power supply: 24V
- Control board: Smoothieboard
- Water cooled extruder: Duyzend
- Work surface: Borosilicate 400 × 380 or aluminum plate
- Heating: 24 V
- Z and Y Axes: C-BEAM
- X-axis: 2040 Vslot rail guide
- Cooling: Old Thermaltake PC Water Cooling System
D-Bot Core-XY on rails
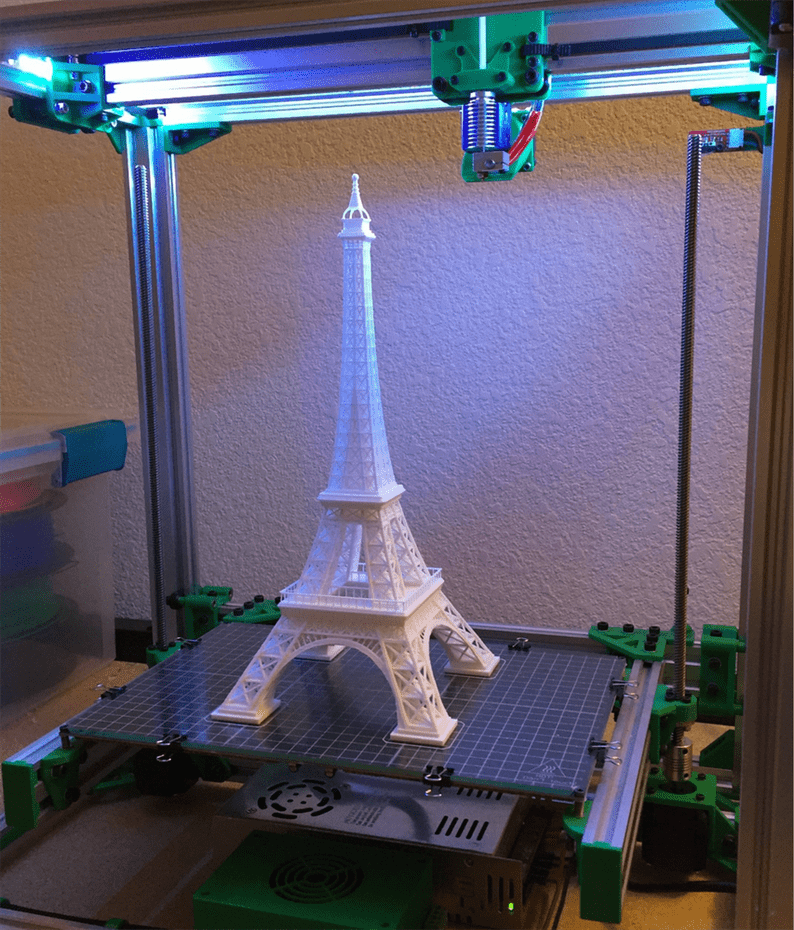
The option of building with a 3D printer with your own hands, proposed by the user spauda01 of the Thingiverse service, implies the use of rail guides on all axes, except for lifting the table: screw is used for it. But since the fluctuations in the vertical direction are not so great, the solution has a right to exist.
For this do-it-yourself 3d printer, drawings, specifications and even a video with the assembly and configuration process are available. The project itself is a significantly modified Core-XY C-Bot with a slightly higher available print volume (300mm x 200mm x 325mm) and the use of simpler and more affordable versions of components. As a result, the final cost of the project is estimated by the author at about $ 200, which is very good for a 3D printer on rail guides.
Trade in 3D images for printing on 3D printers
 The 3D printer is a revolutionary device for the home business. Now the implementation of good industrial ideas has become available to small businesses. More creative people will be able to realize and develop on their own, earning their living and doing what they love at the same time.
The projected increase in competition should be taken into account. But fair competition is more good than bad. In the near future, a 3D printer will become a household device. This means that a new important change will pass in the modern world. The number of consumers of 3D models created in programs for three-dimensional modeling will increase. This fact will affect the first earning opportunity from the popularity of household 3D printing devices. Not a single printer! Today there are already several stocks selling three-dimensional images (3D models). And in a year, demand will skyrocket, which will raise the price for the work of 3D designers and engineers. After all, it is easy to imagine how people congratulate each other by e-mail or on social networks, but as a gift they will not send electronic “cool” postcards, but files of ready-made 3D models. The birthday boy will be able to print them on his household 3D printer and receive his useful gift. It is important to note that one file can be sold a huge number of times.
To the list of ideas on the topic: “What can be printed on a 3D printer?” Should be added an item: “trading files for three-dimensional printers.” Thanks to a 3D printer, you can earn money even before it is available. Trading three-dimensional images is the first and residual (passive) income from sales of files for 3D printing made of plastic You need to start learning 3D design today in order to be one of the first sellers tomorrow.
3D printers create innovative inventions
 A great example of how you can 3D print your idea and bring it to life, giving the world a new useful invention. Doug Gonterman and Jessica Linebury use a 3D printer to bring their innovative product to life. They invented a spoon, which helps children quickly learn to eat on their own, without getting dirty themselves and everything around them.
Home inventors have printed two kinds of their inventions from safe plastic. A spoon with a through hole with an unusual shape – for thick porridge. And a spoon with special indentations for liquid food. But in order to achieve the best result, it was necessary to pass a number of tests. And those spoons that turned out with the best effect differ significantly from the test versions. The 3D printing technology allowed to do inventive work, repeated testing, honing products to achieve the best result. And how many more ideas are stored in the minds of small and home entrepreneurs that people will admire many times over.
Types of 3D printers and how they work
3D printers are used to create 3D models by overlaying a specific material in multiple layers. The object grows layer by layer. The principle of layer-by-layer build-up is called “additive technologies”. A 3D digital model is used as a sample. There are many types of 3D printers today. They can differ in the principle of operation, the size of the printable area, as well as dimensions.
Powder 3D Printers
The principle of powder printing is used. The powder is applied to the surface, then it is melted by a laser or solvent, so the layers of the created model are built up. The main advantage of such equipment is that the powder printer can work with a wide range of substances and materials, such as metal, plaster or glass. The resulting models can be full color. These printers are quite expensive and demanding to maintain.
The price for such models starts at 600,000 rubles. They are purchased by design bureaus or large design studios.
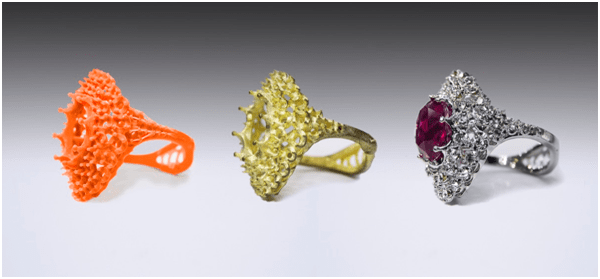
3D printers based on stereolithography (SLA)
The basic principle of operation is laser printing. A photosensitive resin can be used as the base material for printing. Under the influence of a special laser or digital projector, the first layer of resin hardens and then the next layer is built up. These steps are repeated until the model is complete. The advantages include perfectly smooth printing and minimal layer thicknesses. The disadvantages are the limited area (due to the narrow light flow) and the slow printing speed. Such printing is often used in the jewelry industry, where the size of the final products is not very large. The price for such equipment starts at 100,000 rubles.
professional 3D printer
Professional 3D printers (FDM)
They use FDM printing technology. They are characterized by additional functional potential, for example, they can effectively work with layers of plastic thread, minimum in thickness, or autonomously. These printers have two extruders and a larger printable area compared to consumer printers. The products are smooth. The price of the devices starts at 100,000 rubles.
Basic Direction 3D Printers (FDM)
Affordable hardware option. The design is simpler than those described above. The principle of operation is based on layer-by-layer fusing of a plastic filament. The filament is fed through one nozzle. These printers are characterized by low print speeds and a small work area. A wide range of common types of plastic are used for work. The price of such printers is much more democratic and starts at 13,000 rubles.
Main characteristics
- Working material – various types of plastic, powder or photopolymer. Prototypes with varying degrees of strength and flexibility are created from filament. Photopolymers allow you to create highly detailed samples that are in demand in the jewelry industry and in dentistry. Powder technology is used in construction and cooking – it allows printing with metal, concrete or even chocolate.
- The size of the printable area. One of the most important characteristics. The maximum size of the printed figure depends on it. It is counted along three axes: width, depth and height. Each type of printer has a different print area. For home 3D printers, it is about 10-20 cm in width, depth and height. While in professional printers it varies from 50 cm or more.
- Print quality. Print quality is affected by device characteristics such as layer height, printhead nozzle thickness, and temperature range. The thinner the layer, the better and stronger the product is. In FDM 3D printers, the correct melting point of the plastic improves the adhesion of the layers and makes the surface of the product smoother.
- Print speed. The production time of the model depends on this parameter. The more complex and larger the object, the slower the print head moves. The thinner the print layer, the longer it takes to manufacture the part. These parameters can be adjusted. For example, specifying a higher layer thickness and increasing the speed of movement of the print head can reduce the printing time by 30-50%, losing in the final quality and strength.
Software. The link between a 3D model in a computer and a physical object. Each printer model has its own print management application. The manufacturer's website always has an up-to-date download link. If you are just getting started in 3D printing, then you just need to understand a few basic points in the settings to get started. A separate category is specialized programs for creating and editing three-dimensional models. They can be paid or free, but special 3D modeling skills are required to work in such programs. You can also download a free ready-made 3D model from the Internet, upload it to the program, adjust the printing parameters and wait for the result.
Scope of 3D printers
Despite the fact that this type of equipment is practically inaccessible to the average user, its popularity is already gradually gaining momentum. And it's not just about advertising and good reviews. Volumetric printing allows the production of high-precision items without resorting to various technological processes, thereby unifying the production of the final product. Of course, any manager wants to have such a device that allows him to rationalize his field of activity (construction, medicine, etc.).

Many large companies order 3D printers that can create large objects, others need jewelry, and sometimes microscopic accuracy, so they get more accurate devices. The price for such a device can sometimes be calculated in very large six-figure amounts in dollar terms, but this does not stop the buyer, because the profit that can be obtained from production with the help of this device may turn out to be much greater.
Art
An ordinary printer can print a photo in black and white or color, but this is where its capabilities are exhausted. In the case of a 3D printer, this is just the beginning. Several exhibitions have already taken place, at which the work of several enthusiasts, made with 3D printing devices, have been presented.
The object of these exhibitions were volumetric photographs, representing an image that was given volume. It may seem strange, but in many European countries this kind of art, called PrintArt, is very popular and already has many followers and fans.
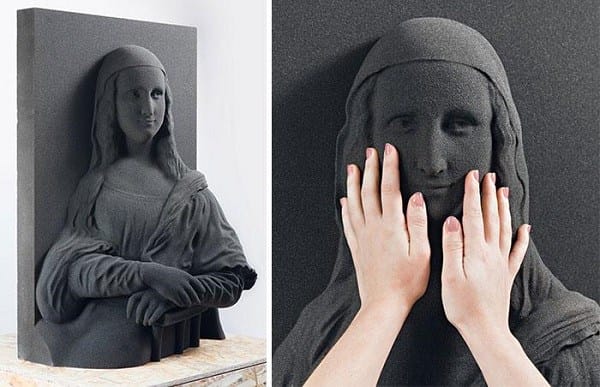
Portrait of Mona Lisa in 3D
Several volumetric portraits were sold for a record amount for this direction of art.
The scope of application in art is not limited to three-dimensional photographs. Of course, this is very technologically advanced, but this is far from all that a 3D printer can offer at the moment. Several experiments on the digitization of antique statues are known at once, some of which were repeated using 3D printing with amazing accuracy and reliability, and a clear advantage is the ability to use almost any material. Want a full-length statue of Apollo made of plastic? It couldn't be easier: a 3D printing device can easily produce it for you, with the original matrix.
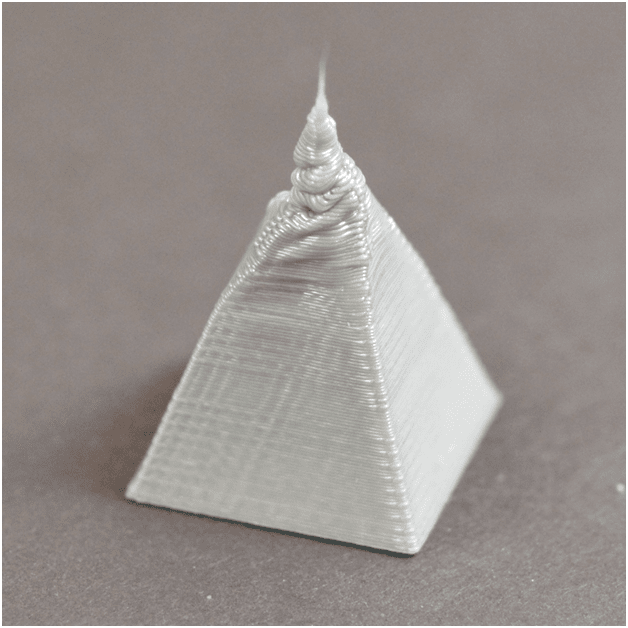
- The renowned Dutch construction company was one of the first to take orders for the design and decoration of the front side of buildings using volumetric printing. Each house, decorated with individual stucco moldings made on a 3D printer, is a work of art.
![How to assemble a steel frame 3D printer at home. Homemade 3D printer on steps from a dot matrix printer]()
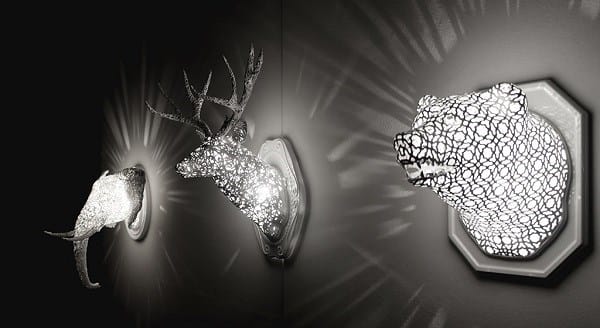
- Small start-up projects offer volumetric design services based on retrofuturism and vintage. All this is achieved by creating decorative interior elements using volumetric printing.
![How to assemble a steel frame 3D printer at home. Homemade 3D printer on steps from a dot matrix printer]()
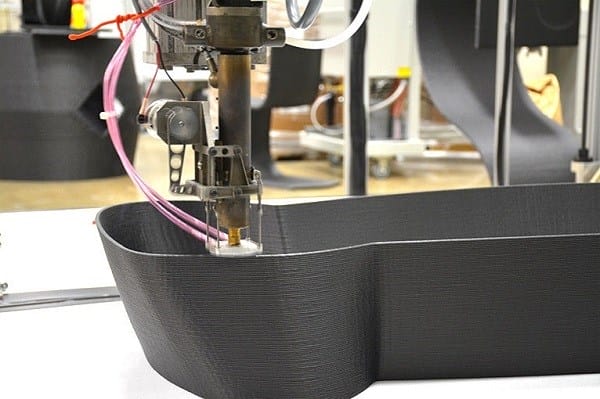
- The well-known concept of a 3D pen capable of writing with special “ink” (hot plastic that can take any shape) right in the air, lining up any lines, is also a kind of volumetric printing. Only in this case, the predefined parameters of the source are not used, which allows you to create your own picture “right out of thin air”.
![How to assemble a steel frame 3D printer at home. Homemade 3D printer on steps from a dot matrix printer]()


Of course, the 3D printer is in demand among designers and artists who prefer to keep up with the times and set fashion trends in art.
Industry
What can be printed on a 3D printer besides home furnishings and art? This question was asked by a Chinese construction company, one of the first to offer the services of a new type of house, built in literally months. The secret is that the material for their construction is made on a 3D printer, therefore, it has high accuracy and does not require adjustment. In the Middle Kingdom, whole areas of houses appeared, erected in the shortest possible time using 3D printing technologies.

House printed on a 3D printer
Russian automotive companies specializing in tuning are already offering customers high-precision parts made for each specific car. We are talking about body kits, special sports bumpers and spoilers that are ideal for your model, because all the raw data will be taken directly from your car.
Bumper on a 3D printer
Some 3D metal printers are capable of printing everything from heavy piles and tower crane structural elements.
The day is not far off when many car models will be fully 3D printed, without the involvement of human force. The advantages of such an improvement in the technological process are obvious: the printer is able to work 24 hours a day, interrupting only for service, does not require a salary and sick leave, and does not ask for vacation. There is nothing surprising in the fact that many large auto concerns have already begun to partially replace employees with automation, in particular, 3D printers.
Medicine
There are many videos on the Internet showing us how researchers from state-of-the-art medical centers are learning to print entire organs. This is not a fantasy and not a matter of tomorrow – all of the above is happening today.
The first breakthroughs in printing (rapidly growing) human liver tissue were reported by Chinese doctors. Yes, so far it has not been possible to print the entire organ in its entirety, but a start has been made, which means that it is only a matter of time. Moreover, we are talking about the complete replacement of an organ built on the biological material of the operated patient, which means that the rejection and use of immunosuppressants can be avoided. This is a qualitatively new step in medicine, which is awaiting a whole layer of discoveries related to volumetric printing of organs.
Our compatriots also do not sit idle, not wanting to remain on the periphery of technological progress. Several research institutes specializing in dermatology work in the field of skin printing. It is worth noting that the demand for grown leather is great, because every day people get injured and burned, get into accidents, etc. It takes too long to wait for the skin to heal itself, and sometimes there is simply no such opportunity. This is where 3D printing technology comes in. Printers, using active biological material, grow new skin, which is then engrafted on the victim.
The rejection rate of such skin is much lower than that of donor skin. And the process itself takes less time, injuries heal much faster.
It is possible to make the skin on a printer, but is its medical capabilities limited only to this? Of course not! In the arsenal of volumetric printing, there are many opportunities waiting to be successfully realized. It seems that a 3D printer will serve patients not only as an assistant in wound healing, but also as a good prosthetist. We are talking not only about the manufacture of high-precision prostheses for movable limbs, with the help of which people get the opportunity not only to walk, but also to run, to take part in competitions, but also about internal replacement and prosthetics. For example, Israeli doctors are successfully developing the direction of printing (or high-speed growth) of vessels and arteries. Chinese doctors recently performed an operation in which an adult was implanted with an artificial spine, which was fully 3D printed. In the case of medicine, opportunities,
Souvenir products
Printing mementos and small collectible figurines is a great idea for a startup. The main thing is to have at least a minimum of artistic skills and to find permanent distribution channels. For example, fans of computer games and movies will be happy to purchase miniature copies of their favorite characters. Another option is to print original phone cases.

Fishing products
Experienced anglers are always on the lookout for something new and different. Something that cannot be bought even in a specialized store. 3D printing allows you to create unique and useful things for them, from fish bait to tackle.
Parts for modeling and hobbies
This niche in Russia is still quite free. When a part is needed urgently, a problem arises: there is nowhere to buy it, and it takes a long time to wait for an ordered one from abroad. In this case, 3D printing will be a good alternative.
Auto parts
Spare parts for cars made on a 3D printer are much cheaper than industrial designs. In some cases, printed items are especially relevant:
- owners are limited in time, the part is needed urgently;
- the auto part cannot be found in retail sales;
- the cost of the original part is very high;
- the spare part is sold only in assembly with others.

Restoration of a gear on a 3D printer
A real example: Toyota Avensis owners are often faced with a breakdown of the plastic windshield washer nozzle. This spare part is not sold separately from dealers, and the complete mechanism for extending the washer nozzle costs around 10,000 rubles.
In the field of auto-tuning, 3D printing will also be relevant. Those who like to improve their car and make it extraordinary are ready to pay well for it. Customers' requests depend only on their imagination: from bumpers to knobs on the gearshift knob. See Thingeverse for ready-made options.
Printing process
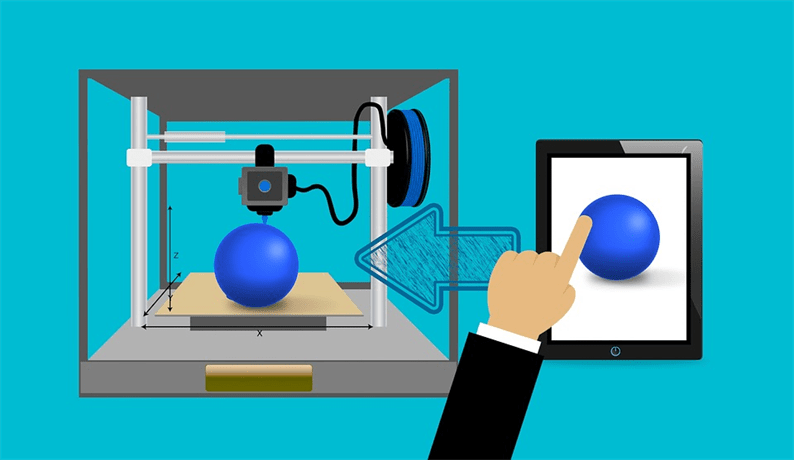
The prepared model can be sent to the printer via USB, SD card or Wi-Fi. The interface of most printers intended for home use is simple and straightforward, it does not cause difficulties in starting the process.

Print speed is affected by printer settings such as layer thickness and infill, model size and complexity. It usually takes several hours before holding the first self-printed figure or part in your hands.

Provide good ventilation in the room where the printer is located, as it produces a characteristic odor due to heating of the plastic.
Possible pitfalls
Printing the first few models is exciting, unpredictable and exciting. A new thing will gradually be created before your eyes. But you need to prepare for the fact that not everything will go smoothly right away. It is undesirable to set high or maximum speed for printing models, wanting to quickly get the finished product – haste will affect the quality and the surface of the product may turn out to be uneven, and the contours – sloppy.
You may not be able to find the right temperature for the material you intend to use right away. Thermistors with different sensitivities are used in printers, which will affect the temperature at which the plastic will melt.
Even materials from the same manufacturer, but from different series or different colors, may differ slightly in melting point. Naturally, overheated plastic can give uneven, blurry product contours. If this happens, please be patient and try again with different settings.
Incorrect platform heating can be another possible problem. If the platform is too cold, it can cause the product to lag and deform.
DLP technology
This technology is in many ways similar to SLA technology. Their common principle of operation is the curing of liquid photopolymer by light. In SLA technology, the photopolymer hardens when a laser beam is applied to specific areas of the model, and DLP uses an ultraviolet projector for polymerization and the radiation hits the entire layer of the manufactured model at once. DLP, and even more so LCD-printers (using an LCD-matrix instead of a projector) are usually more affordable than devices with SLA technology.
Using DLP technology, the model is formed with constant lifting and lowering of the platform. When the platform is at the lowest point of its movement, an ultraviolet projector is triggered and illuminates the next layer of material, causing it to polymerize. Then the platform is raised so that the fresh layer of the model is torn off the projection surface and the next portion of photopolymer gets under it, and then the model is lowered to the height of the new layer above the bottom of the bath. This layer also burns out and hardens. The procedure is repeated until the model is complete.
How to make money on photopolymer
DLP printers are used in dentistry, for making prototypes of crowns and prostheses, in the jewelry industry, design, souvenir production, mechanical engineering and other areas.
The positive side of the method is the ability to produce models with high detail and smooth surface, which does not require such serious post-processing as when printing using FDM technology. DLP printing accuracy is comparable to that of SLA technology and starts at 12 microns for individual devices, compared to the minimum possible 50 microns for FDM models.
The disadvantage of this technology is the rather high cost of consumables. Photopolymer resins start at $ 80 per liter, while a kilogram of FDM filament can be purchased for $ 35.
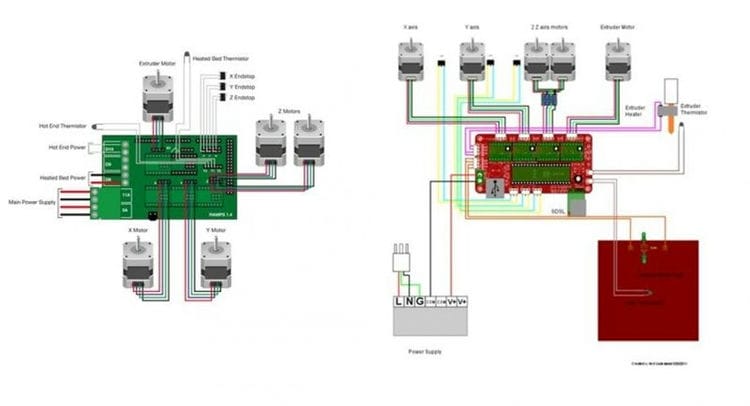
Preparing the power supply

First of all, we connect the two wires to each other (as shown in the picture) so that there is direct power from the switch to the stand. After that, we select one yellow (12V) and one black (GND) wire to power the controller.
Checking motors and Arduino IDE program

Now we are going to test the engines. To do this, we need to download the Arduino IDE (Physical Computing Environment), can be found at: http://arduino.cc/en/Main/Software.
We need to download and install Arduino version 23.
After we have installed the Arduino, we will connect our Rampa / Sanguino / Gen6-7 controller CNC computer with a USB cable, we will select the corresponding serial port under the Arduino IDE tools / serial port, and we will select the controller type for the board tools (Ramps (Arduino Mega 2560), Sanguinololu / Gen6 (Sanguino W / ATmega644P – Sanguino must be installed inside Arduino)).
Basic explanation of the parameter, all configuration parameters are in the configuration.h file:
In the Arduino environment we will open the firmware, we already have the file / Sketchbook / Marlin uploaded and we will see the configuration options before we upload the firmware to our controller.
-
define MOTHERBOARD 3, according to the real equipment we use (Ramps 1,3 or 1,4 = 33, Gen6 = 5,…).
-
Thermistor 7, RepRappro uses Honeywell 100k.
-
PID – this value makes our laser more stable in terms of temperature.
-
Step per unit, this is a very important point in order to set up any controller
Printer. Computer management.

Controlling the printer via a computer.
Software: there are various freely available programs that allow us to interact with and control the printer (Pronterface, Repetier,…) we use the Repetier host, which you can download from http://www.repetier.com/. It's easy to set up and bundles layers together. A slicer is a piece of software that generates a sequence of sections of the object we want to print, associates those sections with layers, and generates a G-code for the machine. Slices can be adjusted using parameters such as layer height, print speed, infill, and others that are important for print quality.
Common slicer configurations can be found in the following links:
- Skeinforge config: http://fabmetheus.crsndoo.com/wiki/index.php/Skeinforge
- Slic3r config: http://manual.slic3r.org/
In our case, we have a configuret Skeinforge profile for the printer that can be integrated into the receiving printhead of the software.
Regulation of current and intensity
We are now ready to test the printer motors. Connect the computer and the machine controller with a USB cable (motors must be connected to the corresponding sockets). Start Repetier Hosting and activate the communication between the software and the controller by selecting the appropriate serial port. If the connection is successful, you will be able to control the connected motors using the manual control on the right.
In order to avoid overheating of the motors during regular use, we will adjust the amperage so that each motor can get an even load.
For this we will only connect one motor. We will repeat this operation for each axis. For this we need a multimeter connected in series between the power supply and the controller. The multimeter must be set in amplifier (current) mode – see figure.
Then we connect the controller to the computer again, turn it on and measure the current with a multimeter. When we manually activated the motor through the Repetier interface, the current must rise by a certain number of milliamps (which are current to activate the stepper motor). For each axis, the current is slightly different, depending on the motor pitch. You will have to tune a small potentiometer to control the step interval and set the current limit for each axis according to the following reference values:
The board conducts a current of about 80mA
We will supply 200mA current for the X and Y-axis steppers.
400 mA for the Z-axis, this is required due to the higher power to raise the writing head.
400 mA to power the extruder motor, since it is a powerful current sink.
Building a structure machine
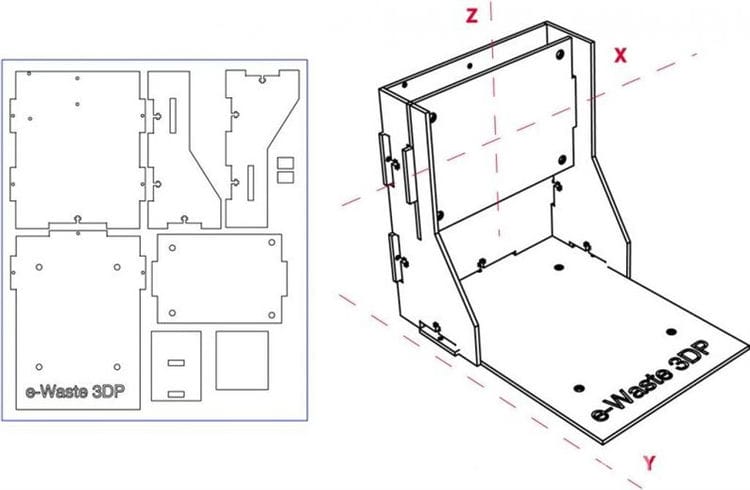
In the following link you will find the required laser templates for cutting parts. We used 5mm thick acrylic plates, but other materials like wood can be used depending on availability and price.
The frame design makes it possible to build a machine without glue: all parts are assembled using mechanical connections and screws. Before the laser cut out the frame parts, make sure the motor is well secured to the CD / DVD drive. You will have to measure and modify holes in the CAD template.
X, Y and Z Calibration
Although the downloaded Marlin firmware already has a standard calibration for the axis resolution, you will have to go through this step if you want to fine-tune your printer. Here you will be told about the firmware that allows you to set the laser pitch down to the millimeter, your machine actually needs these precise settings. This value depends on the pitches of your motor and the thread size of the moving rods of your axles. By doing this, we will make sure that the movement of the car actually matches the distances in the G-code.
This knowledge will allow you to build a CNC machine yourself, regardless of the composite types and sizes.
In this case, X, Y and Z have the same threaded rods so the calibration values will be the same for them (some may differ if you use different components for different axes).
We will have to calculate how many motor steps are needed to move a 1 mm carriage. It depends on the:
- Pulley radius.
- One step per revolution of our stepper motor.
Micro-step parameters (in our case 1/16, which means that in one clock cycle, only 1/16 of a step is executed, giving higher accuracy to the system).
We set this value in the firmware (stepspermillimeter).
For the Z axis:
Using the Controller (Repetier) interface, we set up the Z axis, which allows us to move a certain distance and measure the real displacement.
As an example, we will command it to move 10mm and measure an offset of 37.4mm.
There is N number of steps defined in stepspermillimeter in firmware (X = 80, Y = 80, Z = 2560, EXTR = 777.6).
N = 2560
N = N * 10 / 37,4
The new value should be 682.67.
We repeat this for 3 or 4 times, recompiling and reloading the firmware for the controller, we get higher accuracy.
In this project we did not use final settings to make the machine more accurate, but they can easily be included in the firmware and it will be ready for us.
We are ready for the first test, we can use the pen to check that the distances on the drawing are correct.
Children's toys and entertainment
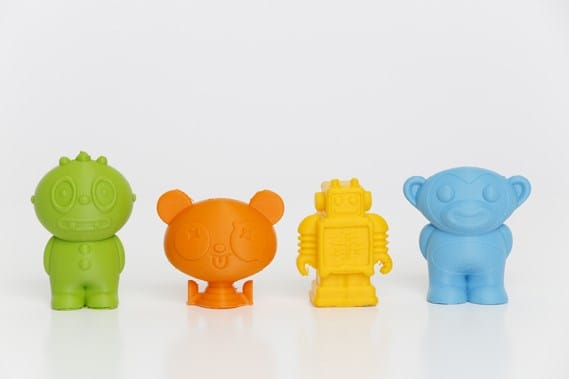
Users create online communities where they share 3D models of various children's toys, bricks, constructors and figures. In addition, children can print their own fantasies on their home device. Drawings drawn in the program “come to life” before their eyes thanks to the technology of layer-by-layer synthesis. The 3D printer has gained fame also because you can take a photo or video of a new idea and put it on the Web – for evaluation by other owners of a three-dimensional device.
To create children's masterpieces, it is worth stocking up on a wide color spectrum of ABS and PLA plastics, since the direction requires the maximum riot of colors. The high-tech Space Monkey Gorilla printer is perfect for these jobs. Wide, it allows you to create monolithic toys of large sizes, and its bright non-standard design will perfectly fit into the interior of a child's room.
Dishes and household utensils
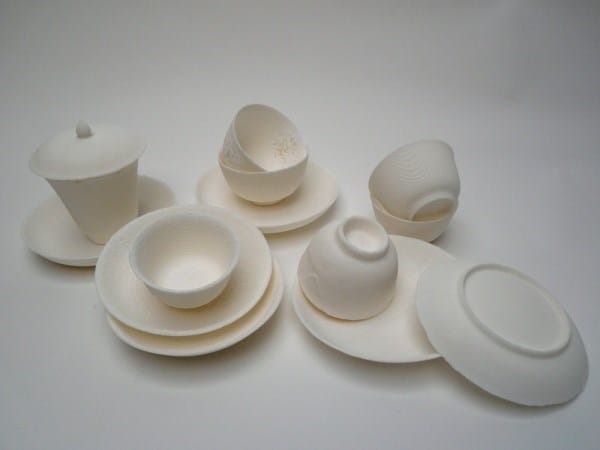
In the kitchen utensil industry, technological innovations are rarely introduced. But 3D printing technology has radically changed the structure of tableware production. Ceramics and porcelain were replaced by much more economical plastics: low-pressure polyethylene, polypropylene, as well as acrylic and ABS-plastic.
At home, you should start with simpler utensils, from generally available polymers as a building material: from plastic containers, coasters, molds, colanders, plates, cutting boards and lids. To make them, it is enough to have a polymer filament of one color and a convenient printer such as the Ultimaker 2 Extended – a high-speed model at a reasonable price for its quality.
Furniture and fittings
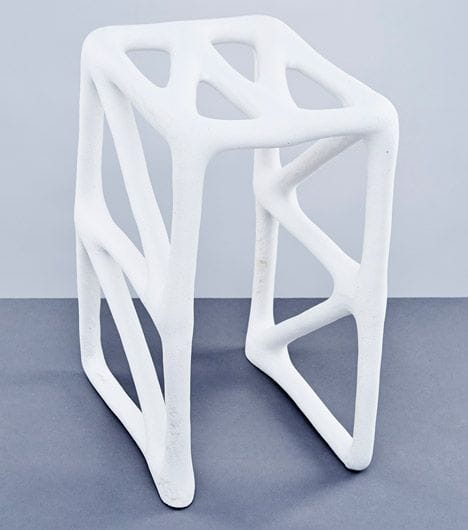
Furniture is associated with something large and bulky, but three-dimensional innovations have made their way to this patriarchal realm. Dutch developers came up with the idea of assembling furniture from cells of various shapes, which can be printed separately and then fastened with glue. The main advantages of such furniture and interior items are the simplicity of their manufacture. Only one type of plastic is used, environmental friendliness is also at a high level. What can be made on a 3D printer? These can be small chairs, tabletops, sofas. Another option is to separately print the original round table leg, lamp stand, drawer handles, as well as shelves, hangers, lamp holders and locks.
For printing of such scales, a 3D printer with a large capacity and a wide platform is chosen, for example, such as the Leapfrog Creatr XL. Its dimensions allow you to print items up to 60 cm in height.
Sources used and useful links on the topic: https://aD-Ma.ru/3d-printer-svoimi-rukami/ https://top3dshop.ru/blog/3d-printer-na-relsah-svoimi-rukami-opisanija- i-kejsy.html https://businessideas.com.ua/business-ideas/pechatat-na-3D-printere https://club.dns-shop.ru/blog/t-297-3d-printeryi/20030- primenenie-3d-printera-v-byitu / https://tehnika.expert/cifrovaya/printer/3d-chto-mozhno-napechatat.html https://top3dshop.ru/blog/3D-printer-for-beginners-how -to-start-printing.html https://sdelay.tv/blogs/sergey-n/delaem-samodelnyi-3d-printer https://robot-ik.ru/obzory/chto-mozhno-pechatat-i-delat -na-3d-printere-doma-iv-kommercheskih-tselyah /
Post source: lastici.ru