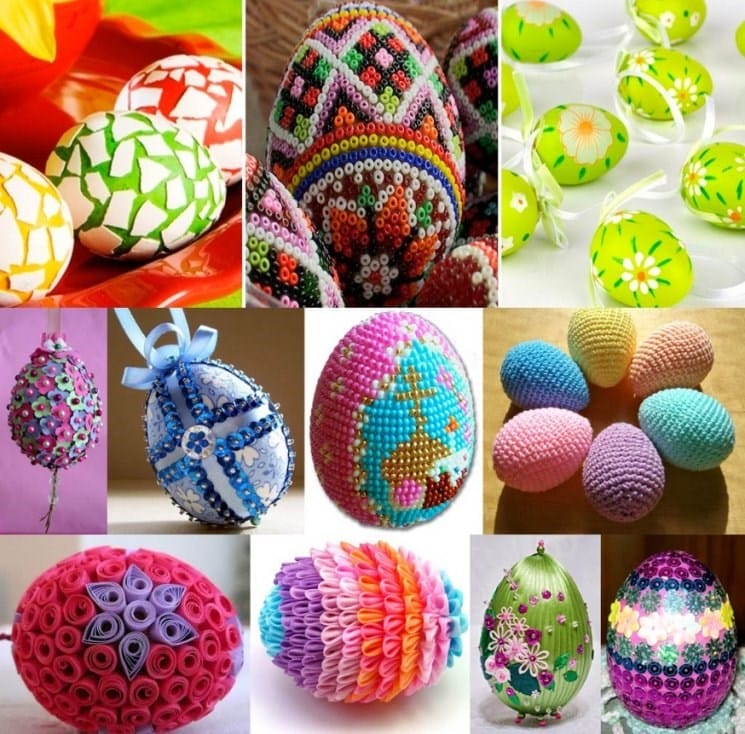
How to decorate Easter eggs with your own hands? Painting methods at home. Easter eggs decoration

Content
Useful tips for the hostess
• before staining, wipe the eggs with vinegar or wash with soap, the paint will lay better on a clean shell;
• so that the eggs do not burst during cooking, let them lie down at room temperature for an hour before, and add a spoonful of salt to the water;
• the longer the egg lies in the paint, the richer the color will come out, the eggs can even be left in a dye (preferably natural) overnight;
• to make the eggs shine, wipe them with a napkin slightly dipped in sunflower oil;
• it is convenient to dry colored eggs on a metal rack from the oven.
Drying eggs conveniently on the wire rack
Specialty dyes and stickers are easy to find in stores, but if you want to get a little more creative with the process, let's take a look at different ways to create interesting and colorful eggs for both the table and home decoration. Showing your imagination in decorating eggs, keep in mind that Easter is a church holiday and it is desirable that the drawing be appropriate and respectful to the meaning of this celebration.
You can find natural dyes in your refrigerator.
How to decorate eggs for Easter
To begin with, all decorated eggs can be divided into two categories: the first are edible, and the second are a kind of small works of art that you can admire, but it is either a pity to eat them, or it is better not worth it due to the use of chemical materials (glue, paints, etc.).
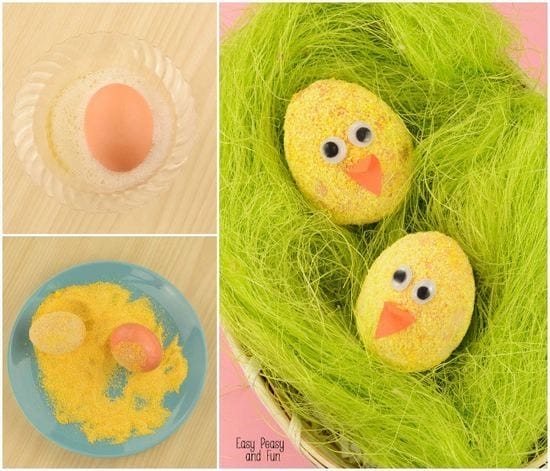
So, if you decide to make small works of art, then it is advisable to empty the eggs first. Agree, boiled eggs will not be able to lie for a long time so as not to deteriorate. Extracting the contents of an egg is not that difficult. To do this, rinse the eggs thoroughly. Make two small holes on each side as in the photo below. And gently blow out the contents of the egg. The empty shell must be dried and only after that you can start the creative process.
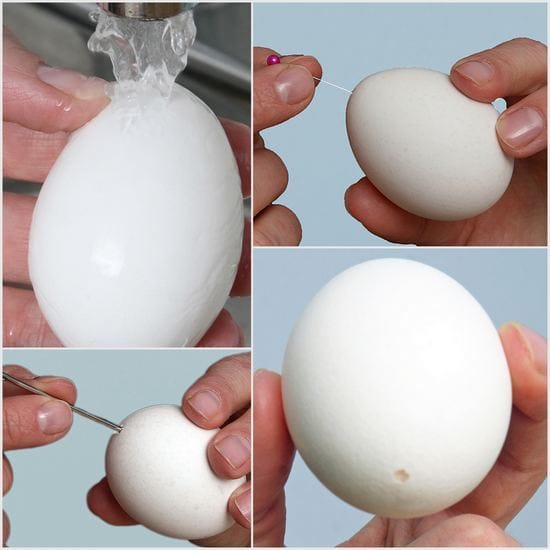
How to empty an egg: 1 – wash, 2 – make two holes on different sides, 3 – blow the contents of the egg over a plate
If the chosen decor is not too complicated and not harmful, then before starting work, the eggs are also well mine and boiled. Cool in cold water, dry, and then start decorating.
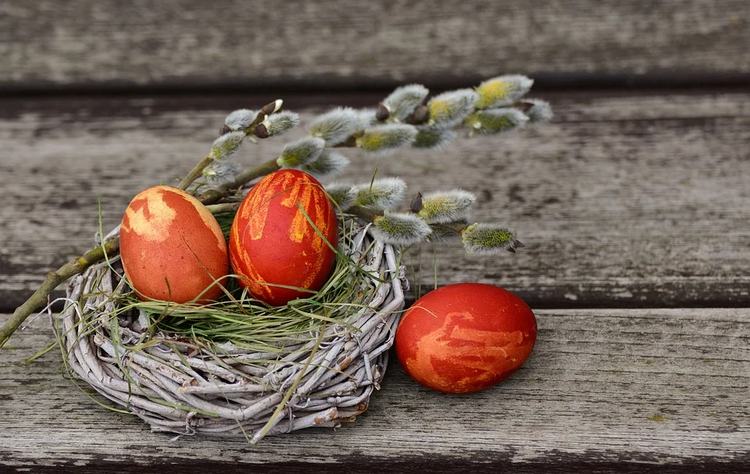
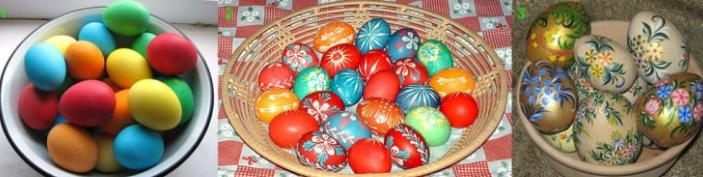
Let's start with natural dyes. Not everyone knows that in addition to onion peels, coffee, tea, beets, cranberries, currants, spinach, red cabbage, turmeric and carrots can be a good option for coloring eggs. Instructions for using these products can be seen below. Do not forget to add a spoonful of vinegar to all dyes, without exception.
Eggs colored with natural dyes

Tea and berry for dyeing eggs
Instructions for dyeing eggs with coffee, tea, etc.
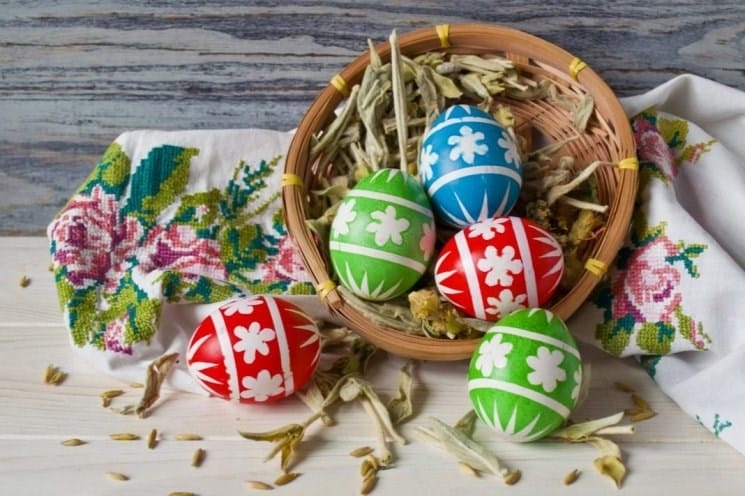
To add a simple pattern, you can use a rubber band or stickers on the eggs before coloring, leaving light stripes on the eggs.
Before dyeing, put an elastic band on the egg
And here we pre-pasted stickers
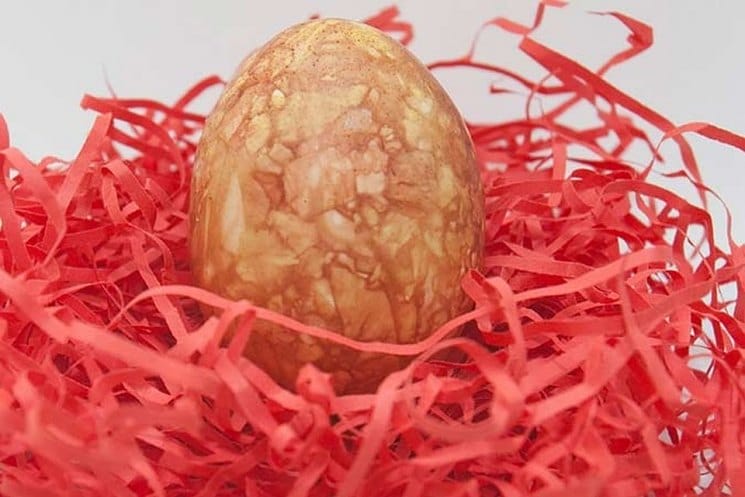
To achieve a marble effect, you need to add a spoonful of vegetable oil to the liquid with paint (either natural or chemical).

Marble testicles
The same vegetable oil can be used after dyeing to give the eggs a glossy sheen.

To make the eggs shine, you need to rub them with vegetable oil.
Another harmless way to decorate eggs is with cereals. Egg white with sugar can be used as an environmentally friendly glue. (For some options, you may need a stronger glue, in which case you can think of paste.) Dip the boiled eggs in a sticky liquid of protein and sugar, and then roll them in cereal. The decoration of corn grits looks most interesting. It will not be difficult to remove such decor either – you just need to rinse the eggs in water, after which you can eat them.
Dip eggs in protein with sugar and roll in cereal
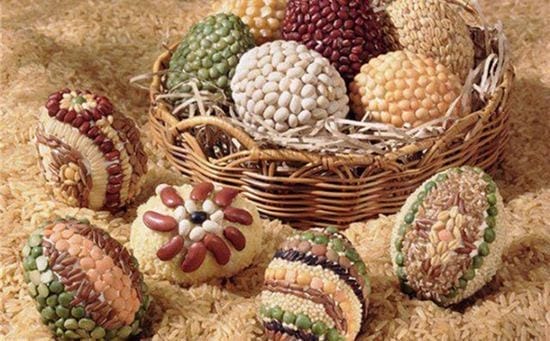
Decorating eggs with groats
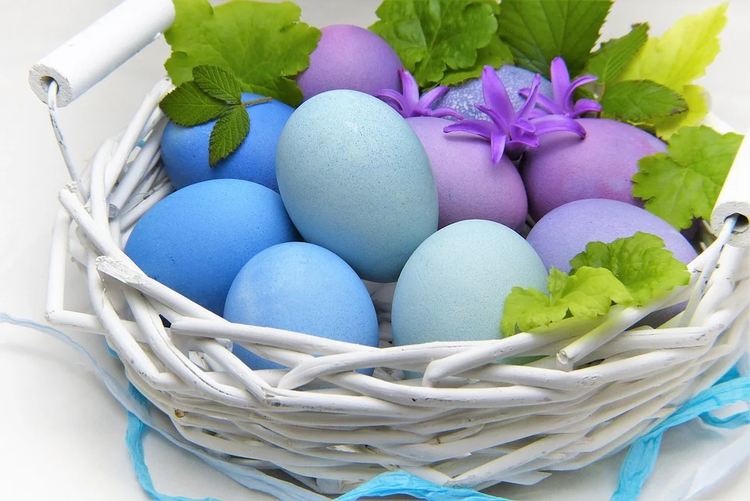
You can create beautiful decor with color transitions using food coloring. To do this, we dilute the dyes in water, adding a spoonful of vinegar, and dip the egg with one end, for example, in pink, and with the other in blue.
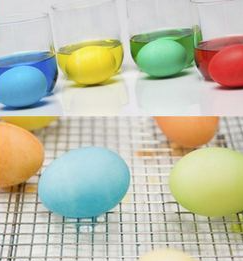
Coloring eggs with food colors
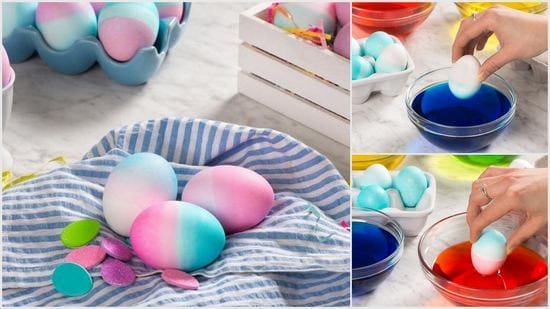
How to color transition eggs
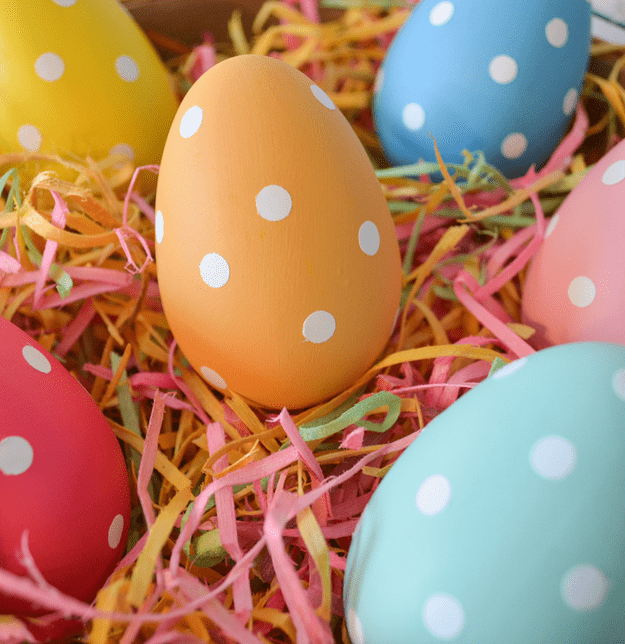
A simple but cute decor will turn out if you place multi-colored dots on the eggs – peas.
Multicolored dots with food coloring
But such cute cactus can be made using dyes, a black felt-tip pen and a piece of napkin. To glue a flower from a napkin, you can use the same protein-sugar solution.
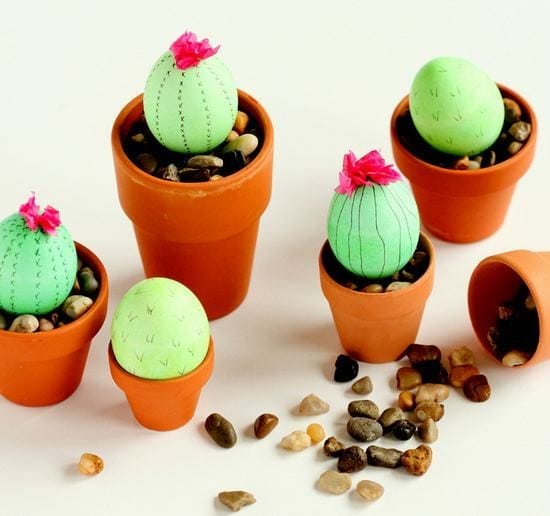
Easter cactus eggs
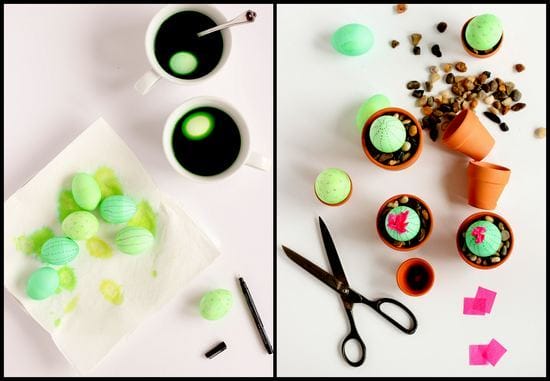
We paint the eggs, draw thorns and glue the flower
By the way, felt-tip pens or markers can also become a separate item for decoration, as is the case in the photo below. This option is suitable for children who also want to have a hand in the creative process of decorating eggs. It is worth noting that it is recommended to use markers not ordinary, but food.
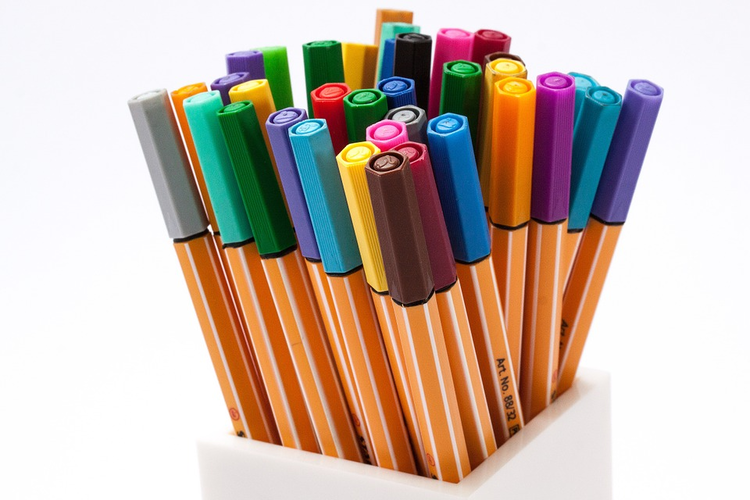
Food markers

We draw on eggs with food markers
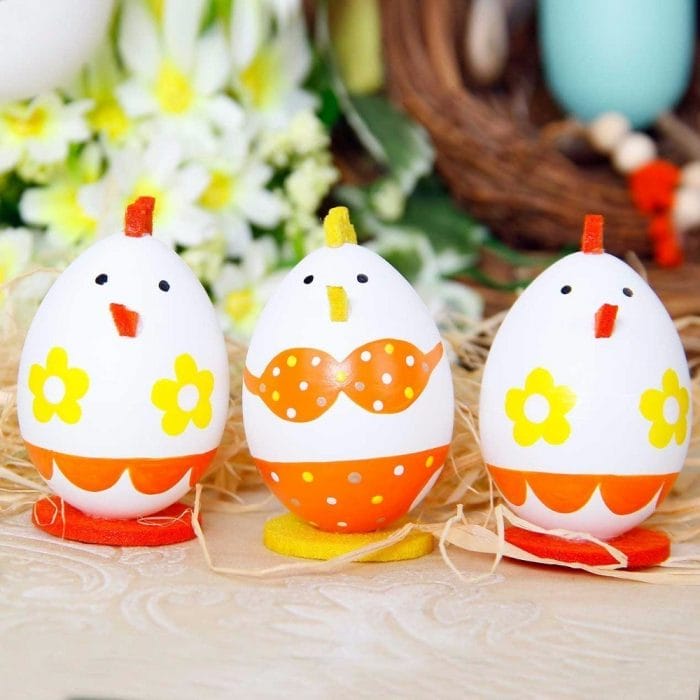
Another idea is egg animals. For example, these adorable chickens will not require much work and time. It is enough to paint the eggs yellow, stick the faces and feathers. As a nest, you can use ordinary egg packaging, although they would look more interesting in a wicker basket.

Chicken eggs
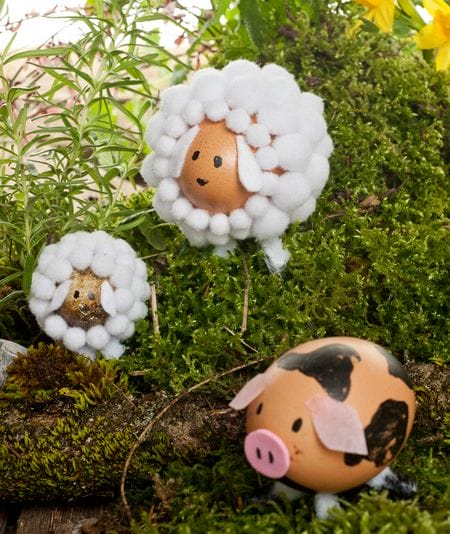
But such a composition-farm looks more impressive. For such a craft, it is advisable to empty the eggs first, as described above. For work, you will need paper napkins, fluffy balls, felt and paste.

Easter Eggs

Quail egg pigs look especially cute.

Rooster
Lamb
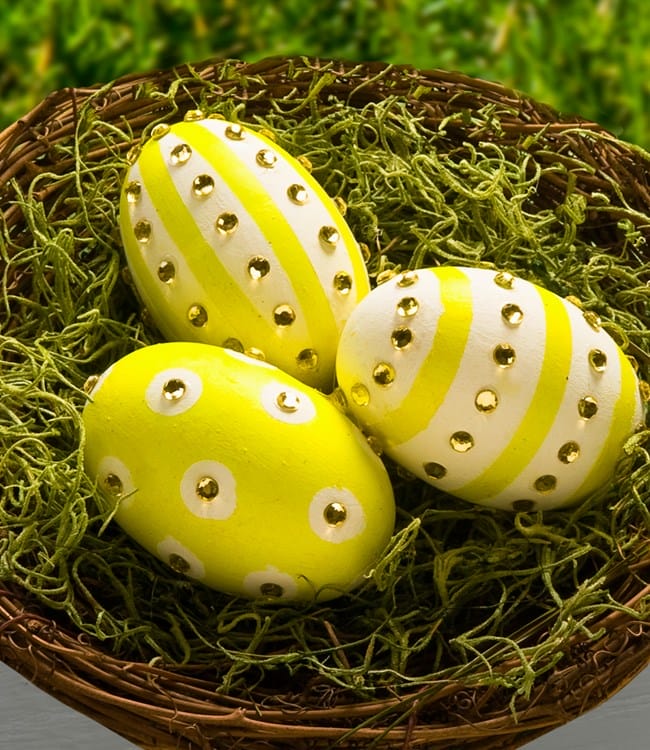
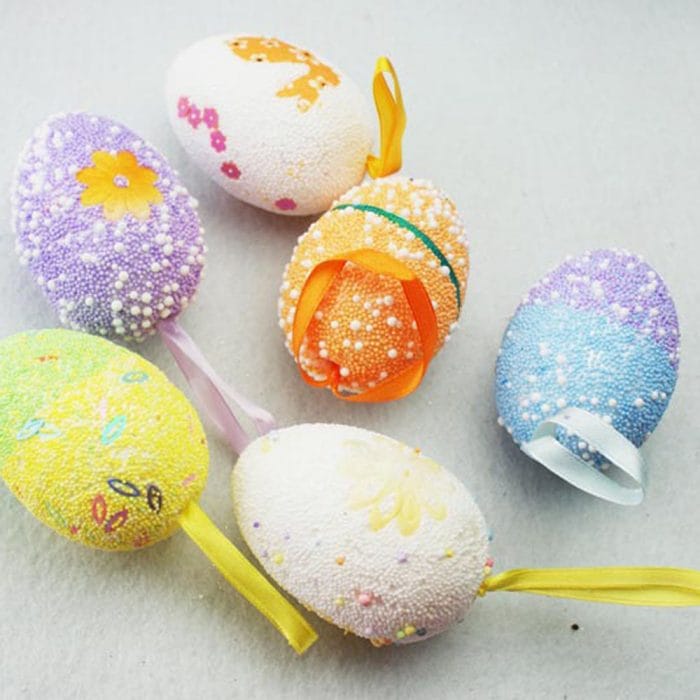
Eggs decorated with beads, sparkles, chemical paints, etc. can also be attributed to the number of inedible small crafts. Such Easter eggs look very beautiful, they can delight the eye for a long time after the holiday.

Beaded egg
Shiny eggs
By the way, for some crafts it is not necessary to use real eggs. So for this blooming composition foam eggs were used. Just look at how beautiful it is! All you need to do is prepare paper flowers and pin them to the egg with pins with mother-of-pearl balls.
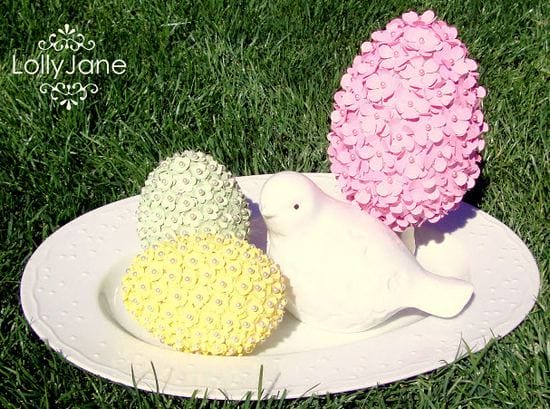
Foam eggs decorated with paper flowers

How to Decorate Styrofoam Eggs: Need Paper Flowers and Pins
And finally, some more interesting ideas for decorating eggs.
Spring animals from eggshell
Manufacturing technology is very simple
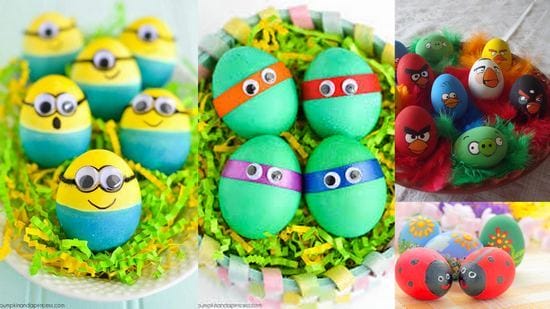
Eggs can be colored like popular cartoon characters: minions, teenage mutant ninja turtles and angry birds

Pineapple eggs
For work you will need yellow eggs, paper and glue (it is better to use paste)

Glue the leaves to the eggs – the pineapples are ready!
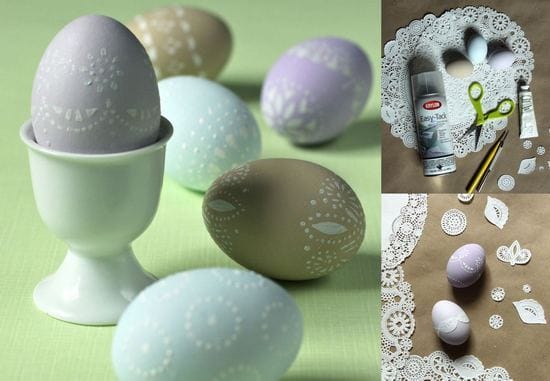
Decorating eggs with a lace doily
Decor with shiny toys

Any small toys will do

And you can make prints

Erasers on the back of pencils act as a print.
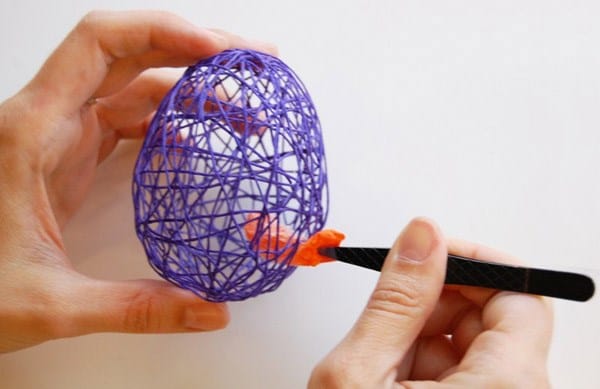
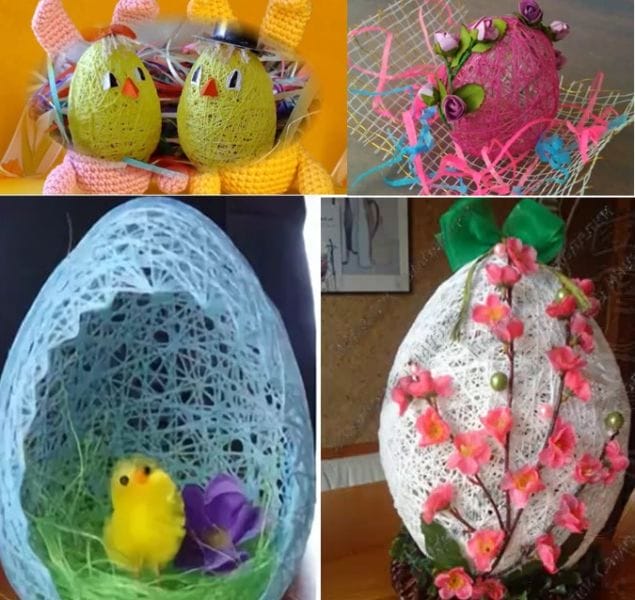
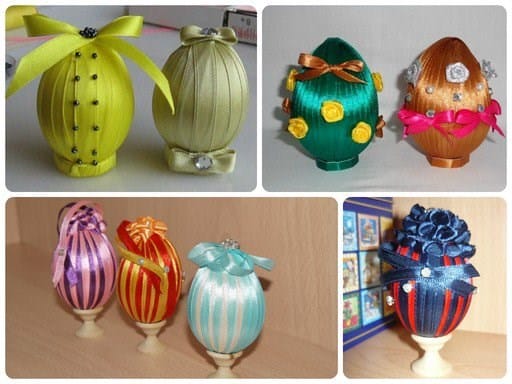
Easter egg made of thread
The simplest craft is using threads or satin ribbons. There are quite a few options on how to decorate eggs for a bright Easter holiday, using multi-colored threads of different thicknesses or bright silk ribbons or satin fabrics.
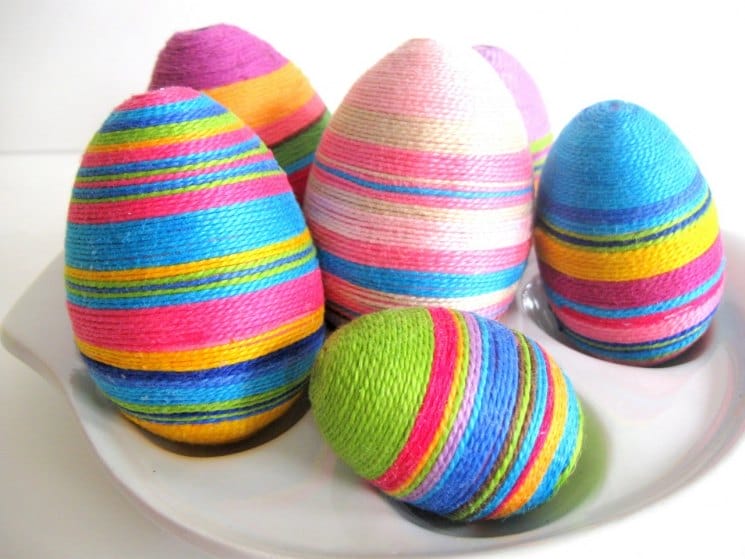
In order to make a beautiful Easter egg from satin ribbons with your own hands, you will need to take:
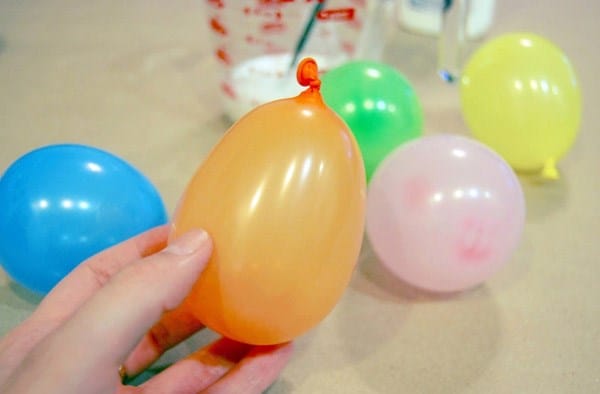
- Balloon.
- Threads – you can take ordinary cotton, you can woolen.
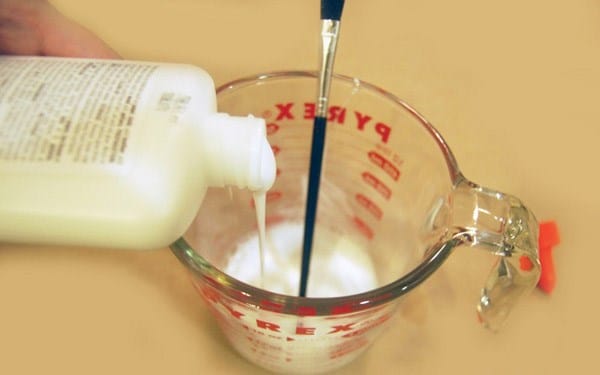
- Glue. PVA works best.
- Bright ribbons.
- Scissors or a paper knife.
To make Easter eggs from threads with your own hands, you first need to inflate a balloon and start wrapping it with threads.

Each turn of thread should be coated with PVA glue and allowed to dry before wrapping with new turns. Once you have a ball of thread, coat it with glue one last time and let it dry completely.
After the glue has frozen, you need to gently burst the ball. Inside such an egg, you can put small chocolates or make small eggs from ordinary food foil.

You can additionally beautifully decorate your Easter eggs with bright ribbons. Such crafts work well with children.

Decoupage on eggs
The decoupage technique is quite simple and easy to perform. In order to decorate an egg for a bright Easter holiday using this technique, take ordinary eggs that are carried by chickens (it is better to boil them first) or special wooden blanks, napkins for decoupage, a brush. DIY Easter egg craft can unite children and adults.

Boil chicken eggs in advance. It is desirable that the shell is white. For gluing, you need not glue, but ordinary chicken egg white.

Choose a bright and festive decoupage napkin and separate the layer you need to work with. This is usually the very first layer.
It is best to pull the drawing out of the napkin by hand, and not cut it out with scissors. Blend the image over the egg and brush over with a squirrel brush.
Do this until you have completely covered the egg with drawings. Place the Easter egg on a wire rack to help dry the egg white.
Egg pasta
Another great way to decorate Easter eggs is with pasta.

To get a wonderful gift for your family, you will need a special wooden blank in the form of a chicken egg, yellow paint (acrylic is ideal), small pasta (small stars will look good), PVA glue, a brush and sparkles or foil stars.
Initially, it is necessary to apply the glue in several diagonal stripes. Attach pasta to the glue.
Try to leave the sides empty. After the glue is completely dry, yellow paint can be applied to the workpiece. Let the paint dry completely.
Now you can apply glue to the empty sides of the workpiece and glue foil stars or sparkles. If it is difficult to imagine how to make this craft from the description, you can watch a master class on making Easter eggs with your own hands.
Your Easter egg is ready! If you wish, you can turn on your imagination and experiment with colors.
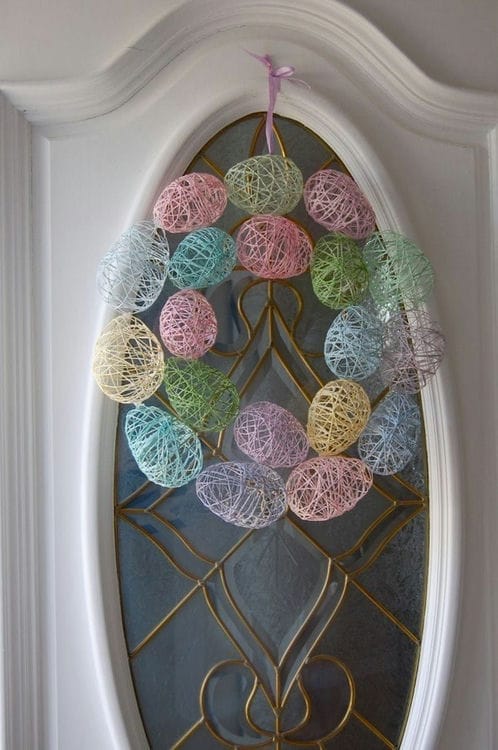
The original idea of making eggs from threads with your own hands
Openwork volumetric eggs can be made from threads. They will be a great addition to decorating your home for the holy holiday of Easter. Even a child can easily cope with the manufacture of such a craft, so we invite them more boldly to this lesson.

Necessary materials:
- Balloon
- PVA glue
- Colored threads
- Container for glue
Getting started:
Inflate the balloons to the desired size.
Pour the glue into a convenient bowl and soak the threads.
Wrap the eggs with threads dipped in glue and then you can blot them again with glue already on the ball.

Hang up the finished balls to dry them.
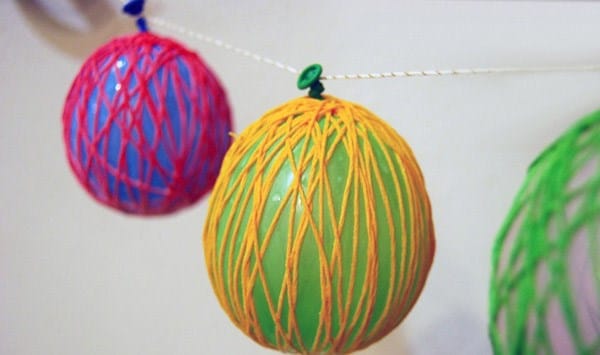
When the glue is dry, burst the ball inside and remove it with tweezers.
All is ready. Such simple patterns can be created from threads on an egg.
And I also spied great decorating ideas on the Internet, take a look.
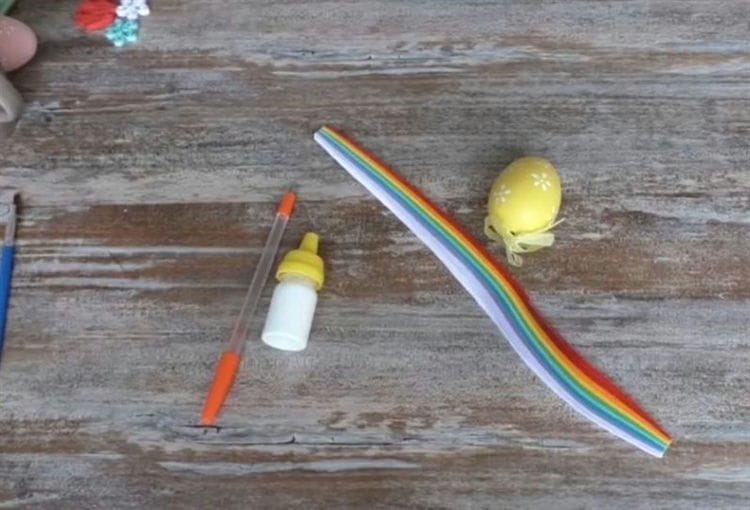
Quilling decoration
Many of us, at least once in our lives, have twisted strips of paper into spirals and did not suspect that this is quilling. But this is a very entertaining and exciting way of making crafts. In the approach of a bright Easter day, I propose to decorate the egg with this technique. A step-by-step master class for you below.
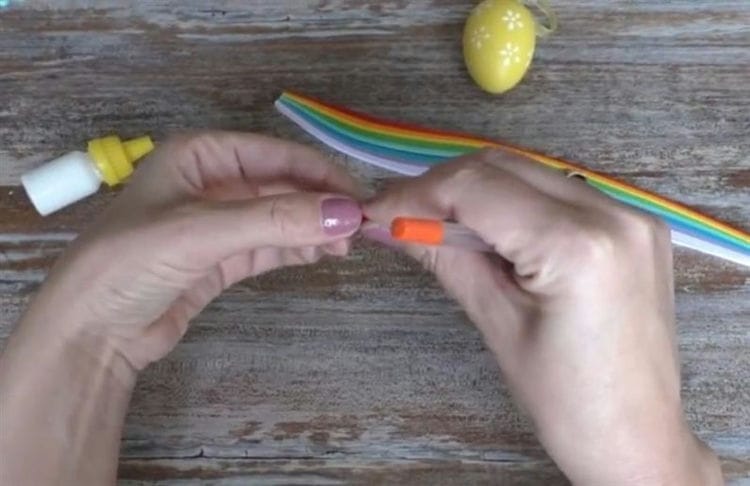
Prepare quilling paper, paper spiral twist, glue, and an egg blank.
The first step is to wind the spirals.

Bend the curled strips of paper with your fingers.
Secure the ends of the finished spirals with glue.
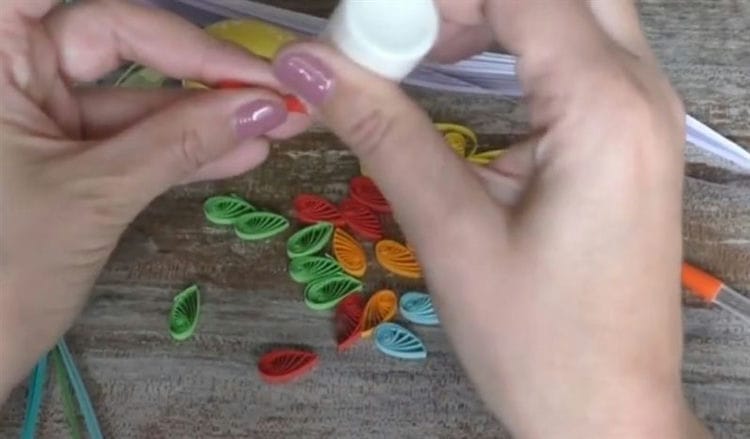
Begin gluing the spirals on top of the egg, moving downward.
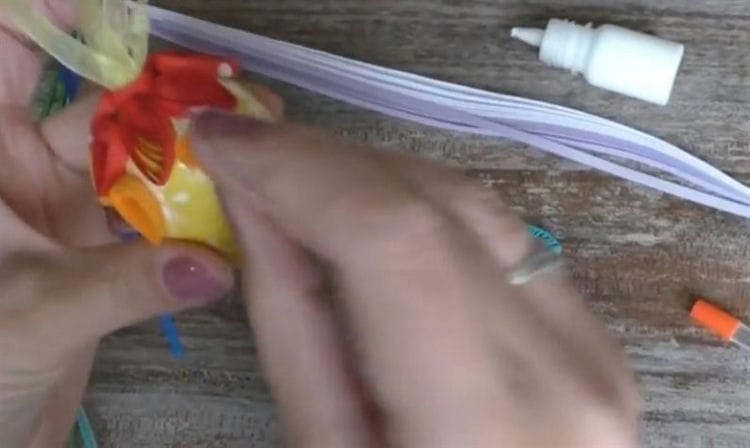
Finish decorating.

Here we have such a beautiful, rainbow Easter egg.

In this way, you can make a bunch of more options. Imagine and create your masterpieces.
Creativity makes it possible to reveal our capabilities and do unique things. It's so great when children are still involved in the process. Each egg decorated with your hands will keep the warmth of your hands and bring joy to those around you.
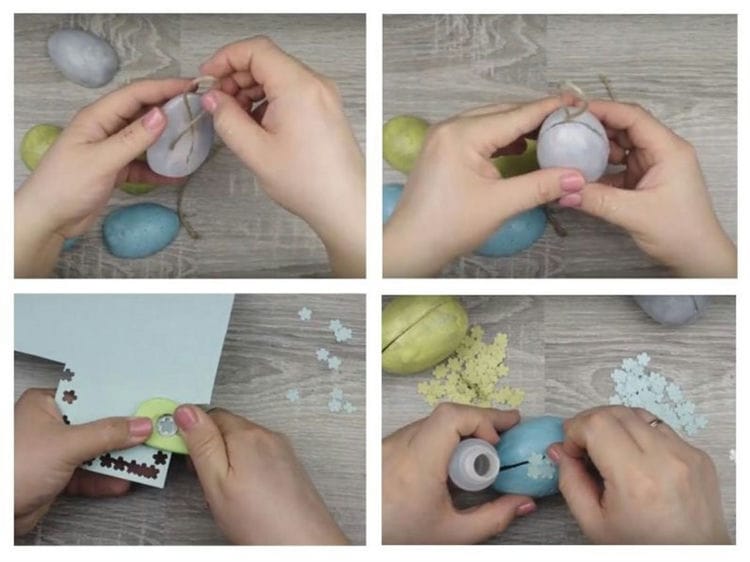
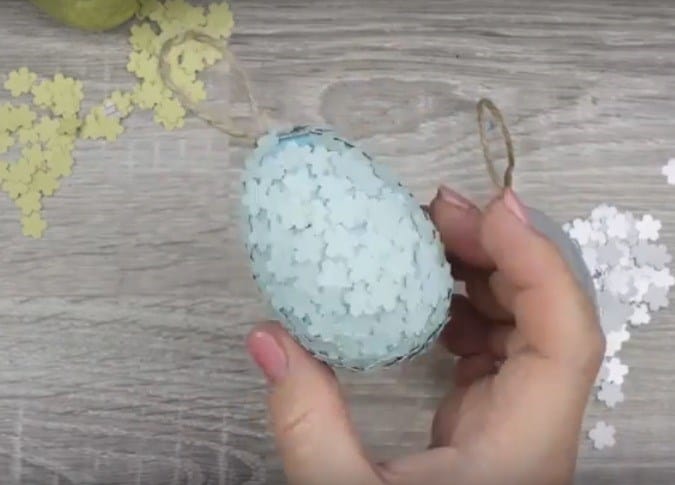
Beaded Easter egg
DIY beaded Easter eggs look very beautiful. The craft is done quickly and easily. Prepare in advance an egg from foam, sequins, pins.

One pin must be pinned to the workpiece and several rows must be made. The next step is to secure the ribbons and sequins. Continue fastening ribbons and beads in rows until the entire area of the workpiece is covered.

Such crafts will pleasantly surprise and delight children. They can be made together with them and brought as a gift for grandparents, who will surely appreciate the efforts of their grandchildren.
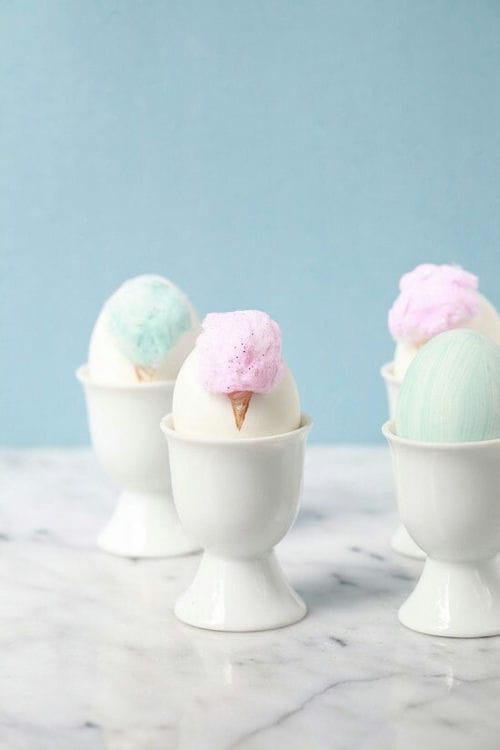
1 Cotton candy decor
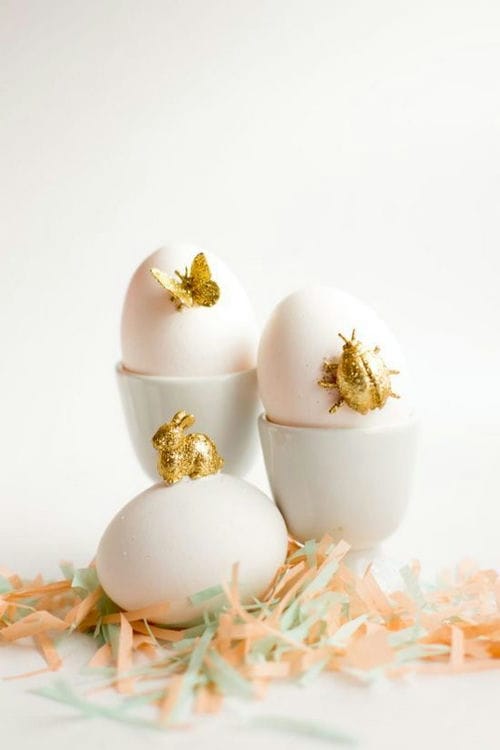
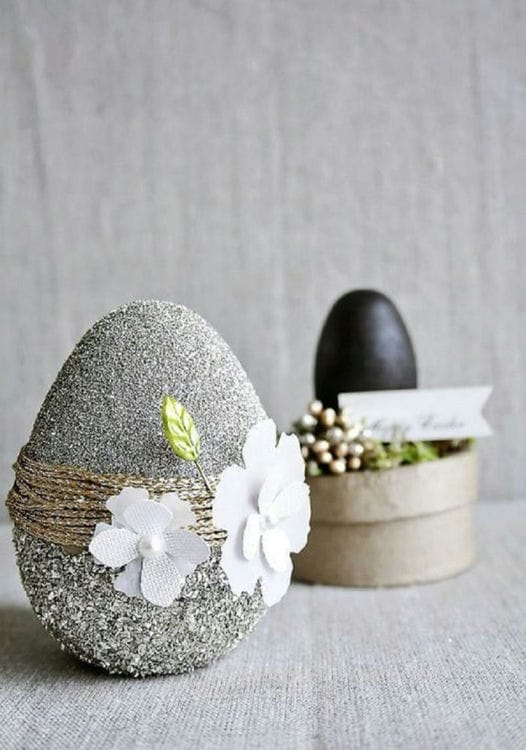
2 Decorative golden eggs.
Fresh flowers look amazing in these mini gold-shell vases! You can also add wax and make mini candles.
Under no circumstances use gold paint on edible products – apply only to an empty shell prepared in advance!
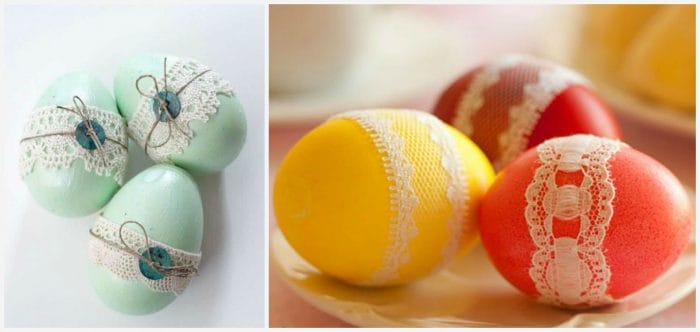
3 Napkin decor
This is how you can transform colored eggs using ordinary napkins.
You will need:
Colored eggs;
Paper napkins with different patterns;
Glue;
Paper;
Scissors (fine-tipped);
Needle or awl (optional);
Brush (thin);
Acrylic paint (white and pale gray).
1 Place napkins face down on paper and apply glue; leave to dry.
2 Cut out the pieces from the napkins. Use a needle or awl if necessary.
3 Place the napkin applique on the egg and press down with your fingers.
4 Apply paint to the napkin patterns.
5 If desired, add freehand details and embellishments to complement the design.
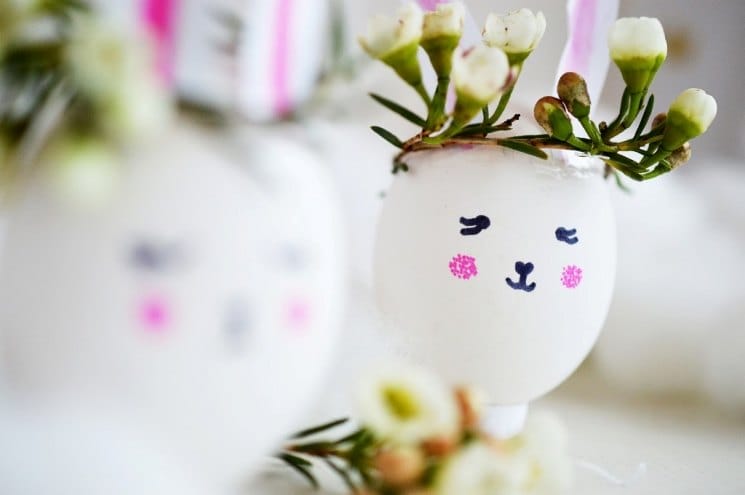
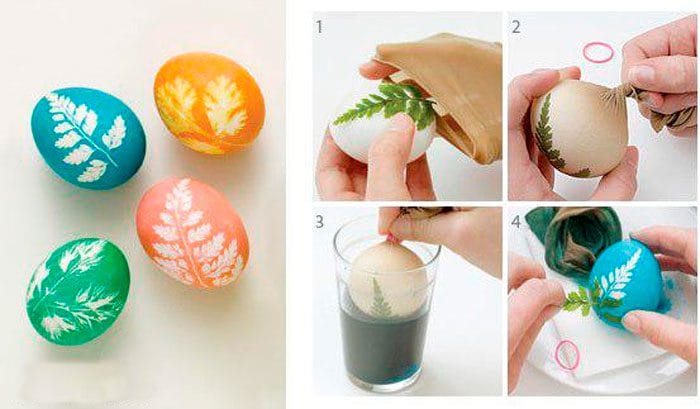
4 Natural decor
Yes, you can do without any paints and make unique spring eggs. All you need: ready-made eggs, twisted twine and some spring flowers and leaves.
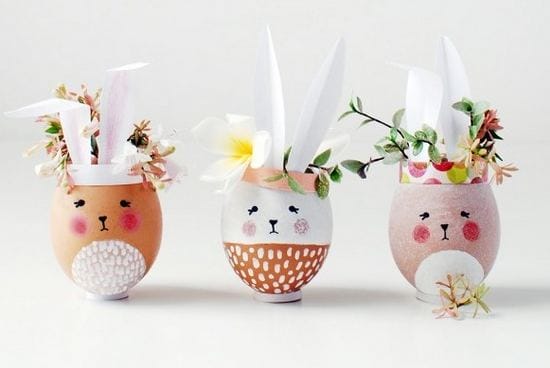
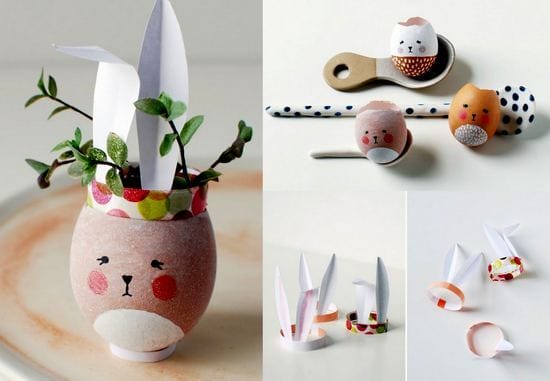
5 Bunnies from the shell

6 Pineapples
1 Paint the eggs with yellow paint
2 Cut out leaves from green paper
3 We glue the leaves
7 Balloons
A very unusual decor option.
I will reveal the secret of the skill of packing eggs into balloons:
By the way, it is not necessary to paint eggs at all)
32 Black and white decoration in Marimekko style
33 Fairy tree
Such decorative fruits can be made from decorated shells.
35 Galactic Eggs
Space decor for plastic eggs.
8 Fruit prints
It looks pretty interesting. You can take the very idea of printing and experiment (for example, make gold seals on painted eggs)
Colorful motives
Eggs decorated with eco-friendly materials look good. For example, a rope. You can buy it from your art store or utility department. The cord is attached with hot glue.
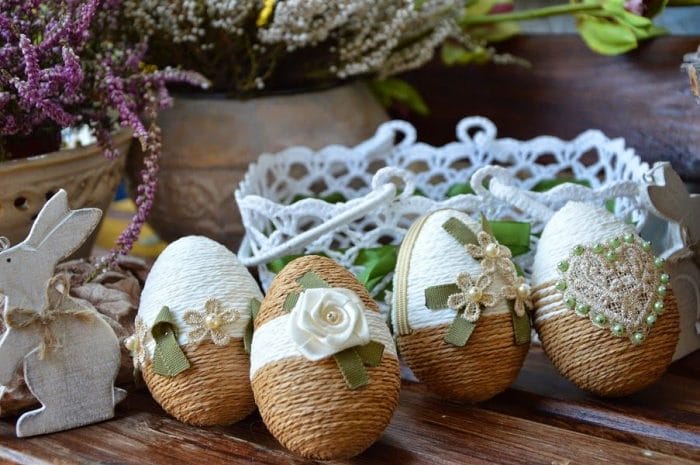
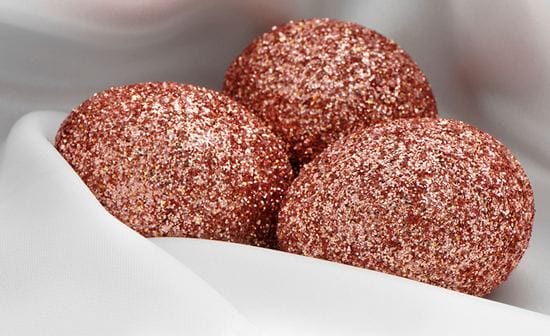
A similar principle is used to create a shiny egg. To do this, the workpiece is smeared with glue, and then dumped in glitter. After that, a rope is wound around the egg.
Flowers from ribbons look great on a foam blank.

The Provence style egg looks good. To do this, the blank is wrapped in a newspaper and painted over in places. Then you can decorate the craft with ribbons.

One of the easiest options is to paint the workpiece. After drying, you can apply lace and other decor to it. Such crafts cannot be distinguished from the original.
Craftswomen are used for decoration and quilling. Ordinary PVA glue will help to fix the paper springs on the foam.
Eggs can be dressed up in cute crochet outfits. To do this, use a circular amigurumi pattern or other ring knitting.

If you don't have enough patience, you can put aside the ribbons and start with the simplest decor. Rhinestones, paints and a brush will help decorate eggs in an hour.
Popular Provence can also be embodied using decoupage technique. Napkins fit perfectly on polystyrene, and you can cover them with any varnish or glue.
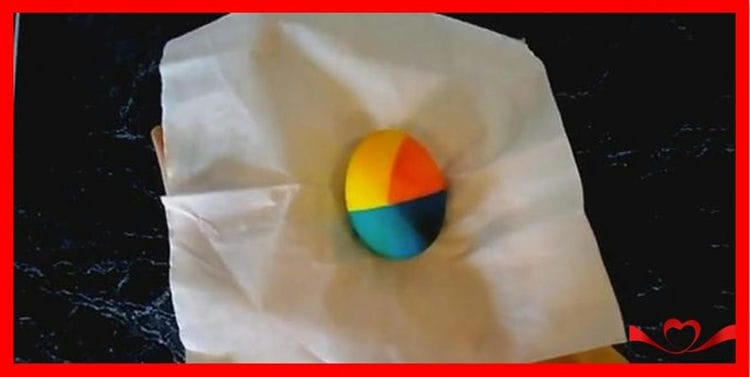
Color-blocking eggs

Color blocking is a modern trend, which is a combination of two or three bright colors opposite to each other in one unit (thing, object). For example: red-green, yellow-blue-orange.
You will need: white boiled eggs, food colors of the desired shades, 9% table vinegar.
Master Class
- Dissolve food colors in water, in different containers according to the instructions as written on the package.
![How to decorate Easter eggs with your own hands? Painting methods at home. Easter eggs decoration]()
- Add 2 tablespoons of vinegar to each container.
- Place the egg ½ or ¼ part in the coloring container.
- In this way, color the entire egg vertically, horizontally and even diagonally.

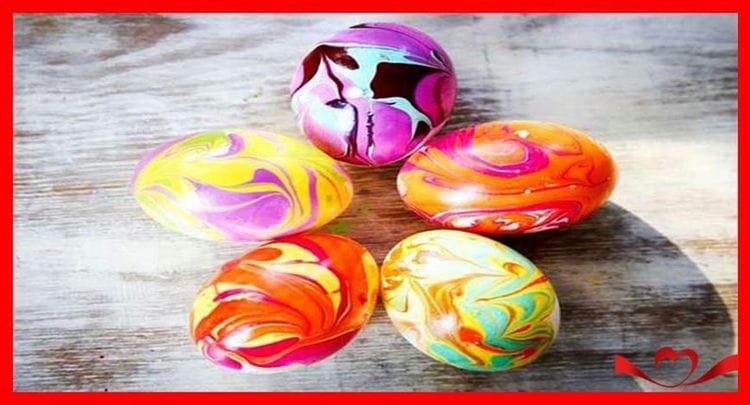
Marble effect of Easter eggs
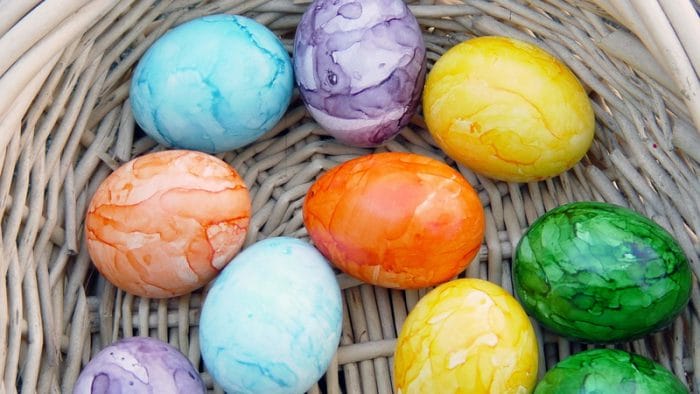
You will need: boiled eggs, food coloring of two colors, sunflower oil.
Master Class
- Color the egg with food coloring as described above.
- Dilute food coloring that is darker than the colored egg in water.
![How to decorate Easter eggs with your own hands? Painting methods at home. Easter eggs decoration]()
- Add a teaspoon of oil.
- Stir the mixture until oil balls form.
- Place the egg in the solution and remove it immediately.

Silk effect of Easter eggs
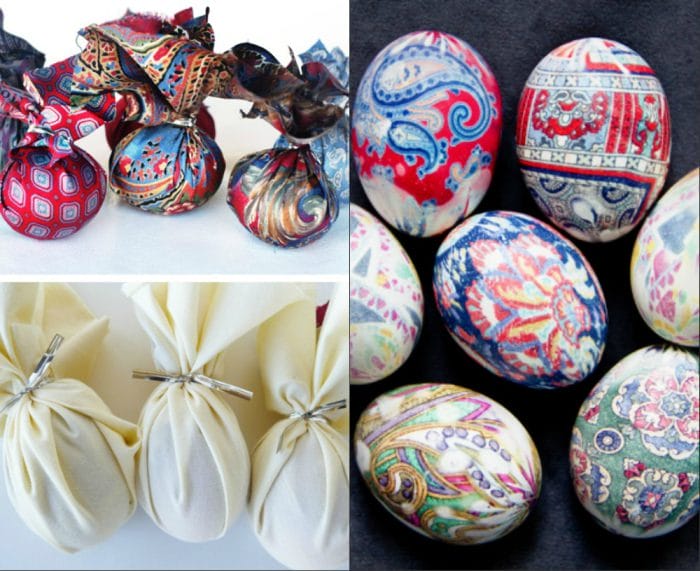
You will need: raw white eggs, silk cloth, cotton cloth, string or rubber band, 9% table vinegar, a cooking container.
Master Class
- Carefully wrap a raw egg with the right side in a silk cloth.
- Wrap the top with a cotton cloth and secure with an elastic band.
- Add 3 tablespoons of vinegar to a cooking container and cover with water.
![How to decorate Easter eggs with your own hands? Painting methods at home. Easter eggs decoration]()
- Place the egg in a bowl, let it boil and simmer for another 10 minutes.
- Cover the boiled egg with cold water, cool and remove the cloth.
- The fabric pattern should be imprinted on the egg shell.

Stencil coloring of Easter eggs
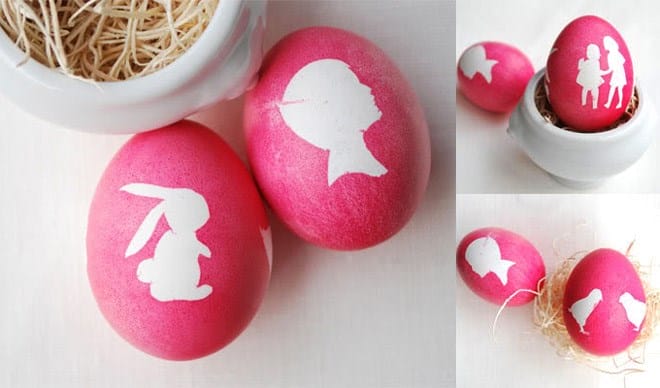
You will need: boiled white eggs, food coloring of the desired shade, stencil, tracing paper (transparent paper), gauze or nylon, scissors.
Master Class
- Select and print a stencil from the gallery just below.
- Place the stencil on tracing paper and cut it out.
- Moisten the stencil and apply to the shell.
![How to decorate Easter eggs with your own hands? Painting methods at home. Easter eggs decoration]()
- Fix the stencil with nylon or gauze.
- Dissolve the food coloring in water according to the instructions as written on the package.
- Add 2 tablespoons of vinegar.
- Soak the eggs for 4 minutes in the dyes.
- Cool the eggs and remove the stencil.
The selected pattern should be imprinted on the egg shell. Use stencils and everyone will see that you approached the holiday creatively.
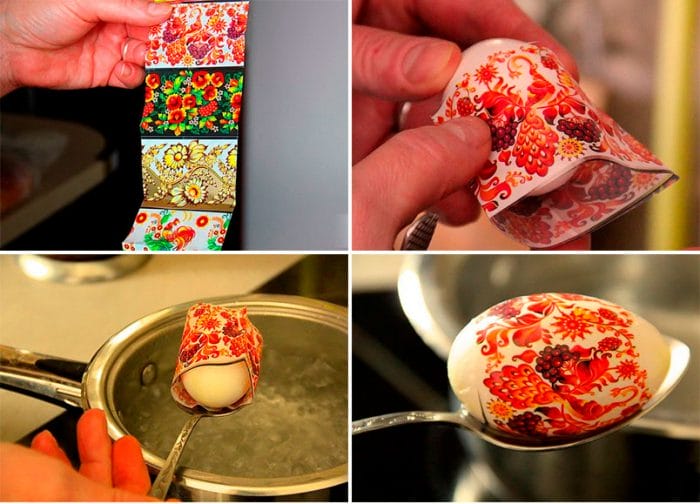
Decorating eggs with iron-on stickers
You will need: boiled eggs, thermal stickers, a cooking container.
Master Class
- Place the sticker over the boiled egg.
![How to decorate Easter eggs with your own hands? Painting methods at home. Easter eggs decoration]()
- Dip the egg in boiling water.
- Wait for the sticker to take the desired shape, then remove the egg.
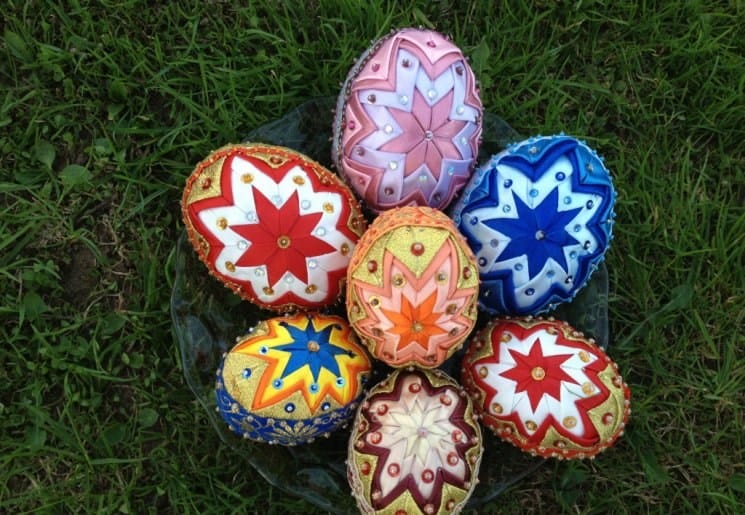
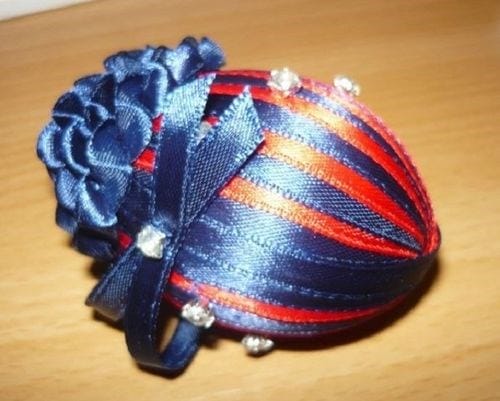
Decorating with satin ribbons
This lesson is not difficult and will not take much time. You can use several different colors and options and make a whole Easter composition. It will turn out very brightly in spring, which will cheer up everyone around.
Necessary materials:
- Eggs – fresh or prepared from plastic, wood, foam
- Satin ribbons – 5 mm wide, two or more colors
- Glue gun
- Scotch tape or double-sided
- Lighter – for soldering the ends of belts
Let's start:
If the egg is fresh, then we free it from the contents inside by puncturing from below and from above. We wash it as carefully as possible, trying not to damage the shell and dry it
On top of the egg, you need to stick double-sided tape or use the usual tape to fix it in two colors.
Then we carefully begin to wrap the egg with ribbons, crossing the top and bottom, trying to do this as tightly as possible.
When the workpiece is completely wrapped with tapes, burn the ends of the tapes with a lighter and secure with a glue gun.
For additional decoration, make a ribbon bow and secure the gathered ribbon. You can use rhinestones and beads as you wish.

It is so easy and simple to create a bright mood in the form of an elegant souvenir.
Kanzashi Easter eggs
Kanzashi is a type of handicraft made of fabric; this technique is used to make jewelry and crafts. This art form came to us from Japan. This technique is used to make hair jewelry for Japanese beauties. Our people went further and began to use this technique to create various original things.
I found an instruction for you in the video on decorating an Easter egg using this technique. They show and tell everything in great detail, do not be afraid to try and you will succeed without a doubt.
Staining eggs with nail polish
This method can be called in another way water manicure (or in the technique of water manicure). The method is quite attractive, but not very safe for health. Since varnish is a chemistry, so you can use this method, if at the same time you just donate the egg, but not eat it, I would not risk it.
We need :
- eggs white, nail polish
Stages of work:
1 Boil the eggs first and cool, dry.
2 Pour room temperature water into a bowl and drip varnish (you can use one color, you can use several colors, here it is at your discretion).
3 If you use several colors, remember that you need to drip the varnish into the center of the bowl alternately, then one, then the other color.

4 Now take a toothpick and draw any abstract pattern designs. Or, take an egg and dip it into a bowl first with one side, then the other. Let dry.
5 You can not dilute the varnish in water, but just paint anything you like with varnish, flowers, horses, chickens, bunnies, etc. Let your imagination run wild!
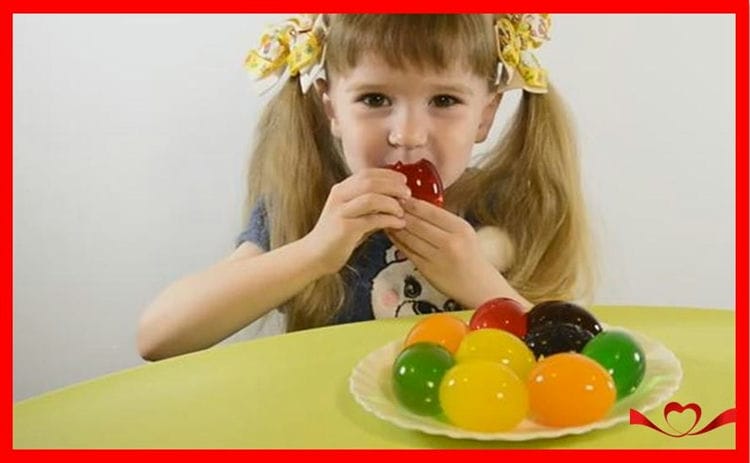
Fancy Easter Jelly Eggs
When I was preparing for this article, I saw such an amazing video on how to make unusual jelly eggs. A child is filmed in the video, very naughty and funny. It turns out such a bright, sunny meadow of multi-colored shiny eggs.
Besides, who loves jokes, or making surprises to relatives or friends, this idea of joking with such eggs is perfect. To do this, you do not need to remove the shell from such eggs, just decorate the shell in any way. And it will turn out to be, like, just an Easter egg, but in fact, when they start cleaning, they will see a surprise
Look and see for yourself.
These jelly testicles (eggs) can be created with your baby, as shown in this video. After all, the joint work of the child and the mother unites and brings them closer together. And most importantly, the child will be delighted
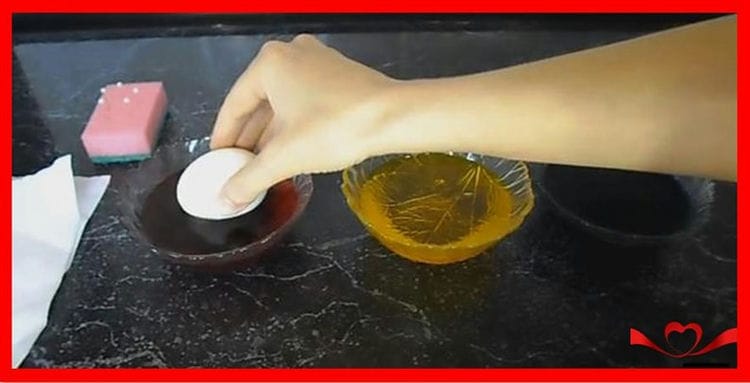
Painting eggs with vegetable oil
It turns out very interesting, I never thought that vegetable oil in combination with a dye can give such an effect!
We need:
- eggs, food colors, vegetable oil, water
Stages of work:
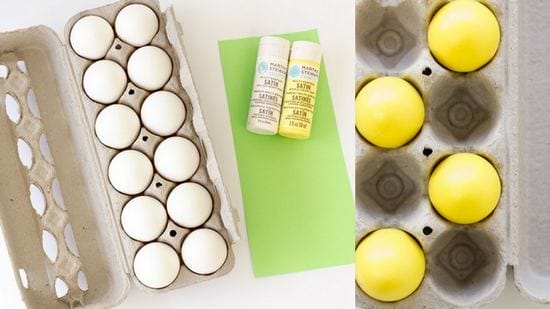
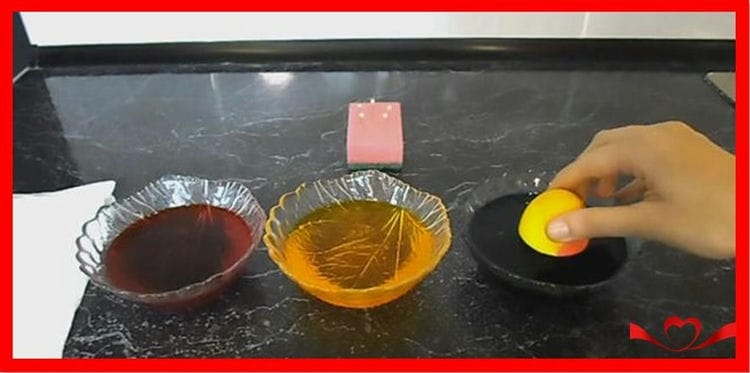
1 Paint the egg some light color, such as yellow.

2 Take a container with a dark dye, such as green, and add 1 tablespoon to it. vegetable oil and stir.
3 Dip the egg in green dye, let it stain. Here's how original it turned out!
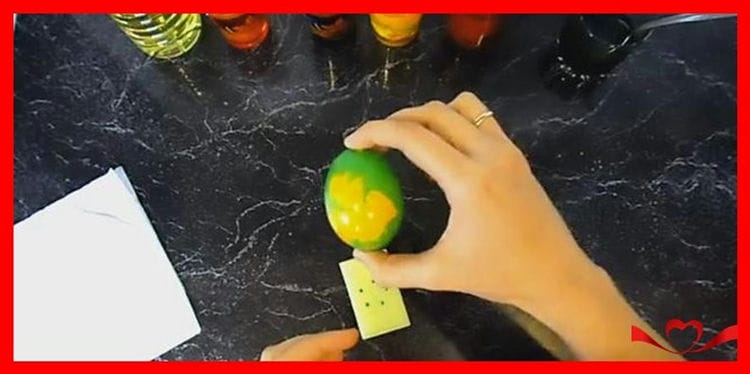
4 Remove the egg. Place on a stand to dry.
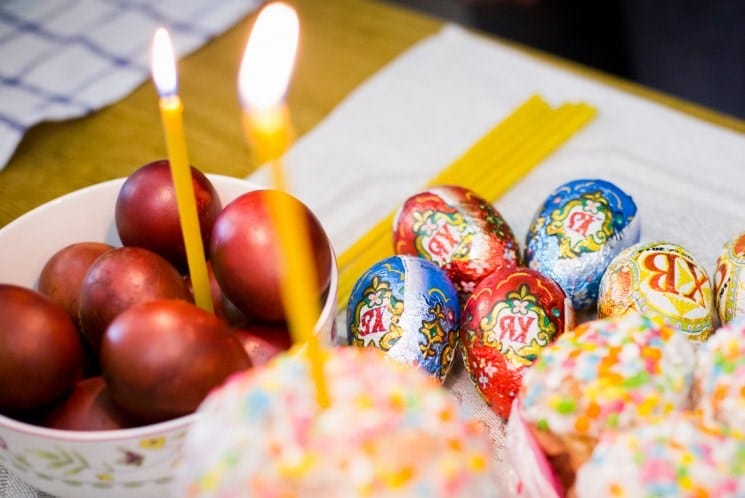
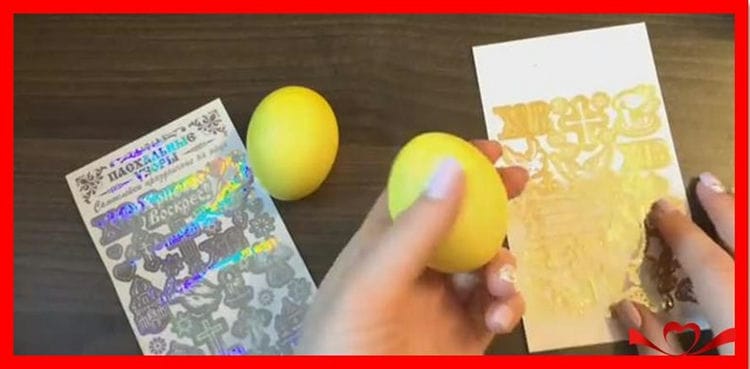
Easter sticker patterns
The easiest way is to buy Easter stickers and decorate our holiday eggs in any way you like.
We need:
- eggs, food colors, easter stickers
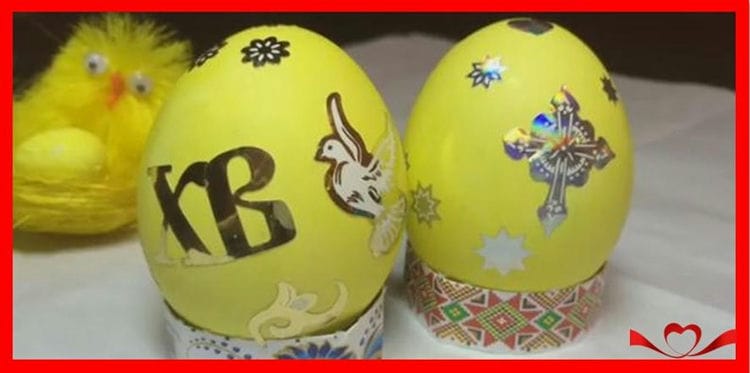
Stages of work:
1 Paint the eggs any color. Or you can leave it white.
2 Take the Easter stickers, they are sold in the store. Remove the stickers from the leaf and decorate the eggs.
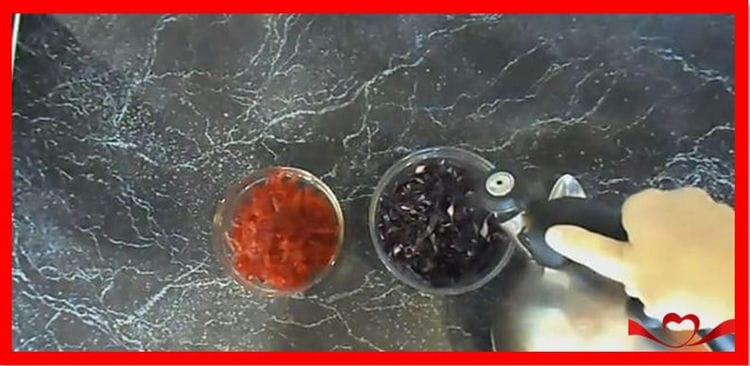
Method using onion and beet husks
You can always use this method, since products such as beets, onions, red cabbage and turmeric are almost always in the house. The only drawback of this painting is the time. In this way, eggs are dyed much longer than with food coloring.
We need:
- white eggs, red cabbage, beets, water, onion skins, turmeric can be used
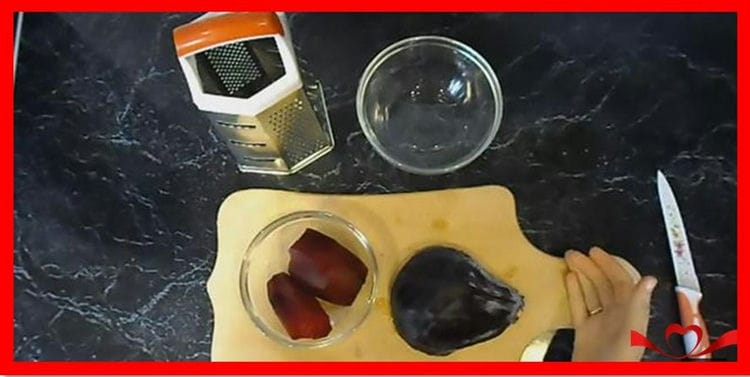
Stages of work:
1 Take red cabbage and cut it into pieces with a knife.
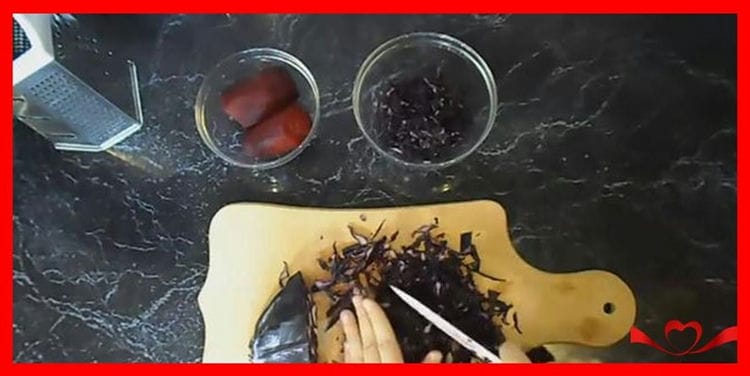
2 Grate the beets. Pour boiling water over vegetables in separate cups. (Onion peels, if you are making painting from it, you need to pour water and cook this broth for about 40 minutes, then add eggs and insist in the onion peel until the water cools down. After that, move the pan to the refrigerator overnight, at in the morning the eggs in the onion skins will be colored).
3 Dip there in the egg.

4 Remove after a while and dip the eggs with a napkin.
5 Place the eggs on the stand and let them dry.

6 In this way, the eggs are not very bright, saturated. But on the other hand, these are real natural dyes!
We paint from improvised means at home
We need:
- eggs, food colors

Stages of work:
1 The egg must be dry, it is also an important condition, it must be warm or hot.
2 Dilute the dye with water according to the instructions and add 1 tablespoon to the dye with water. vinegar and mix thoroughly.
3 Dip the testicle not completely in the paint, hold it for a little while in the dye for 2-3 minutes. Remove the egg and remove the drop of paint with a napkin.
4 Place the egg on the stand and let the paint dry.
5 Next, lower the egg into the next color.
6 Repeat steps 4, 5 and 4 again.
7 Here's what you get approximately, an interesting design, I think
8 Place the colored egg on the stand and dry.
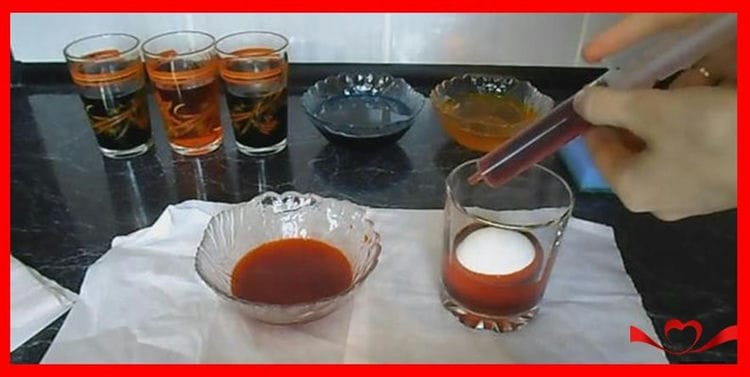
Painting eggs in a glass
We need:
- eggs, food colors, glass, syringe
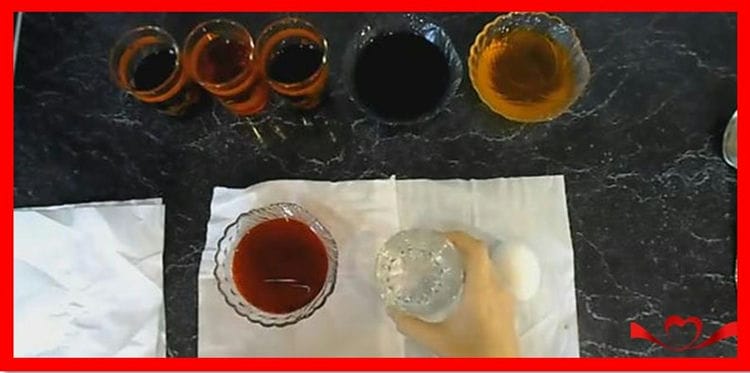
Stages of work:
1 Take a glass, put an egg in it.
2 Draw the dye into the syringe and carefully pour the dye along the sides of the beaker. Let the egg sit for 30 minutes. Then put it back in the syringe and pour it gently so that the egg is completely covered and leave it again for 20 minutes, and again draw the paint into the syringe and hold it for 10 minutes.
3 Remove the egg from the paint Dip the egg gently with napkins, dry on a stand.
4 The egg will turn out to be monochromatic, but the color on it will have 3 types: dark, lighter, completely light.
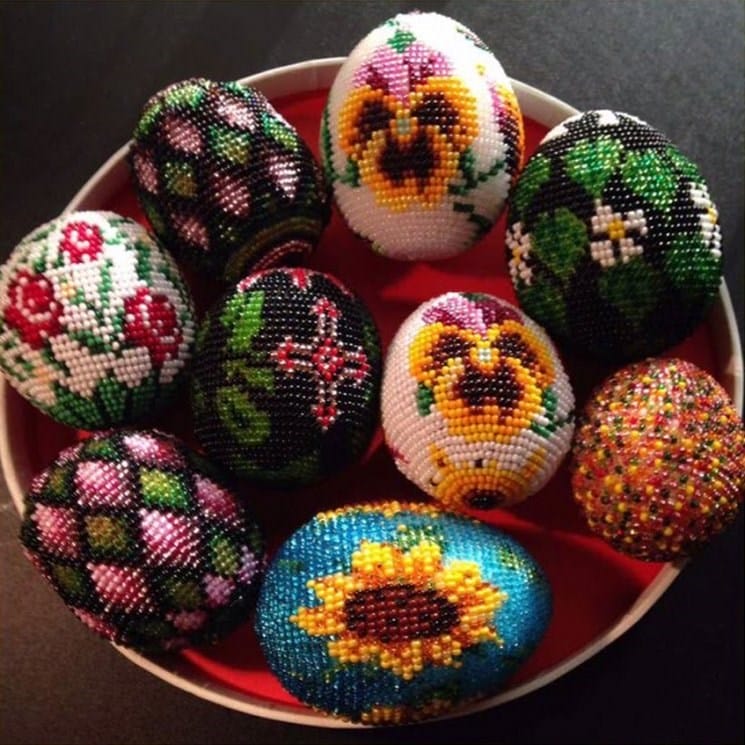
We decorate with beads – a master class with weaving patterns
There are many different ways to decorate Easter eggs. One of them is braiding decorative testicles with beads. Such a souvenir will shimmer beautifully when rays of light hit them and please the eye. And such a souvenir looks very festive and elegant.
The egg symbolizes the beginning of a new life, the miracle is true. The main symbol of the holiday will be an excellent gift for creating a festive mood. And if you make this souvenir yourself, then there will be no price for it.
Of course, decorating eggs with beads is not an easy task and it will take some time. But the end result will delight not only you, but those around you. And most importantly, those who will receive such gifts.
Beading
There are several ways to decorate eggs with beads. The first option, and it will be the simplest, is pasting. To start this work, you will need materials such as a decorative or hard-boiled egg, PVA glue, beads, toothpicks, a simple pencil, and thin fishing line.
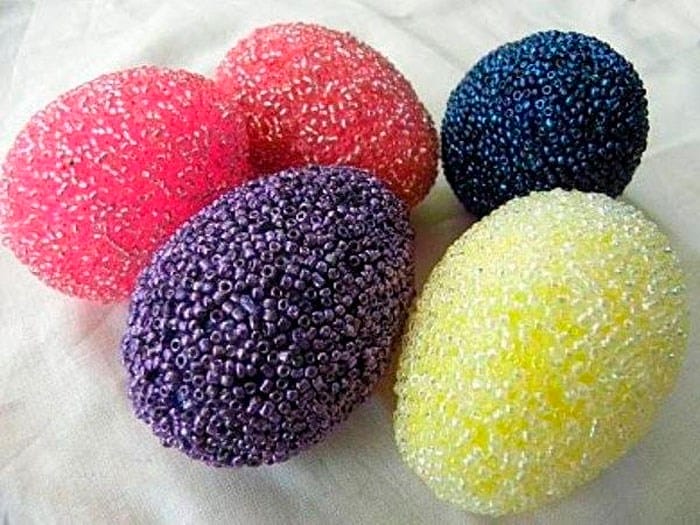
Let's get started:
- Apply glue to the shell.
- Prepare the beads of the desired color and sprinkle them over the surface of the egg.
- If you want to get a beautiful pattern, then first apply it to the workpiece with a simple pencil.
- Gradually applying glue to it, use a toothpick to lay out the desired pattern with beads.
Another simple option, but no less interesting

String the beads onto the fishing line to create these eggs.
Cover the egg with glue.

Spiral the entire space of the egg with the resulting string of beads.
Fix the strips to secure the glue.

You can create very beautiful and unusual ornaments in this way.
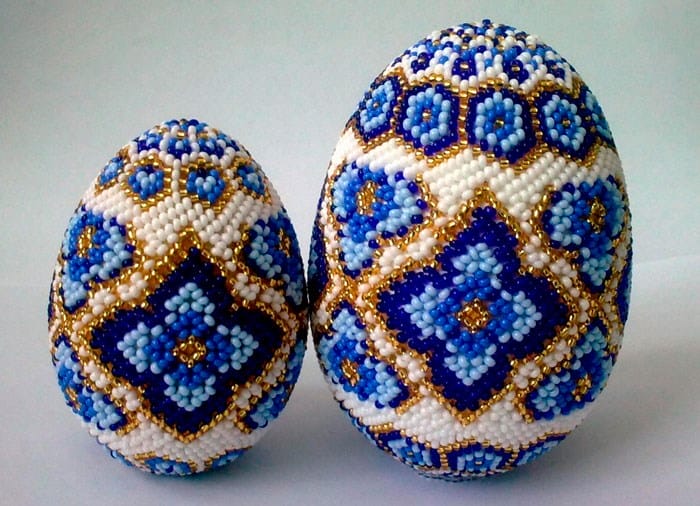
Braiding with beads
This technique is more difficult, but if there is a desire, then everything is easy to learn.

Such an egg is made in a diamond-shaped weaving method.
On the fishing line, you need to collect beads so that the length coincides with the size of the egg at its widest part. In this case, the number of beads should be a multiple of 6, that is, 24, 30, 36, and so on. Close the chain by passing the needle and line through the first bead.
The next step is to dial 5 beads, in the finished chain, count 6 in a row and pass the fishing line through it, the first diamond is ready. Continue this way to the end of the first row.
Subsequent rows need to pass the line along the rhombus with an exit through the middle. The middle part of the braid is woven according to the pattern. The finished belt needs to be put on the egg blank and continue weaving, reducing the number of beads in the rhombus as the testicle narrows and so on.

There is also a double-sided weaving option.

1 Draw two beads onto the line with the needle.
2 Return the needle and insert it into the first bead.
3 String two beads again.
4 Return the needle and insert it into the third bead.
5 Weave two rows in this pattern.

6 In the first row, the beads should be connected to each other, and in the second row, the beads should be attached to the first row.
7 Then connect the beads in pairs, the last but one with the first, the last with the second.
8 Pass the thread through four beads of the first odd row, then pass it through the bead of the even row. Repeat this process, leading the thread to the right in the fourth bead of an odd row.
9 Begin to weave the third row of linen by stringing one bead and threading through the same bead from which it was taken. Run the needle through the last bead and then knit it.
10 Thread one bead again and weave the fabric around the egg in the same pattern.
Try to make such beauty and you will succeed. And I wish you success in this matter.
Easter Egg Clothes

If you like to sew, knit and create handmade masterpieces – then create beautiful clothes, covers for Easter eggs. You can knit them hats, skirts, make belts from ribbons, sew bags, wrap with lace, and elegantly decorate with ribbons, beads, flowers, sequins …
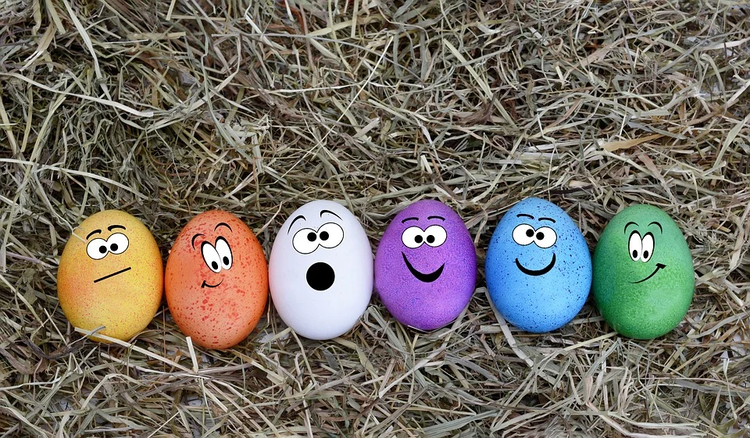
If you do not know how to sew and knit, do not despair, just draw funny faces to the eggs. This process will not take much time and, moreover, will amuse all guests. Get inspired by ideas from our photo gallery!
Luxurious, wonderful, creative, exquisite, delicious Easter eggs will become not only an excellent decor for a festive table, but also an original gift for relatives. Happy holiday to you and your loved ones, Christ is Risen – Truly Risen!
How to decorate styrofoam dyes
The simplest idea for decorating Styrofoam eggs is wrapping them with paper flowers. It looks very stylish and beautiful.

We need:
- Styrofoam egg halves
- Acrylic paints
- Colored paper
- Can of water
- Figured hole punch
- Brush
- Polymer glue
- Latex gloves
- Scissors
- Bechevka
- Palette
- Toothpicks
We start decorating:
Carefully pierce the halves of the eggs with a toothpick, this action is optional, it is for the convenience of painting the halves.
The blanks must be painted to match the colored paper used and dried.

Cut off a piece of string to serve as a hanging loop.
Glue it and glue both halves of the egg together.
Use a curly hole punch to cut flowers from colored paper, you can also cut flowers with scissors, it just takes you more time.
Glue the egg with these flowers chaotically and slightly overlap.
Here's an egg you should get. The rest are decorated in the same way.
The method is more complicated, but very interesting, I found in the video and I hasten to share it with you. Decoupage styrofoam eggs, be sure to look.
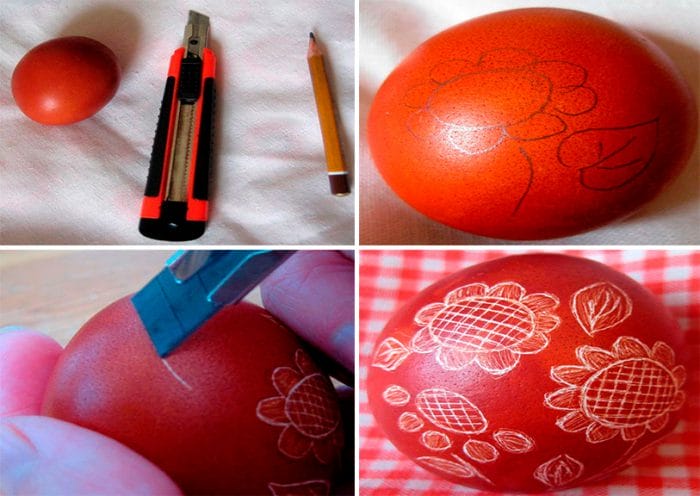
Scratches
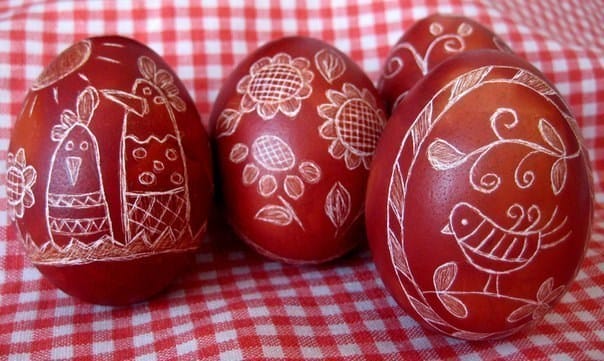
You will need: raw white eggs, onion skins, a cooking container, a sharp pencil, a gypsy needle.
Master Class
- Boil the eggs in the onion skins.
- Cool them down.
![How to decorate Easter eggs with your own hands? Painting methods at home. Easter eggs decoration]()
- Draw a pattern, inscription with a simple pencil on the shell.
- Scratch the egg along the lines of the drawing to remove the stain.
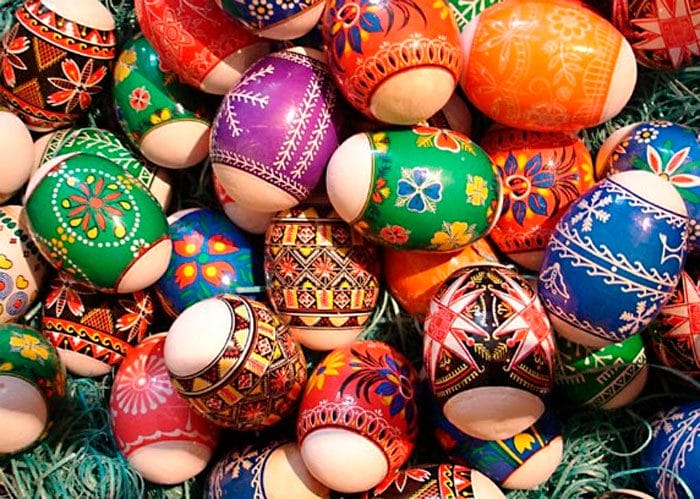
Easter eggs
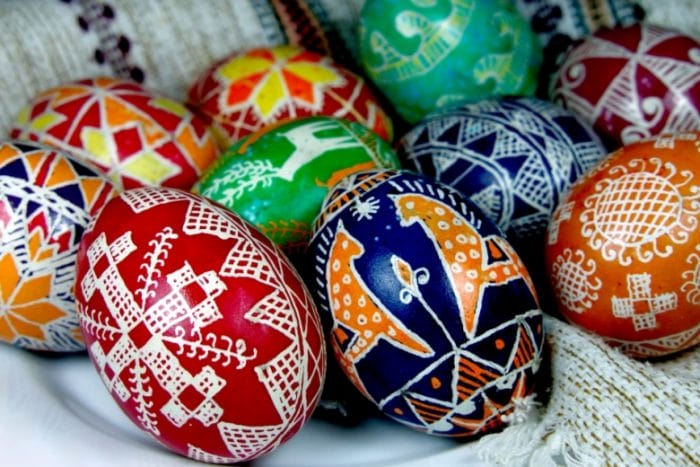
It should be noted that Easter eggs appeared a long time ago and always attract attention. If you are good at drawing, then try to paint an Easter egg exclusively, and for inspiration, browse the photo gallery of Easter eggs ideas.
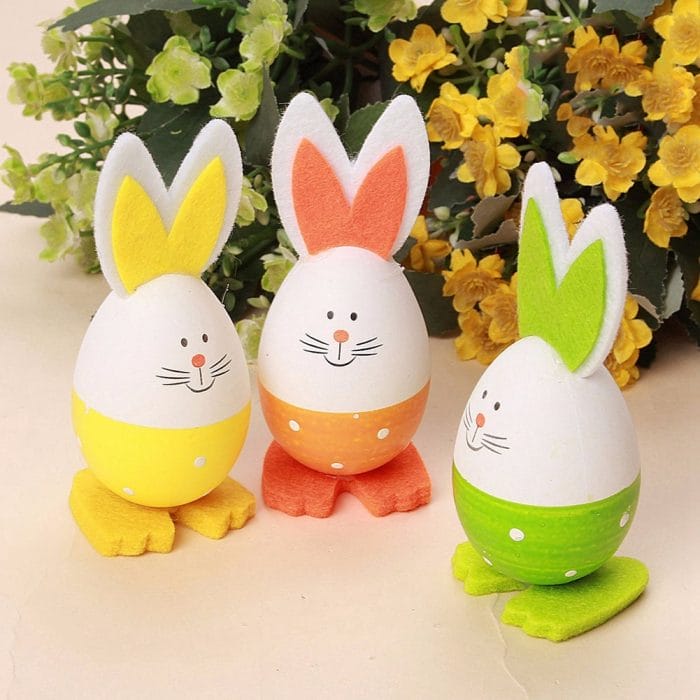
Children's creativity
Toddlers will love decorating the eggs, turning them into little animals. You can create these cute hares by painting a foam blank with acrylic paint. The ears are created from felt, inserting it into the cut.
With the help of paper applications, you can make cute chickens and other animals.
Older children will love to decorate eggs with polymer clay. To do this, it is enough to warm up the material in your palms and glue it to the workpiece piece by piece. It is important to use the self-curing option, since the foam cannot be baked in the oven.

Funny “marble” eggs will be obtained by sprinkling painted blanks with paint. To make the spray light, brush it over the comb. The comb will spray paint. It is better to cover the table with a newspaper beforehand.

A simple way to decorate is gluing sequins. You can make them yourself by cutting out the necessary pieces from foil. Better to take a thin sheet. For example, a chocolate insert. Purchased glitter will also come in handy. For local application, only some areas of the egg are covered with glue. Then they are sprinkled with sparkles.

At a craft store, you can buy foam filler. If you spread the blank with glue and dump it in this “powder”, you can get such cute eggs. The embroidered pattern is applied after the glue has dried.
Easter decor does not end with the painting of real eggs. With the help of simple ideas and foam blanks, you can create real masterpieces that will delight the eye for more than one year.
Sources used and useful links on the topic: https://ogorod.mirtesen.ru/blog/43310204975/Kak-ukrasit-yaytsa-k-Pashe:-27-originalnyih-idey-dekora-i-rospis https: // www. yh-ti.ru/2019/04/kak-ukrasit-yajca-na-pasxu-novye-i-neobychnye-idei/ https://svoimirykami.info/pasxalnye-yajca-svoimi-rukami/ https: // scastje- est.ru/pasxalnye-yajca-svoimi-rukami-2.html https://zen.yandex.ru/media/id/5c9e2fb7da76cf04f0f9e191/kak-sdelat-krasivye-iaica-na-pashu-35-idei-dlia-ukrasheniia -pashalnyh-iaic-5ca4b55b4fc63200b341d791 https://shkolabuduschego.com/podarki/kak-ukrasit-yayco-iz-penoplasta-na-pashu.html https://svoimirukamy.com/ukrashhenie-yaits.html https://page365.ru/pasxalnye-yajca-svoimi-rukami-ili-kak-krasit-yajca-na-pasxu-2017-13-sposobov-pokraski.html
Post source: lastici.ru