DIY USB – Micro USB cable repair. We repair the charging wire (simple, fast, cheap and reliable)

Content
Causes of malfunctions of the mobile phone charger
The most common reason for the failure of a charger is a careless attitude towards it during operation.
Phone charger repair
Possible causes of breakdowns of the mobile phone charging unit
1 Broken wire at the plug and at the base of the charging unit. You can break the wires when charging is on during calls.
You need to pull the plug out of the phone jack not by the wire, but by the plug body.
2 Failure of the elements of the electronic board of the charger. Very often, the charger is left plugged in and is not removed from the outlet. In this case, the entire electronic board of the charger is constantly energized, which reduces the service life of the radio elements of the board.
The wrong order of switching on and off the charger also leads to premature wear of the unit elements.
If the phone is disconnected from the charger while energized, sudden voltage surges occur, which exceed the maximum permissible operating voltage of the cells. This is due to transient processes that occur in the memory when the load is removed (disconnecting the phone) under voltage. With proper operation of the charger, the phone is connected and disconnected with the charger turned off.
When it's easy to fix a wire
The electrical wire is damaged by improper use of the cable, for example, frequent bending to one side or strong pressure.
The nature of the damage is different. The outer insulation may be damaged and the contacts may come off, or the thin cores inside the wire may break. In cases where the veins are damaged, the repair will be quite difficult, at least soldering skills will be required. It's easier to throw away the damaged accessory and buy a new one.
In the case when only the external insulation is broken, you can try to repair the wire yourself. This is convenient if the phone needs to be charged urgently, but there is no way to buy or find a suitable device. For the charger to work in case of damage to the insulation, it is necessary to firmly press the cord in the place of the outgoing contact (insulation break). Three items can be used for quick repairs:
- electrical tape;
- FUM tape;
- heat shrink tubing.
The nature of the damage
Before starting the repair, it is required to assess the damage and the feasibility of restoration. In some cases, such repairs will be costly or difficult to fix.
The most common breakage of a cord is a broken cable. Usually, the malfunction occurs in places with frequent bends – near the connection plug or in a certain area along the entire length of the cable. A similar malfunction occurs with chargers, where the ability to filter out the USB cable is not provided.
Less often, cracks appear on the cable sheath, resulting from prolonged use and gradual wear of the cable. Such damage does not affect the performance of the cable. In this case, ignoring damage often leads to subsequent failure.
Damage in the cable section
The solution is relevant in the event of a cable break with a distinct deformation at the site of a break in the supply lines.
Damage near the connection plug
This solution is relevant if the cable is broken near the connection plug, including the version of the charger with a detachable cable. The connecting plug in chargers is usually of a non-separable type. Therefore, in the absence of a sufficient area for the connection, it needs to be completely replaced.
Important! Some manufacturers build additional microcircuits into the plug, more often for fast charging. If you replace the original plug with a regular one, there is a high probability of failure of the charger or the lack of certain functions, such as fast charging.
Damage to the cable without visible deformations
The solution is relevant for cases when the cable does not visually contain visible damage, while the charger does not function.
Damage to the cable near the power supply
The solution is relevant for chargers where USB cable filtering is not provided. It is necessary to disassemble the case, and then solder the wires directly to the motherboard of the charger.
Damage to the outer shell
Solution for a working charger, but with a damaged outer shell.
Cable repair
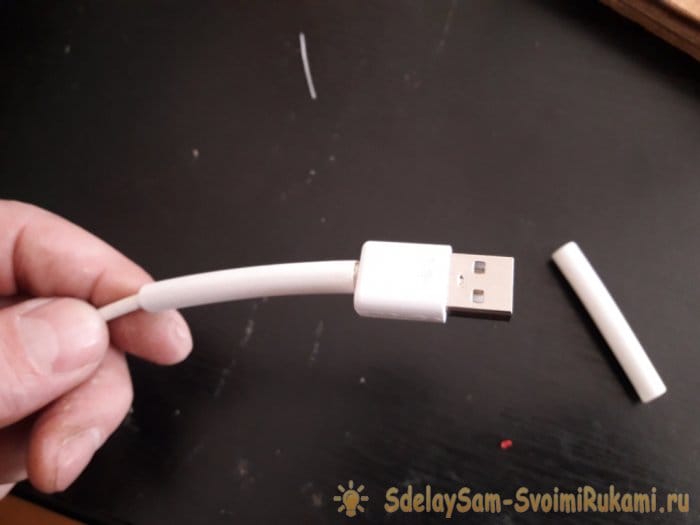
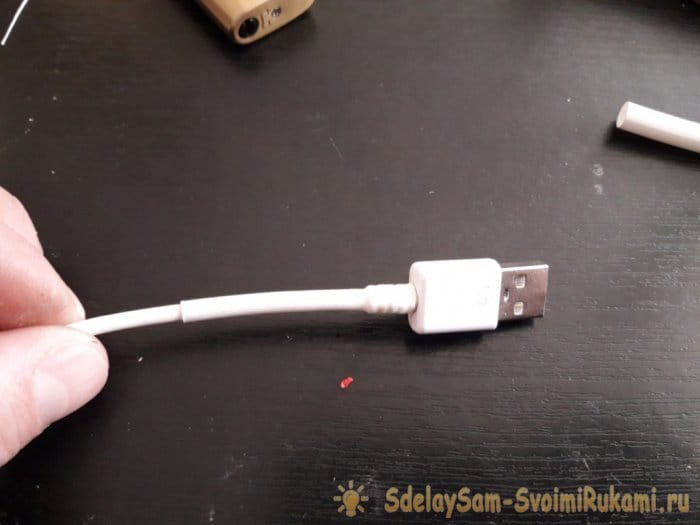
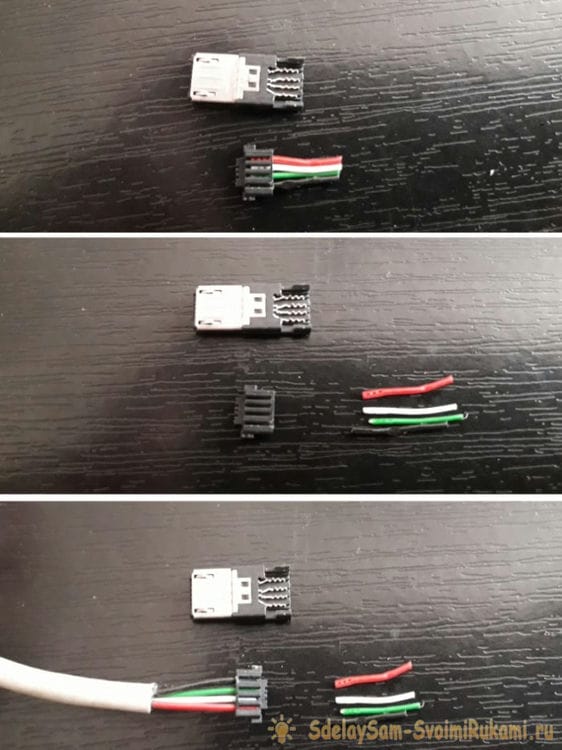
To begin with, without ceremony, we cut off the damaged plug from the cable. In my case, both plugs.
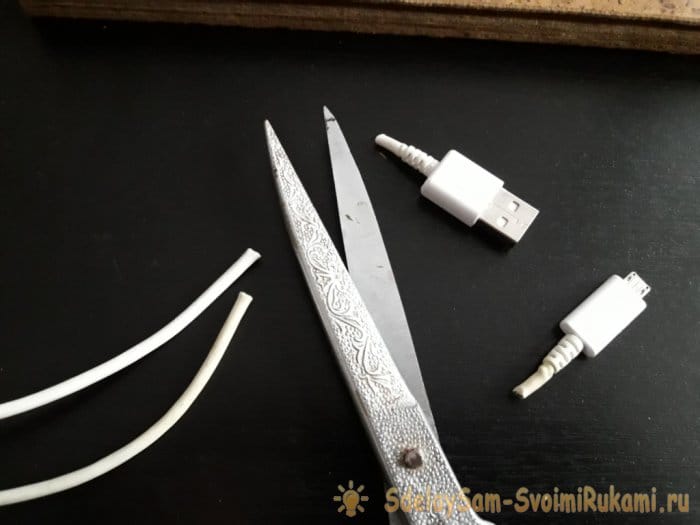
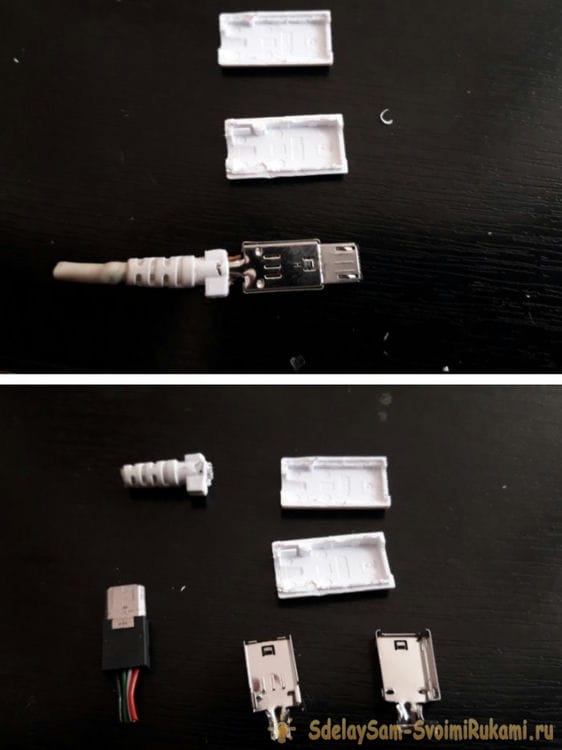
Next, using a clerical knife, we cut the plug along the seam. My plug housings were welded along the seam, so I had to tinker. But there are plugs with a collapsible body – here as you are lucky. Nevertheless, after running a few times with a new clerical knife blade along the seams of the case, I detached it quite easily and quickly. After removing the case, we disassemble the plug into its component parts.

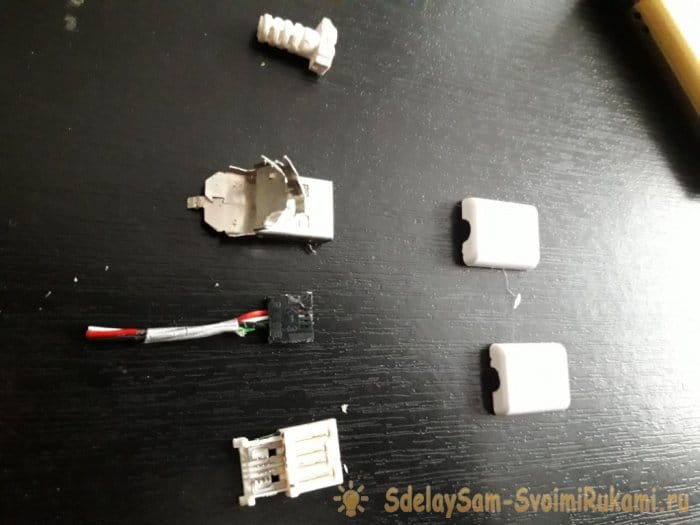
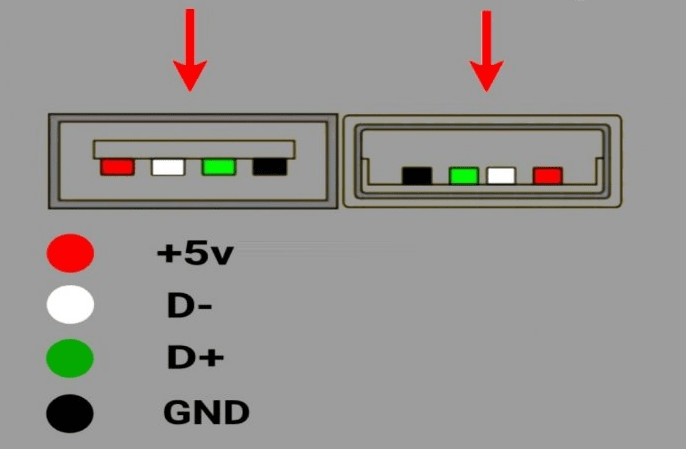
You have to be careful here. In terms of the contacts of the plug: to which of them which wire is soldered. In order not to get confused, you can mark the contacts with multi-colored markers, in the color of the wires. I don't need this, I have known the usb layout by heart for a long time … Just in case:
Now let's get into the cable. We measure the distance from the edge to the length of the rubber seal, and also add the length here to the contacts of the plug. Cut off the braid from the cable according to the calculated length.
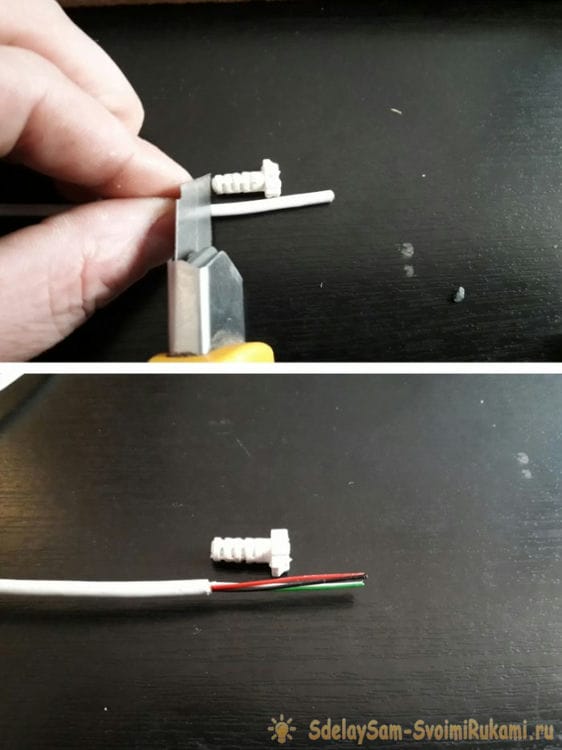
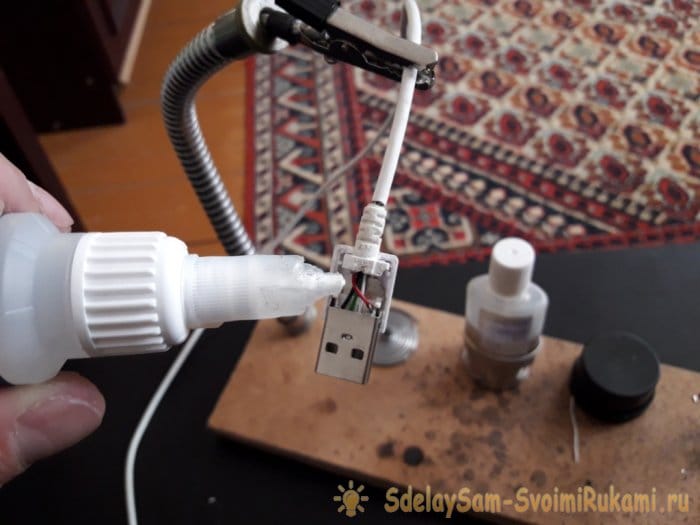
We put a rubber seal on the wires, solder the colored wires to the corresponding contacts and insert the block with contacts into the metal plug.

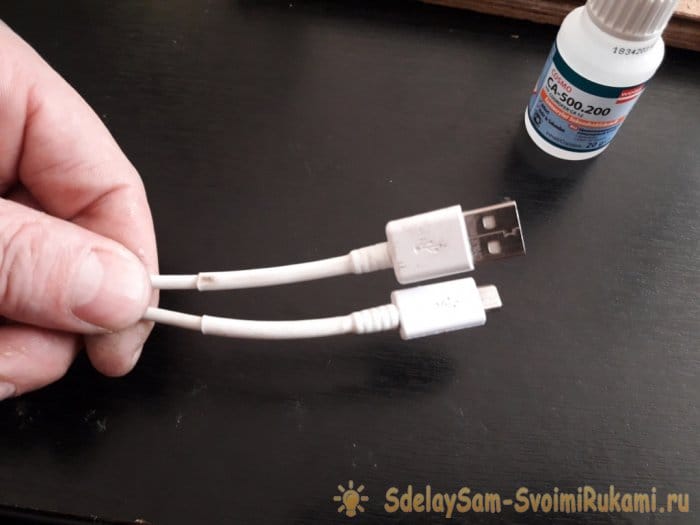
After making sure that everything is in its place, nothing sticks out anywhere, we glue the plastic case to the plug with a second glue. We make sure that the glue does not get on the contacts of the plug.
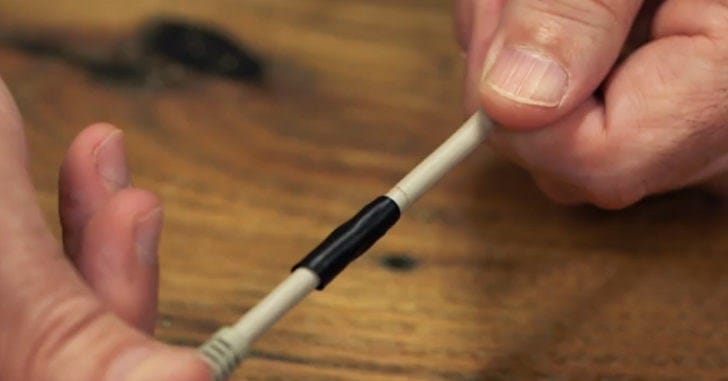
Next, we put a heat-shrinkable tube on the cable (from the other end) and seat it with a lighter. One more note: if you are repairing only one plug, make sure that the thermotube is put on the cable before you solder the plug to the cable and glue the case, otherwise you will have to disassemble everything again to correct this oversight. After shrinkage, the tube will grip the cable tightly together with the rubber seal; you will get an almost monolithic braid, as before.
Now the second plug is micro usb. We pass the thermotube onto the cable in advance, so as not to forget later. We disassemble the plug. The same as the previous one: using a clerical knife.
Here, the design turned out to be even simpler than that of the usb plug – the wiring is simply stuck into the upper part of the plug directly in its braid, and when connected to the lower part of the plug, this braid is pierced by the notches on the contacts located on the lower part of the plug. The main thing here is not to confuse the layout of the colored wires.
Next, we collect the plug together, like the previous one.

We put a thermotube on the broken braid of the cable, which we had previously threaded onto the cable. We sit down the tube.
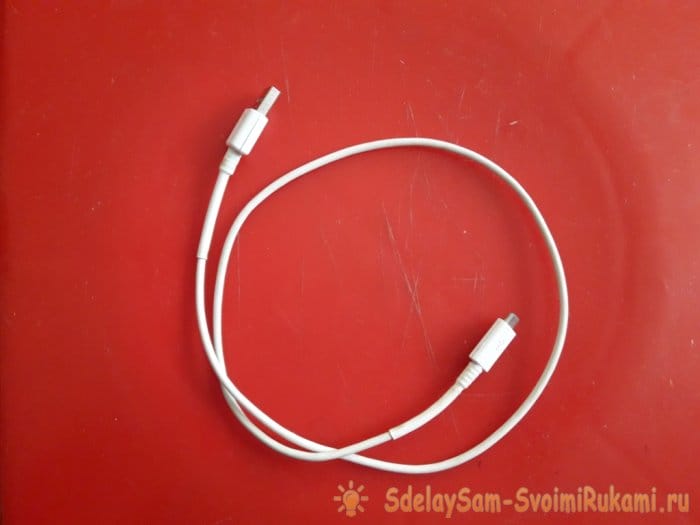
That's all – the broken cable is back in service, with the same functions for which it was intended in the instructions. Moreover, without any external and visible violations of the braid, such as wound electrical tape. Looks like new. We connect to the phone and use it with pleasure!
DIY phone charger repair technique
You don't need to be a great specialist to find and fix a broken wire from the charging unit to the plug. Wire damage can be detected with the phone connected. Having connected the phone to the charger, bend the wire at the plug u at the base of the unit, while simultaneously observing the continuity of the battery charging process.
In these places, wire breaks most often occur. If a break is found at the very base of the plug, then the wire is cut off at a distance of 5-7 mm from the plug. This is necessary in order to be able to solder the whole part of the wire. The soldered wires are insulated separately with a thin heat-shrinkable tube.
When the soldering points of the wires are insulated, a thicker heat shrink tube is put on the plug to stiffen the soldering point. Sometimes a wire break occurs at the very base of the plug, then the plug is completely freed from the plastic seal, and the wires are soldered directly to the plug.
Do not reverse the polarity of the plug wires. The break point is also found with a multimeter in the audible dial mode or visually. The found place of wire breakage is cut with a small margin on both sides. Peel the top insulation off the wire. Then it is cut off, stripped of insulation, twisted and soldered, after putting a thin heat-shrinkable tube on each wire, and a thicker tube on the common wire.
After soldering, they put thin tubes on the wires and upset them, heating them with a soldering iron. At the end, a thicker tube is put on in place of the upset thin tubes so that the thick tube overlaps them in length. When soldering wires, observe the polarity according to their color. You can purchase a new cord with a plug for your brand of phone from specialized stores. Then phone repair comes down to a simple replacement of the faulty wire.
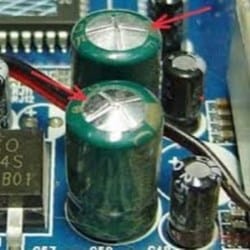
The type of faulty capacitors
Another common malfunction of a phone charger is a loose contact between the pins of the power plug. The spring-loaded pins of the mains plug often extend from the contact pads on the PCB. To eliminate such a malfunction, it is enough to bend these contacts inside the block.
Open the cover of the block. It is good if there are screws securing the charger cover, and if they are soldered. In this case, you need to cut a slot along the entire perimeter of the cover with a hacksaw blade with fine teeth. Having eliminated the malfunction, the lid is closed and fixed with tape 1 cm wide.
More complex, but quite affordable for an electrician are device breakdowns associated with the repair of elements of the phone charger board. First of all, they open the memory and take out the board. Repair begins with a visual inspection of the elements of the printed circuit board and the condition of its tracks.
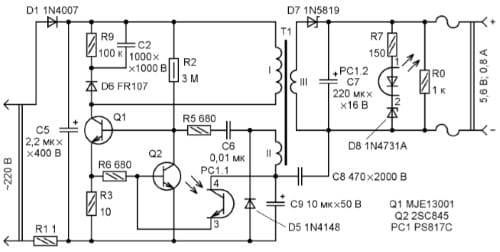
Pulse charger circuit for phone
When inspecting the elements, pay attention to the swelling of the upper part of the capacitors, darkening and violation of the integrity of the resistors. Darkening of the resistors and the tracks below it indicates that the operating temperature has been exceeded. In this case, the resistor itself is checked for resistance and the diodes and transistors are ringing.
The pinout of the transistors and the memory circuit for your phone brand can be found on the Internet. If it was not possible to visually detect a malfunction, turn on the device and measure the input mains voltage. If the mains voltage is present and a faint sound of the pulse transformer is heard, then the output voltage of the unit is measured.
It should be within 7.5V no load. If there is no output voltage, and the transformer is buzzing, then you need to watch the resistance of the output winding of the transformer and the elements that follow it. Since the charger of mobile phones is assembled according to a pulse scheme, when repairing them, you can focus on the article “Repairing a switching power supply with your own hands.”
What do we need
- FUM tape 1 piece
- Usb – charging cable (our damaged wire)
FUM tape should be at home for everyone, if not, we buy it in a plumbing store. Ask, what kind of tape is this? I'll tell you!
This is a narrow film (sealant) that is used in plumbing work to seal joints. In general, flax (the so-called hemp) was traditionally used for these purposes, and it is still relevant now, but we are interested in the ribbon.
We select the tape to match the color of the wire. White for white, and black for black wire. There are also other colors – pink, blue, gray, etc. This is your choice and for your wire.
We use electrical tape
One of the best and most durable ways to repair cables is to use electrical tape. Of course, our charger will not look aesthetically pleasing and will not resemble a new one at all, but such a tape can be bought for about 50 rubles, saving on the purchase of a new cable.
Heat shrink tubing
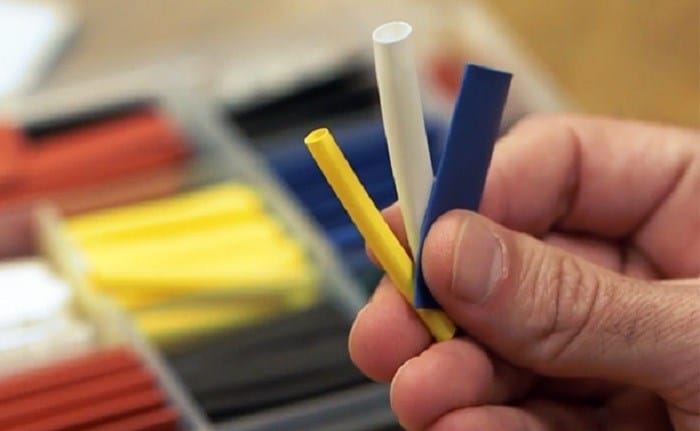
Heat shrink tubing is an excellent solution. They are available in many sizes, so you can easily find the right one for your cable. To attach the heat shrink tubing to the cable, insert it into the end of the charger and then crimp where the wire insulation is damaged. You can use a hair dryer to fix the heat shrink tubing.
Silicone for repair
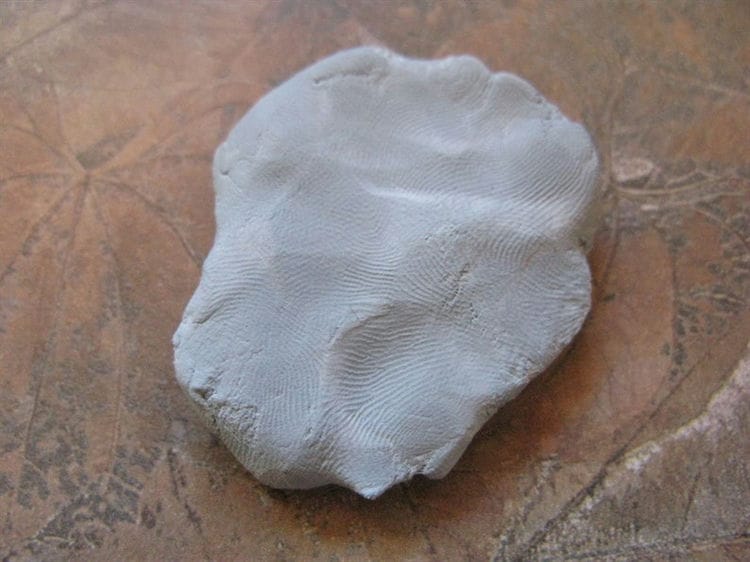
This is not really silicone, but a material that is of high quality and complete electrical safety. Such polymer clay can be formed into any shape and adhered to any surface. If you decide to insulate the cable with this material, leave it for 24 hours until the material is completely dry and takes the correct shape. Unfortunately, silicone is expensive and difficult to find in brick-and-mortar stores, so you have to order it online.
FUM tape
This material is sold in plumbing stores and is commonly used to seal and seal pipe joints. The cost usually does not exceed 25-40 rubles per skein.
FUM tape is more convenient than electrical tape due to the following advantages:
- thin and flexible for a secure and durable fit;
- FUM-tape does not contain glue, therefore it is more reliable and does not dry out or crumble over time.
You can repair the damaged area using FUM tape using the simplest steps:
- find the place of damage to the wire;
- cut off the required amount of tape;
- wind tightly over the damaged area, capturing entire areas around it.
For repair, a small layer is enough: the material adheres well and reliably holds the place of contact.
Both electrical tape and FUM tape are temporary measures. Subsequently, you will need to buy a new charger.
We use the spring from the handle

The short-term solution is to use a spring from a regular ballpoint pen, just stretch it and wrap it around the cable. It should be borne in mind that such an extended spring is not so rigid and does not protect the cable from damage. An alternative to this method is to install a spring on the damaged area and additionally use a heat shrink tubing. In this case, you can guarantee that there will be no problems with a damaged wire in the future.
3 Sugru
Sugru is a multifunctional self-hardening rubber. It can be used to repair almost anything, including cables. In its original form, Sugru resembles plasticine, which takes any shape. And after a day, it hardens, turning into a very durable rubber. By filling in the Sugru's rupture or rupture, you stop further damage to the cable. This tool can be found on AliExpress for 373 rubles for 6 packs
Special cable protectors
An effective and durable solution to the problem of a damaged charger wire is the use of so-called cable glands. Unfortunately, this solution is quite expensive, a high-quality tip can cost up to 500 rubles. The cable protectors are designed in such a way that the most delicate part of the cable does not break and is carefully insulated.
Remember that if a short circuit occurs, the cable emits smoke or a pronounced singe smell emanates from it, then it must be replaced. The repair methods described above are suitable for those cases where the insulation is damaged, but if there are problems with the plug or the wiring melts, then using such a cable becomes simply unsafe.
Sources used and useful links on the topic: https://electricavdome.ru/remont-zaryadnogo-ustrojstva-dlya-telefona-svoimi-rukami.html https://DjDiplomat.ru/kak-bystro-pochinit-zaryadnoe-ustroystvo https: //androfon.ru/article/kak-pochinit-slomannyiy-androidnyiy-shnur-zaryadnogo-ustroystva https://SdelaySam-SvoimiRukami.ru/4804-remont-kabelja-usb-micro-usb-svoimi-rukami.html https: //yurijprosolupov.ru/poleznye-sovety/kak-pochinit-samomu-povrezhdyonnyj-provod-zaryadki-smartfona-ili-plansheta-v-domashnih-usloviyah/ https://FB.ru/post/gadgets-and-gizmos/ 2019/10/28/152799 https://Lifehacker.ru/5-sposobov-pochinit-kabel/
Post source: lastici.ru